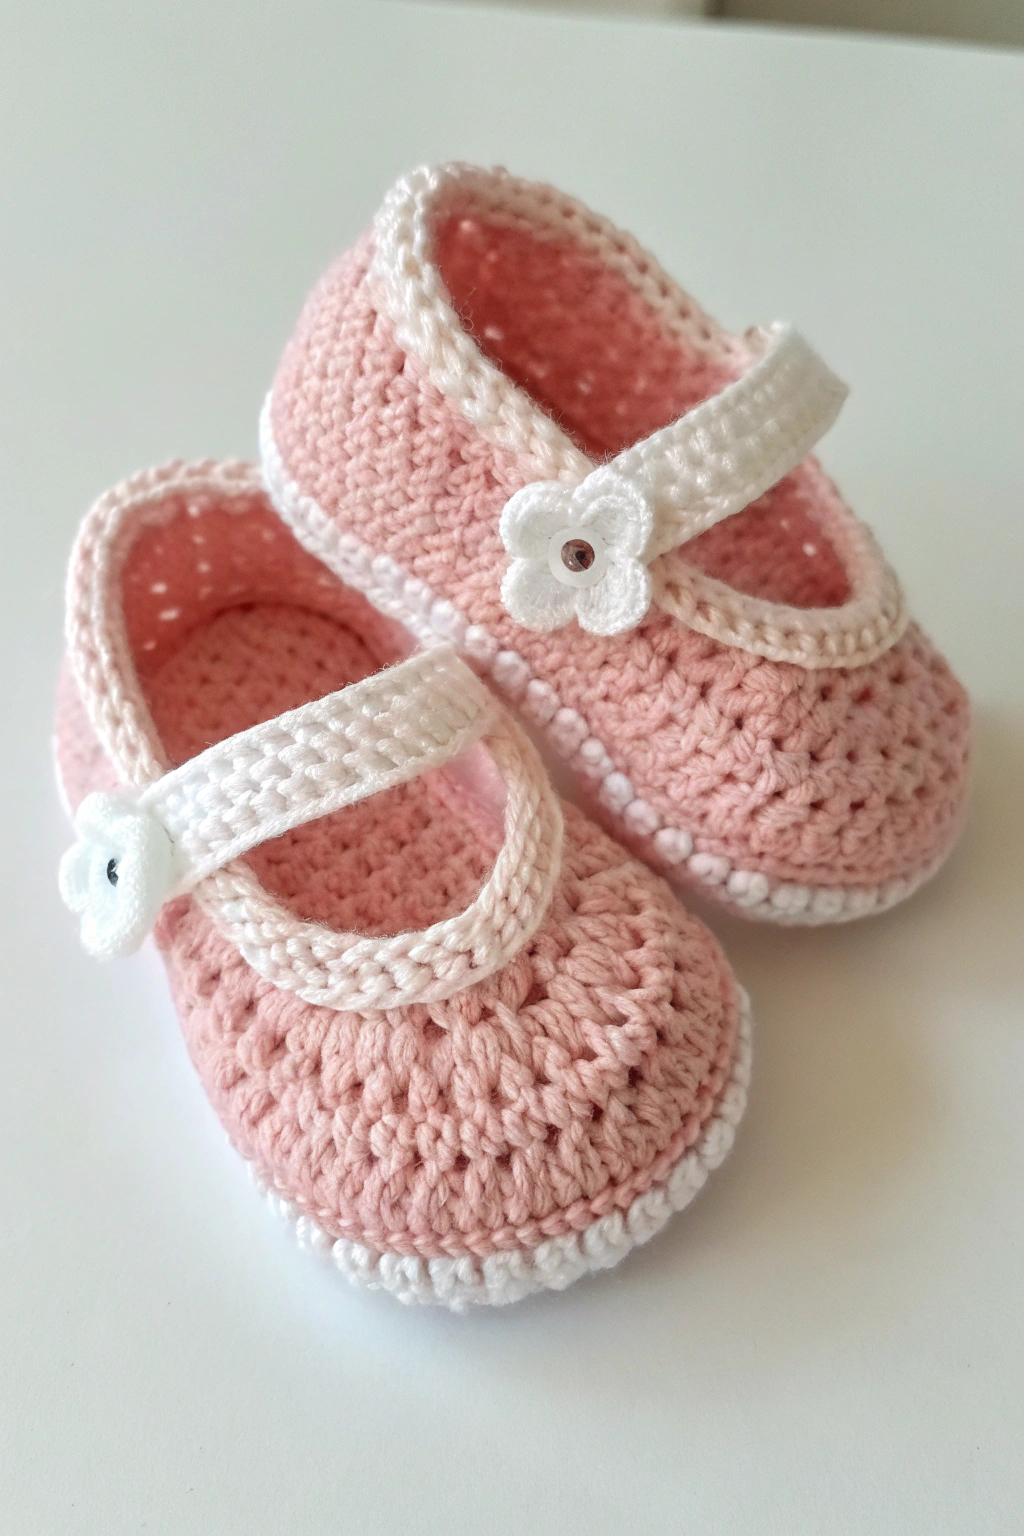
Hello fellow crafters! Get ready to melt some hearts with what might be the sweetest project to ever come off your crochet hook. We’re diving into the delightful world of tiny footwear to make these absolutely adorable baby booties. With their charming details, delicate trim, and a cute-as-a-button flower, these little shoes are a joy to both make and gift. This pattern is designed to guide you through every stitch, turning soft yarn into a precious, handmade treasure. So, grab your hook, pick your favorite baby yarn, and let’s get started on making something truly special!
Materials You’ll Need
- 🧶 Yarn: Soft baby yarn in pink (main color) and white (trim and strap). (DK or Fingering weight)
- 🪡 Crochet Hook: 3.5mm (E/4).
- 🧵 Yarn Needle, 📌 Stitch Markers, 🔘 Small Bead, ✂️ Scissors.
Getting Started: The Perfect Oval Sole
(US crochet terms used.)
- sc: single crochet, hdc: half double crochet, dc: double crochet, sl st: slip stitch, ch: chain, inc: increase (2 sc in one st), sc2tog: decrease, BLO: back loop only.
- X-st (Cross Stitch): Skip the next stitch, work 1 hdc in the following stitch. Now, working behind the hdc you just made, go back and work 1 hdc into the skipped stitch. This creates a crossed ‘X’ shape.
Start with pink yarn.
Foundation: Ch 11.
Round 1: 2 sc in 2nd ch from hook. Sc in next 8 ch. 5 sc in last ch. Working on the other side: Sc in next 8 sts. 3 sc in last st. Join with sl st to first sc. (26 sts)
Round 2: Ch 1. Inc in first 2 sts. Sc in next 8 sts. Inc in next 5 sts. Sc in next 8 sts. Inc in last 3 sts. Join with sl st to first sc. (36 sts) Fasten off pink yarn.
Building the Bootie Upper & Trims
Round 3 (White Bottom Trim):
- Join white yarn with a sl st to any stitch.
- Ch 1. Working in BLO, sl st in each of the 36 stitches around.
- Join with a sl st to the first sl st. (36 sl sts)
- This round creates the decorative white line at the base of the bootie. Fasten off white yarn.
Round 4 (First Side-Wall Round):
- Join pink yarn with a sl st to the unworked front loop of any stitch from Round 2 (the round before the white trim).
- Ch 1. Sc in the same loop and in each front loop around. Join with sl st. (36 sts)
Rounds 5 & 6: Ch 1. Sc in each of the 36 stitches around. Join with sl st. (36 sts) Do not fasten off after Round 6.
Shaping the Toe (with the correct stitch!)
We will now create the distinctive crossed-stitch pattern on top of the bootie.
Row 7: Ch 1. Sc in the next 10 stitches. Now work 3 X-st (this will use the next 6 stitches). Sc in the next stitch. Ch 1, turn. (You will now work back and forth over these front stitches).
Row 8: Sl st in the first sc. Ch 1. Work 3 X-st across the top. Sl st into the last sc of the group. Ch 1, turn.
Row 9: Sl st in the first st. Ch 1. sc2tog, sc in the next 2 sts, sc2tog. (4 sts) Fasten off pink yarn.
Crafting the Final Trim, Strap, and Flower
Top Trim:
- Join white yarn with a sl st to the back of the bootie opening.
- Ch 1. Work one round of sc evenly all the way around the opening. Aim for a neat edge.
- Join with a sl st to the first sc. Fasten off.
Strap:
- With white yarn, ch 16. Sc in 2nd ch from hook and in each ch across. (15 sc). Fasten off, leaving a long tail for sewing.
The 4-Petal Flower:
- With white yarn, create a magic circle.
- Repeat the following pattern four times in the circle: [Ch 2, work 2 dc, ch 2, sl st].
- Pull the tail to close the circle. Fasten off, leaving a long tail.
Assembly & Finishing Touches
- Sew your bead to the center of the 4-petal flower.
- Sew the flower onto one end of the strap.
- Position the strap across the bootie and sew both ends securely to the sides.
- Weave in all remaining ends for a clean, professional finish.
Congratulations! You have now crafted a pair of baby booties that are a perfect, detailed replica of the ones in the photograph.
Share Your Makes!
We hope you enjoyed this deep-dive into creating the perfect baby booties! We’d absolutely love to see your finished creations! Please share photos online and tag us! Happy crocheting!


