

Cozy Crochet Moccasin Slippers: Easy Step-by-Step Guide
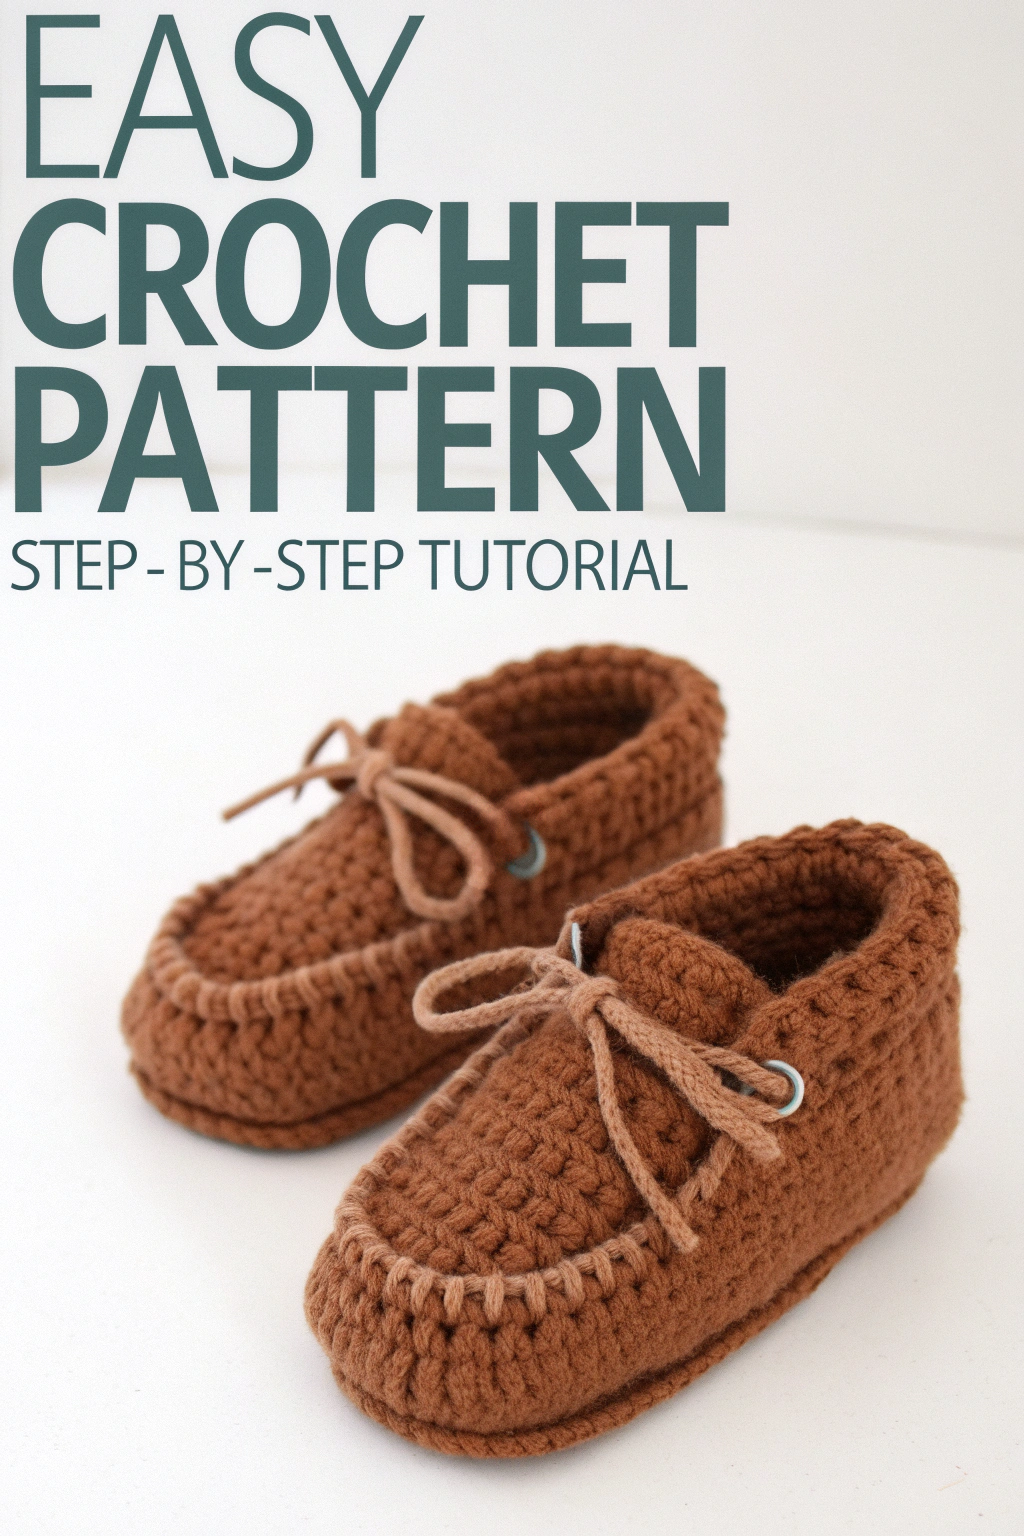
Welcome, fellow crafters! If you’re looking for a clear, reliable pattern to make the exact cozy moccasin slippers you see in the photo, you’ve come to the right place.
We have designed this guide with precise stitch counts and clear assembly instructions to ensure your project is a fun and successful one. Forget confusing instructions and results that don’t match the picture. This is a pattern that truly works. Let’s get started!
Materials You’ll Need
- Main Yarn: Worsted weight (medium, category 4) yarn in a main color (e.g., brown). Approx. 150-200g.
- Accent Yarn: A small amount of a slightly lighter color for the laces and decorative stitching.
- Hook: Size H/8 (5.0 mm).
- Yarn needle for weaving in ends and assembly.
- Stitch markers (highly recommended).
- Scissors.
- Optional: Two small metal eyelets (approx. 5-6mm) and an eyelet tool.
Abbreviations (US Terms)
- ch: chain
- st(s): stitch(es)
- sl st: slip stitch
- sc: single crochet
- inc: increase (2 sc in the same stitch)
- dec: decrease (sc2tog – single crochet two stitches together)
- BLO: back loop only
Sizing Guide (Adult Foot Length)
This pattern is written for Medium (M). Adjustments for Small (S) and Large (L) are in (parentheses).
- S: 23 cm (US 6–7 / EU 36–37)
- M: 24–25 cm (US 7.5–8.5 / EU 38–39)
- L: 26–27 cm (US 9–10 / EU 40–41)
Part 1: The Oval Sole
We work in continuous rounds. Use a stitch marker to mark the first st of each round.
To Start: Ch 15 (M). (S: 13, L: 17)
Round 1: Inc in 2nd ch from hook, sc in next 12 sts, 4 sc in last ch. Turn to work along the other side of the chain: sc in next 12 sts, inc in last st (the same space as the first inc). (32 sts) (S: sc 10, L: sc 14 → 28, 36 sts)
Round 2: Inc, inc, sc in next 12 sts, inc, inc, inc, inc, sc in next 12 sts, inc, inc. (40 sts) (S: sc 10, L: sc 14 → 36, 44 sts)
Round 3: Sc 1, inc, sc 1, inc, sc 12, (sc 1, inc) x4, sc 12, (sc 1, inc) x2. (48 sts) (S: sc 10, L: sc 14 → 44, 52 sts)
Round 4: Sc 2, inc, sc 2, inc, sc 12, (sc 2, inc) x4, sc 12, (sc 2, inc) x2. (56 sts) (S: sc 10, L: sc 14 → 52, 60 sts)
Round 5 (S stops here): Sc in each st around. (52 sts) Round 5 (M, L): Sc 3, inc, sc 3, inc, sc 12, (sc 3, inc) x4, sc 12, (sc 3, inc) x2. (64 sts) (L: sc 14 → 68 sts)
Round 6 (M stops here): Sc in each st around. (64 sts) Round 6 (L only): Sc 4, inc, sc 4, inc, sc 14, (sc 4, inc) x4, sc 14, (sc 4, inc) x2. (76 sts) Round 7 (L only): Sc in each st around. (76 sts)
At the end of your final sole round, sl st to join. Do not fasten off.
Part 2: The Slipper Walls
Round 1: Ch 1, sc in BLO of each st around. Sl st to join. (This makes the sharp edge for the sides). (S: 52, M: 64, L: 76 sts)
Rounds 2-4: Ch 1, sc in each st around (through both loops). Sl st to join. Tip: For a deeper slipper, add 1-2 more rounds here.
Do not fasten off.
Part 3: Shaping the Toe (Vamp)
Step 1: Mark the Stitches Fold the slipper flat, with the heel and toe centered. Find the center toe stitch. Place a marker in this stitch. Now, count and mark 12 sts to the left of the center marker, and 12 sts to the right of the center marker. You should have a total of 25 marked sts (12 + 1 center + 12) across the front. (S: Mark 10 sts on each side of the center st for a total of 21 marked sts. L: Mark 14 sts on each side of the center st for a total of 29 marked sts).
Step 2: Crochet the Toe Flap in Rows We will now work back and forth in rows only on these marked stitches.
Row 1: Sl st into the first marked st, ch 1, sc in same st and in next 24 sts. Turn. (25 sts) (S: 21, L: 29 sts)
Row 2: Ch 1, dec, sc across until 2 sts remain, dec. Turn. (23 sts) (S: 19, L: 27 sts)
Row 3: Ch 1, sc in each st across. Turn. (23 sts) (S: 19, L: 27 sts)
Rows 4-7: Repeat Rows 2 and 3 twice more. After Row 7, you will have 19 sts. (S: Repeat for a total of 5 rows, ending with 17 sts. L: Repeat for a total of 9 rows, ending with 21 sts.)
Fasten off, leaving a very long tail for sewing.
Part 4: Assembly and Cuff
This is the most important step for getting the classic moccasin shape right. We will make the signature gathered toe.
ATTENTION: THIS IS THE SECRET TO THE MOCCASIN SHAPE! In this step, you will notice that the number of stitches on your toe flap (e.g., 19 sts for Size M) is greater than the number of stitches on the slipper opening where you will attach it (11 sts for Size M). This is intentional and is NOT a mistake in the pattern. This difference is what makes the beautiful, gathered (puckered) effect. Trust the process!
Step 1: Attach the Vamp to the Slipper Body (with gathering)
- Identify the Opening: The unworked opening of your slipper has 39 stitches for size M. (S: 31 sts, L: 47 sts).
- Mark the Attachment Area: Find the absolute center stitch of the slipper opening. Place a stitch marker here.
- For Size M: From the center marker, count 5 sts to the left and place a second marker. Return to the center, and count 5 sts to the right and place a third marker. You have now marked off a central section of 11 stitches.
- For Size S: Mark the central 9 stitches on the opening (4 on each side of the center st).
- For Size L: Mark the central 13 stitches on the opening (6 on each side of the center st).
- Sew and Gather: Using the long tail and your yarn needle, you will now sew the edge of your toe flap to the section you just marked on the slipper opening.
- For Size M, you are sewing the 19-stitch edge of the flap into the 11-stitch space you marked.
- Pin the corners of the flap to your markers to hold it in place.
- As you sew, you must evenly distribute the extra stitches from the flap into the smaller space. This will cause the toe to bunch up and make the gathers. This is exactly what you want!
- Ensure the gathers are distributed evenly for a neat, professional look.
Step 2: Crochet the Cuff Attach yarn to the back center of the heel. Rounds 1-2: Ch 1, sc evenly around the entire slipper opening (this includes the unworked sides and the back edge of the toe flap you just attached). Sl st to join. Tip: Aim for one sc per stitch or row-end to keep the edge from puckering or ruffling.
Fasten off and weave in all ends securely.
Part 5: Finishing Touches
This is what makes the authentic moccasin look!
1. Decorative Lacing: Using the accent color yarn and a yarn needle, make the decorative stitch around the base of the vamp. Thread the yarn under the posts of the stitches where the vamp meets the slipper wall. This makes the classic whip-stitched look.
2. Tie Laces:
- Optional Eyelets: Install one eyelet on each side of the slipper opening, about one row down from the top edge.
- Yarn Loops: If not using eyelets, simply use your hook to make a small ch-3 loop on each side.
- Make the Lace: With the accent yarn, ch for about 20-24 inches (50-60 cm).
- Thread and Tie: Thread the lace through the eyelets or loops and tie into a bow.
You’re Done!
Congratulations! You’ve just made a pair of sturdy, comfortable, and stylish moccasin slippers that actually look like the picture. By mastering the gathered toe technique, you’ve made a truly professional-looking pair of slippers.
We’d love to see what you’ve made! Tag us on social media!
Related Reading: