

Crochet Your Cozy Cable Basket
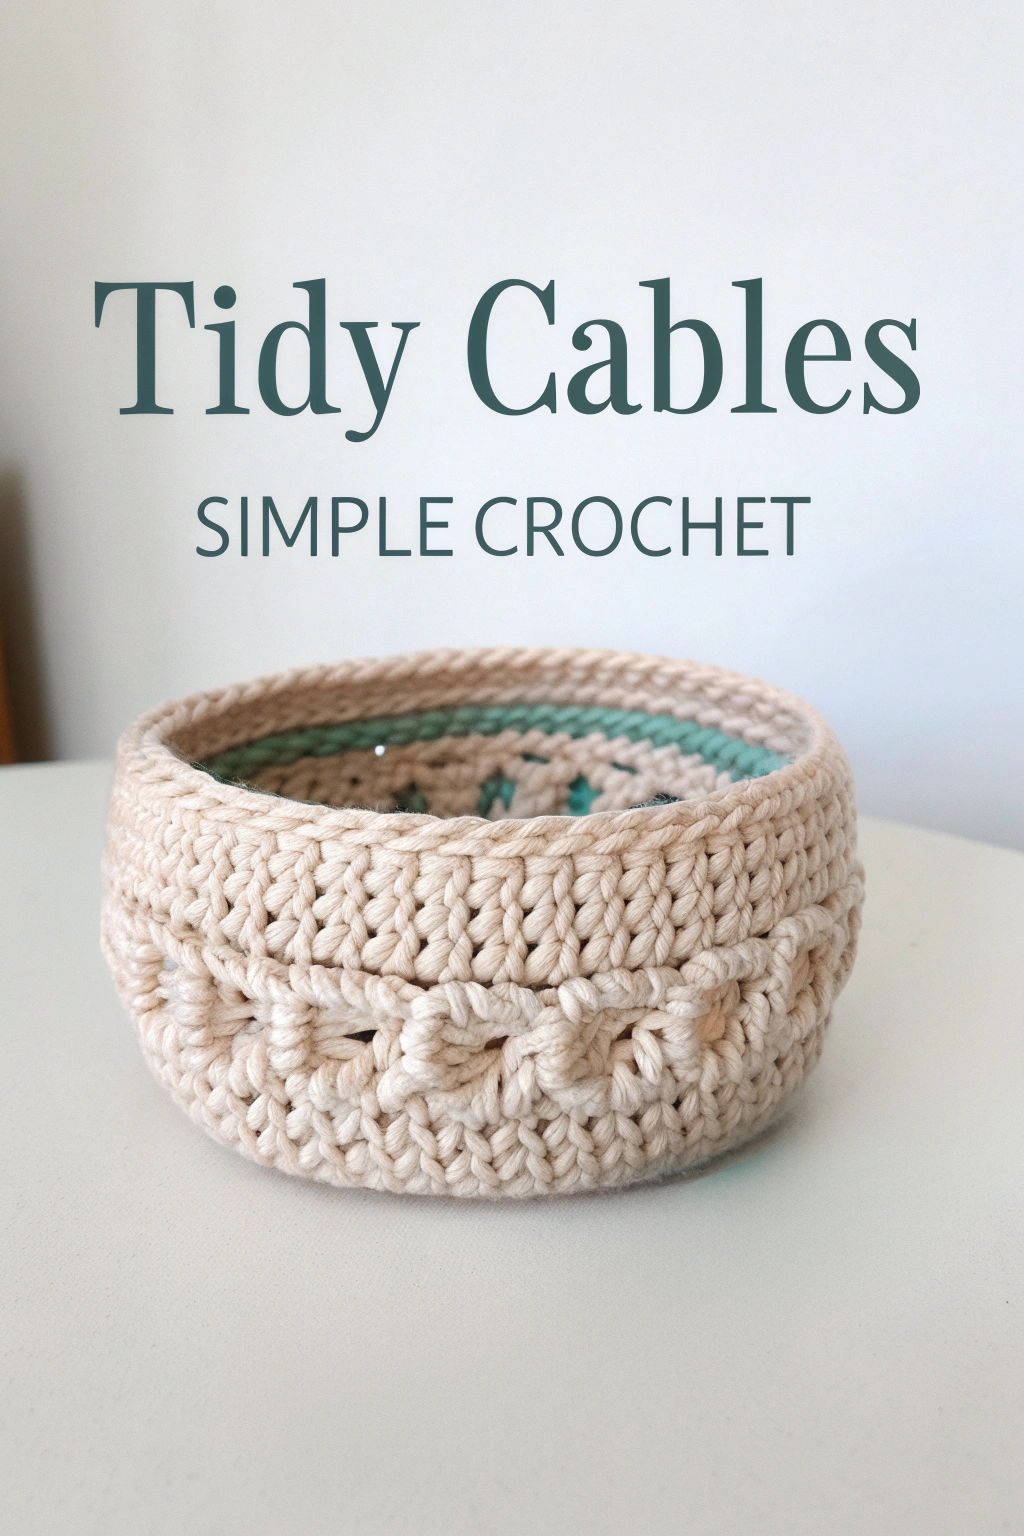
Isn’t there something wonderful about turning a simple strand of yarn into something beautiful and useful? Look at this gorgeous Tidy Cables Crochet Basket from the image – it’s sturdy, stylish with that lovely cable detail, and perfect for holding yarn, bits and bobs, or even a little plant pot. And the best part? You can absolutely make one yourself, even if you’re just starting your crochet journey! This guide will walk you through every step, explaining everything simply along the way. Let’s gather our supplies and begin this fun project together.
What You’ll Need
Before we dive in, let’s get our tools and materials ready. The basket in the image uses a thick yarn which helps it stand up nicely.
- 🧶 Yarn: Bulky weight cotton or blended yarn in a main color (like the light beige shown) – about 150-200 yards. Choose a yarn that feels quite firm.
- 🧶 Accent Yarn: A small amount of contrasting yarn in a lighter weight (DK or worsted) for the inner rim detail (like the mint green seen).
- 🪝 Crochet Hook: A size appropriate for your bulky yarn – likely around 6.0mm (J/10) or 6.5mm (K/10.5). Check your yarn label for recommendations.
- ✂️ Scissors: For snipping yarn ends.
- 🧵 Yarn Needle: A large-eye needle for weaving in ends neatly.
- ✨ Stitch Marker: Helpful for keeping track of the beginning of your rounds.
Understanding the Stitches
We’ll use a few basic crochet techniques. Don’t worry, I’ll explain them simply!
- Slip Knot: This is how you get the yarn onto your hook to start. Make a loop, Categoriescross the working yarn over the tail, insert your hook, yarn over, and pull through. Tighten gently.
- Chain (ch): Yarn over your hook and pull the yarn through the loop already on your hook. That’s one chain!
- Slip Stitch (sl st): Insert your hook into the indicated stitch, yarn over, and pull the yarn through both the stitch and the loop on your hook. It’s used to join rounds or move yarn without adding height.
- Single Crochet (sc): Insert your hook into the stitch, yarn over, pull up a loop (you’ll have 2 loops on your hook). Yarn over again, and pull through both loops on the hook. This is a short, dense stitch.
- Half Double Crochet (hdc): Yarn over before inserting your hook into the stitch. Insert hook, yarn over, pull up a loop (3 loops on hook). Yarn over again, and pull through all three loops on the hook. It’s taller than sc.
- Double Crochet (dc): Yarn over, insert hook into the stitch, yarn over, pull up a loop (3 loops on hook). Yarn over, pull through the first two loops (2 loops left). Yarn over again, pull through the remaining two loops. Taller than hdc.
- Front Post Double Crochet (FPdc): This sounds fancy, but it’s just where you insert your hook! Yarn over. Instead of going into the top loops of the stitch below, insert your hook from front to back to front around the entire post (the vertical body) of the indicated stitch in the previous round. Then, complete the double crochet as usual (yarn over, pull up a loop, yarn over, pull through 2, yarn over, pull through 2). This makes the stitch pop forward, which is key for our cables!
- Working in the Round: We’ll be building the basket bottom-up in continuous circles or joined rounds. A stitch marker helps mark the start of each round.
- Increasing: Making more than one stitch into the same stitch from the previous round. This makes the circle grow outwards for the base.
Making the Basket Base
The basket has a flat, sturdy circular base. We’ll build this first using half double crochet stitches (hdc) and increases.
- Round 1: Start with a magic ring (or ch 4 and sl st to the first ch to form a ring). Work 8 hdc into the ring. Pull the tail tight to close the centre. Place your stitch marker in the last hdc made. (8 stitches)
- Round 2: Work 2 hdc into each stitch around. (Move your marker to the last stitch of this round). This is your first increase round. (16 stitches)
- Round 3: Work 1 hdc in the next stitch, then 2 hdc in the stitch after that. Repeat this pattern (*) all the way around. (24 stitches)
- Round 4: Work 1 hdc in each of the next two stitches, then 2 hdc in the stitch after that. Repeat (*) around. (32 stitches)
- Round 5: Work 1 hdc in each of the next three stitches, then 2 hdc in the stitch after that. Repeat (*) around. (40 stitches)
- Continue Increasing: Keep going in this pattern (increasing the number of single hdc between the increases by one each round) until the base is the diameter you desire. The basket in the image uses about 6-7 inches across. Ensure your last round has a stitch count divisible by 4 for the cable pattern later (e.g., 56, 60, 64 stitches). For this example, let’s assume we stop after Round 7 (ending with 56 stitches: 1 hdc in next 5, 2 hdc in next).
- Transition Round: Work one round of hdc in the back loop only of each stitch around, with no increases. This helps the sides start turning upwards cleanly. Slip stitch to the first hdc of this round to join. (56 stitches)
Building the Basket Sides
Now for the lovely textured sides! We’ll alternate between rounds of plain stitches and the cable round.
- Round 8 (Plain): Chain 1 (does not count as a stitch). Work 1 hdc in each stitch around, working through both loops as normal. Sl st to the first hdc to join. (56 stitches)
- Round 9 (Plain): Repeat Round 8. (56 stitches)
- Round 10 (Cable Round – Pay Close Attention!): This is where we form the distinct cable twists seen in the image. It involves skipping stitches and then going back to them using Front Post Double Crochet (FPdc).
- Chain 2 (counts as the first hdc here and in subsequent rounds).
- Skip the next 2 stitches. Work 1 FPdc around the post of each of the next 2 stitches.
- Now, go back to the 2 stitches you skipped. Working in front of the FPdc you just made, work 1 FPdc around the post of the first skipped stitch, and then 1 FPdc around the post of the second skipped stitch. (This crosses the stitches, forming the cable twist!)
- Repeat this sequence (skip 2, FPdc in next 2; then FPdc in the 2 skipped stitches) all the way around.
- Slip stitch to the top of the beginning chain-2 to join. (56 stitches total, forming 14 cable twists). Tip: Keep your tension even, not too tight, especially when reaching back for the skipped stitches.
- Round 11 (Plain): Chain 1. Work 1 hdc in each stitch around. Sl st to the first hdc to join. (56 stitches)
- Round 12 (Plain): Repeat Round 11. (56 stitches)
- Round 13 (Plain): Repeat Round 11 again. The image shows several plain rounds above the cable. (56 stitches)
- Continuing the Sides: You can adjust the height. If you want another cable row, repeat Rounds 10-13. We’ll proceed as if finishing after Round 13 for the main beige section.
Finishing the Rim (with Accent Color)
The image shows a neat top edge with a subtle mint green line just inside the rim. Let’s add that detail.
- Round 14 (Top Edge): Chain 1. Work 1 sc in each stitch around. Sl st to the first sc to join. (56 stitches)
- Round 15 (Top Edge): Repeat Round 14. Working these sc rounds gives a firm, clean top edge. (56 stitches)
- Fasten Off your main beige yarn, leaving a tail.
- Round 16 (Accent Color): Join your contrasting mint green yarn (or chosen accent color) with a slip stitch to any stitch along the inside loop of the final round.
- Working only into the back/inner loops of the last beige round, chain 1. Work 1 sc in each back loop around.
- Slip stitch to the first sc of this round to join. (56 stitches)
- Fasten off the accent yarn.
Tidying Up
This is the final polish! Using your yarn needle, carefully weave in all the loose ends (the starting tail from the magic ring, the end tails from the main color, and the end tails from the accent color). Thread the tail onto the needle and pass it back and forth through the backs of several stitches on the inside of the basket, making sure it’s secure before snipping the excess close to the fabric.
Your Beautiful Basket is Ready!
And there you have it! Step back and admire the basket you’ve produced. See how the cable pattern adds that lovely texture? The firm stitches give it structure, and that little pop of color inside the rim is such a sweet detail.
Imagine filling it with your current yarn projects, keeping remotes tidy, or maybe gifting it to someone special. The satisfaction of making something with your own hands is truly wonderful.
Don’t hesitate to try this project. Take it one stitch at a time, be patient with yourself (especially on that cable round!), and enjoy the process. We’d love to see photos of your finished baskets – feel free to share them! Happy crocheting!