

Radiant Ginger Rounds with Chocolate Caps
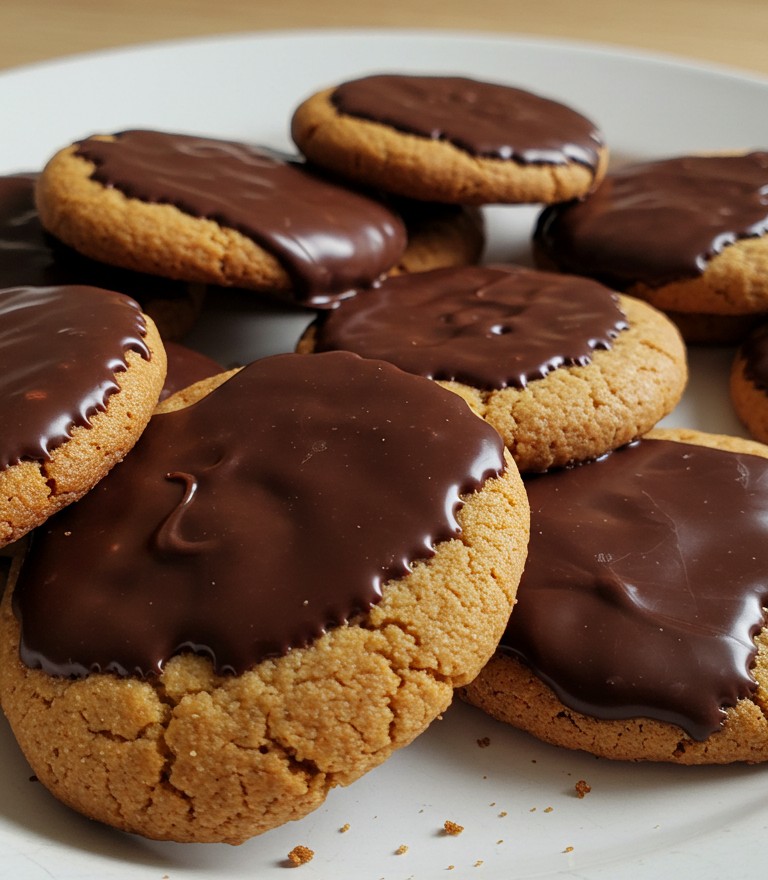
A plate piled high with these golden-brown ginger rounds, each crowned with a glossy cap of dark chocolate, promises a truly delightful experience. This guide will walk any aspiring baker through the process of preparing these beautiful and flavorful treats, perfect for sharing or savoring solo. The satisfying journey of transforming simple ingredients into such appealing morsels is a reward in itself.
What You’ll Need
Before embarking on this baking adventure, gather the following components and tools. Ensuring all ingredients are halal is key for those adhering to this dietary standard.
Ingredients
- 🧈 170g (¾ cup) Unsalted Butter, softened (ensure it’s halal if animal-derived emulsifiers are a concern)
- 🍚 200g (1 cup) Granulated Sugar
- 🥚 1 Large Egg (halal)
- 🍯 60ml (¼ cup) Molasses (ensure it’s pure, without alcohol-based flavorings)
- 🌾 280g (2 ¼ cups) All-Purpose Flour
- 🥄 2 teaspoons Ground Ginger
- 🥄 1 teaspoon Ground Cinnamon
- 🥄 ½ teaspoon Ground Cloves
- 🥄 ½ teaspoon Baking Soda
- 🤏 ¼ teaspoon Salt
- 🍫 200g Good Quality Dark Chocolate (at least 50-70% cacao, check for halal certification or alcohol-free vanilla)
- 🥥 1 teaspoon Coconut Oil or Vegetable Shortening (optional, for extra gloss on the chocolate, ensure halal)
Equipment
- 🥣 Large Mixing Bowl
- 🥣 Medium Mixing Bowl
- 🥄 Whisk
- 🥄 Wooden Spoon or Spatula
- ✨ Electric Mixer (Handheld or Stand)
- 📏 Measuring Cups and Spoons
- 🍪 Baking Sheets (at least two)
- 📜 Parchment Paper
- 🧊 Wire Cooling Rack
- 🫕 Small Saucepan and Heatproof Bowl (for a double boiler) or a microwave-safe bowl
Assembling the Ginger Cookie Dough
The foundation of these treats is a warmly spiced, perfectly textured ginger cookie.
- Combine Dry Ingredients: In the medium mixing bowl, whisk together the flour, ground ginger, ground cinnamon, ground cloves, baking soda, and salt. Whisking does two things: it distributes all the powdery ingredients evenly, so every bite is consistently flavorful, and it helps to lighten the flour. Set this bowl aside.
- Cream Butter and Sugar: In the large mixing bowl, place the softened unsalted butter and granulated sugar. Using an electric mixer on medium speed, beat them together until the mixture is light in color and fluffy in texture. This process, known as creaming, incorporates air, which contributes to a tender cookie. This should take about 2-3 minutes. Scrape down the sides of the bowl occasionally with a spatula to ensure everything is mixed evenly.
- Incorporate Wet Ingredients: Add the large egg to the creamed butter and sugar mixture. Beat well until it’s fully incorporated. Then, pour in the molasses and beat again until combined. The molasses gives these cookies their characteristic deep flavor and contributes to their golden-brown hue, as seen in the final baked cookies from the image.
- Marry Wet and Dry: Gradually add the dry ingredient mixture from the medium bowl to the wet ingredients in the large bowl. Mix on low speed, or by hand with a wooden spoon, until just combined. It’s important not to overmix at this stage; mixing too much can develop the gluten in the flour, leading to tougher cookies. The dough will be soft.
- Chill the Dough: Cover the bowl with plastic wrap and refrigerate the dough for at least 1 hour. Chilling the dough is a crucial step. It allows the fats to solidify, making the dough easier to handle and preventing the cookies from spreading too much during baking, ensuring they maintain their distinct round shape.
Baking to Golden Perfection
This stage transforms the chilled dough into fragrant, golden rounds.
- Preheat and Prepare: Preheat the oven to 175°C (350°F). Line the baking sheets with parchment paper. Parchment paper prevents the cookies from sticking and makes cleanup much easier.
- Shape the Cookies: Remove the chilled dough from the refrigerator. Scoop out portions of dough (about 1.5 tablespoons each) and roll them into smooth balls between your palms. Place the balls on the prepared baking sheets, leaving about 2 inches of space between them to allow for some spreading.
- Flatten (Optional but Recommended for the Look): The cookies in the image possess a relatively flat profile with distinct chocolate tops. To achieve this, gently flatten each ball with the bottom of a glass or your palm to about ½ inch thickness. This ensures the even surface ideal for the chocolate application.
- Bake: Bake for 10-12 minutes, or until the edges are set and the tops are lightly puffed and slightly crackled. The cookies will have a beautiful golden-brown color, precisely like those pictured.
- Cool Completely: Let the cookies cool on the baking sheets for 5 minutes before carefully transferring them to a wire cooling rack to cool completely. This is very important; applying chocolate to warm cookies will result in a melted mess rather than the neat, glossy cap seen in the image.
The Chocolate Embellishment
The crowning glory of these ginger rounds is their smooth, dark chocolate topping.
- Melt the Chocolate: Once the cookies are completely cool, prepare the dark chocolate. The chocolate in the image has a rich, dark color and a noticeable sheen. To achieve this, use good quality dark chocolate. If desired for extra gloss, add the teaspoon of coconut oil or vegetable shortening.
- Double Boiler Method (gentle heat): Fill the small saucepan with about an inch of water and bring it to a simmer. Place the chopped chocolate (and optional oil/shortening) in a heatproof bowl that fits snugly over the saucepan, ensuring the bottom of the bowl does not touch the water. Stir frequently until the chocolate is smooth and melted. This method prevents the chocolate from scorching.
- Microwave Method (quick but requires care): Place the chopped chocolate (and optional oil/shortening) in a microwave-safe bowl. Microwave on medium power (50%) in 20-30 second intervals, stirring well after each interval, until the chocolate is smooth and fully melted. Be careful not to overheat the chocolate, as it can become grainy.
- Dip the Cookies: Hold a cooled cookie by its edges. Dip the top surface of the cookie into the melted chocolate, allowing excess chocolate to drip off back into the bowl. The image shows that the chocolate covers most of the top surface, leaving a small, even border of the golden-brown cookie visible around the edge. Aim to replicate this neat, defined coating. Alternatively, one can spoon a portion of melted chocolate onto the center of each cookie and gently spread it towards the edges with the back of the spoon, leaving that slight border.
- Set the Chocolate: Place the chocolate-topped cookies back onto the parchment-lined baking sheets or the wire rack. Let them sit at room temperature until the chocolate is completely set and firm. This can take 1-2 hours, depending on the room’s temperature. If patience is short, they can be briefly refrigerated for about 10-15 minutes to speed up the setting process, but be mindful that this can sometimes affect the chocolate’s sheen.
Presentation and Enjoyment
Once the chocolate is firm, the Radiant Ginger Rounds with Chocolate Caps are ready. They are presented in the image piled attractively on a white plate, with a few charming crumbs scattered about, highlighting their homemade appeal. The contrast between the dark, glossy chocolate and the warm, golden cookie is visually striking.
These cookies are now ready to be enjoyed. The snap of the chocolate followed by the warmly spiced, tender cookie offers a delightful textural and flavorful experience.
A Sweet Farewell to Baking Bliss
The journey of transforming simple, wholesome ingredients into these elegant Chocolate-Capped Ginger Rounds is a testament to the simple joys found in the kitchen. Sharing these hand-fashioned treats, or simply admiring a plateful, brings a unique sense of accomplishment. May every batch bring warmth, spice, and a touch of chocolatey happiness. Happy baking, and may your kitchen always be filled with wonderful aromas!