
Knit a Charming Posy
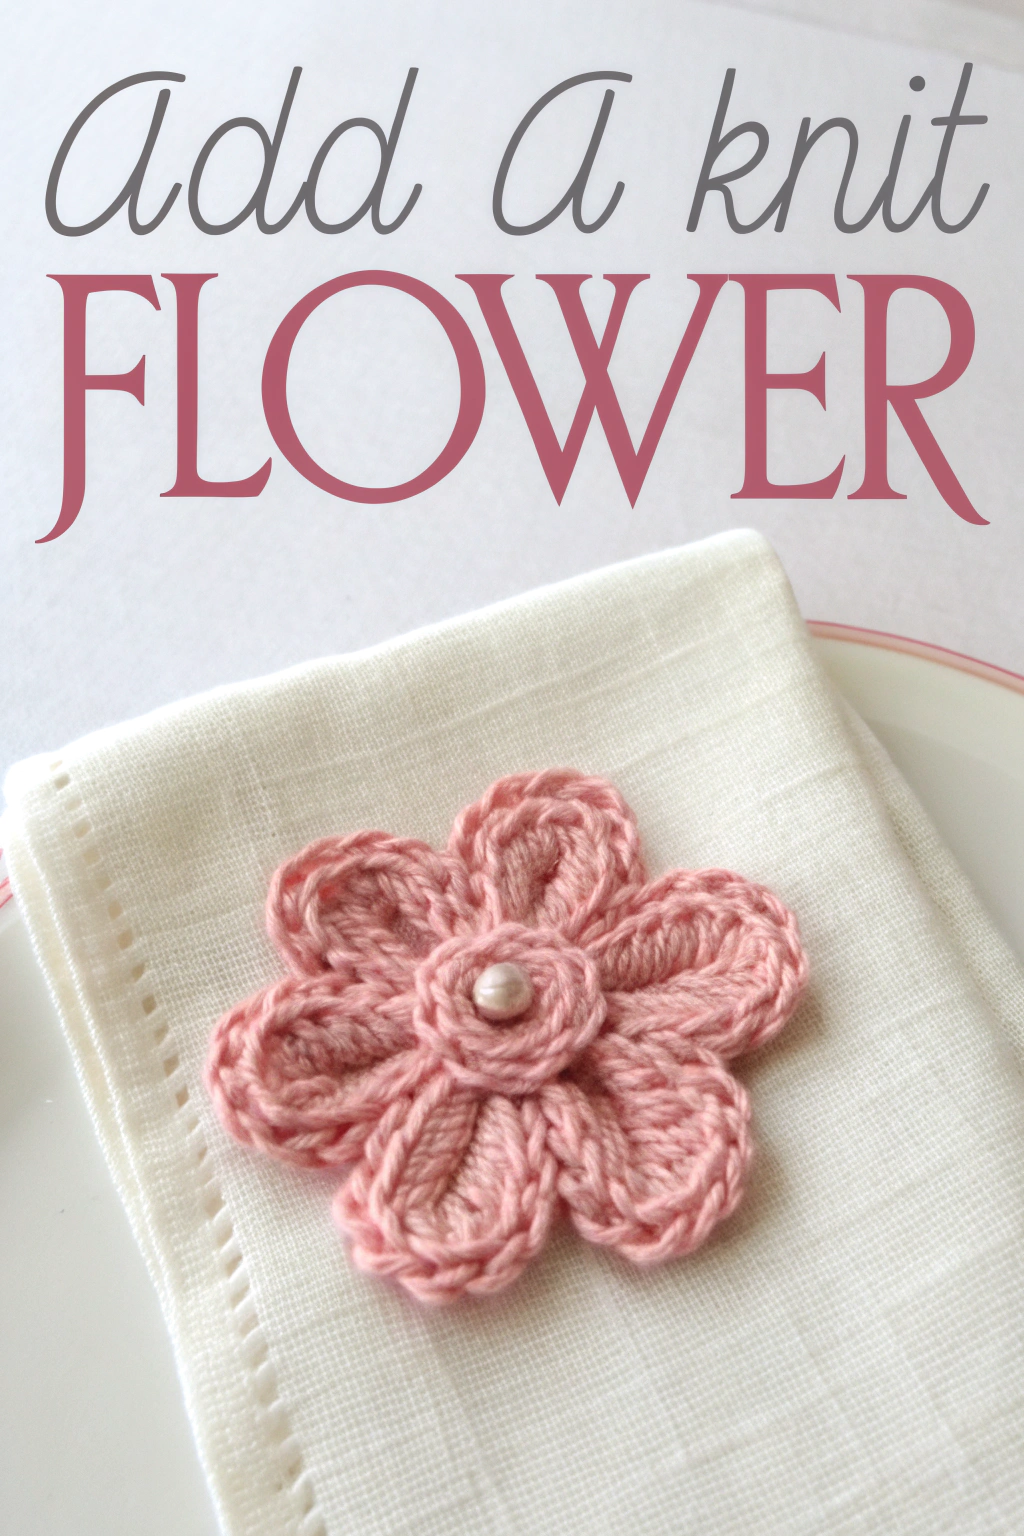
Ever looked at a plain napkin, a simple gift wrap, or even a favourite cardigan and thought it needed just a little something extra? Well, get your needles ready, because we’re going to fashion a beautiful knit flower just like the one you see in the picture! This lovely embellishment is a fantastic way to dip your toes into the world of knitting and add a personal, handcrafted touch to almost anything. The delicate light pink yarn seen in the image gives this flower a soft, sweet appearance, and the single pearl bead at its heart is the perfect finishing touch.
Don’t worry if you’re new to knitting; this project is wonderfully straightforward, and I’ll guide you through every step. Imagine the satisfaction of pointing to it and saying, “I made that!”
What You’ll Need to Gather
Before we begin, let’s get our supplies together. For this project, you will want:
- 🧶 DK weight yarn in a light pink shade (like the one pictured). A smooth cotton or acrylic blend works wonderfully. You won’t need much, so it’s a great project for using up scraps!
- 🥢 A pair of 3.5mm (US 4) Double-Pointed Needles (DPNs). If you don’t have DPNs, you can also make an i-cord using a circular needle.
- ✂️ A small pair of sharp scissors.
- 🪡 A tapestry needle (a blunt needle with a large eye) for weaving in ends and assembly.
- ⚪ One small pearl bead (approximately 5-6mm in diameter, like the one in the flower’s center).
- 🧵 A regular sewing needle and thread (matching your yarn or bead) to attach the pearl.
Getting Started: The Knitted Cord
The lovely, rounded petals of the flower you see in the image are formed from a continuous knitted tube called an i-cord. It sounds fancy, but it’s surprisingly simple to make!
Understanding Basic Stitches (for Absolute Beginners):
- To Cast On: This is how you get your very first stitches onto your knitting needle to begin working. We’ll use a simple method. Make a slip knot and place it on one DPN. Then, knit into this stitch but instead of slipping the old stitch off, place the new loop you’ve just formed back onto the left-hand needle. Repeat until you have the required number of stitches.
- The Knit Stitch (k): This is the foundation of most knitting.
- Hold the needle with the stitches in your left hand and the empty needle in your right.
- Insert the tip of your right-hand needle into the first stitch on your left-hand needle from front to back.
- Wrap the yarn anti-clockwise around the tip of the right-hand needle.
- Pull the right-hand needle back through the stitch, bringing the loop of yarn with it.
- Slip the original stitch off the left-hand needle. You’ve made one knit stitch!
Making the I-Cord:
- Cast on 3 stitches onto one of your DPNs. Just 3 tiny stitches – that’s all it takes!
- Knit these 3 stitches.
- Do NOT turn your work. This is the magic part of an i-cord! Instead, slide the 3 stitches to the other end of the same DPN they are currently on. The working yarn will be coming from the leftmost stitch, stretching across the back of your 3 stitches.
- Knit the 3 stitches again, gently pulling the yarn from the leftmost stitch across the back to work the first stitch on the right. This little tug is what closes the tube.
- Repeat steps 3 and 4 – slide, knit, slide, knit. You’ll see a neat little cord begin to form. It’s quite exciting to watch it grow!
- Continue working your i-cord until it measures approximately 12-14 inches (30-35 cm) long. This length will give you enough to form the six distinct petals and the neat central coil you see in the image.
A Little Tip: Try to keep your tension even as you knit. If your i-cord feels a bit loose, try going down a needle size. If it’s too tight and stiff, a slightly larger needle might help.
Finishing Your Cord
Once your i-cord reaches the desired length:
- Cut your yarn, leaving a tail of about 6-8 inches.
- Thread this tail onto your tapestry needle.
- Pass the tapestry needle through the 3 live stitches on your DPN as if to purl, and slide them off the DPN.
- Pull the yarn firmly to close the end of the i-cord. Weave this end into the cord a little to secure it, but don’t trim it completely yet – it might be useful for assembly! Leave the cast-on tail as well.
Assembling Your Beautiful Bloom
Now for the really fun part – transforming your knitted cord into the charming six-petaled flower! Look closely at the image; the flower has a coiled center and six evenly spaced petals. We’re going to replicate that.
- Find the middle of your i-cord. This will be the starting point for your flower’s center.
- Begin coiling one end of the i-cord tightly for about 1 to 1.5 inches to form the central part of the flower. Using one of the yarn tails threaded on your tapestry needle, make a few small, discreet stitches on the underside of the coil to secure it in place as you go. Keep these stitches hidden!
- Form the first petal: Once the center is coiled and secured, take the remaining length of the i-cord and form a loop for your first petal. Each petal uses about 1.5 inches (3.5-4 cm) of the i-cord. Pinch the base of the loop where it meets the central coil.
- Secure the petal: Using your tapestry needle and the yarn tail (or a new piece of matching yarn if your tails are too short), make a few small stitches at the base of this loop, attaching it securely to the edge of the central coil and to itself to hold the petal shape. Again, keep these stitches on the underside so they are not visible from the front.
- Continue forming petals: Repeat step 4, working your way around the central coil, to form five more petals. Aim to make them roughly the same size and space them evenly, just like the flower in the photograph. You will be using the single continuous i-cord to fashion all six petals.
- Finishing touches: Once all six petals are formed and securely stitched down at their bases, check the overall shape. Make any tiny adjustments by adding a stitch here or there to ensure the petals sit nicely.
- Weave in all ends: Securely weave any remaining yarn tails into the back of the flower using your tapestry needle and then carefully trim any excess yarn.
Adding the Pearl Center
The single, elegant pearl bead you see in the center of the pictured flower is the final flourish.
- Thread your sewing needle with a length of sewing thread. You can double it for strength if your bead hole is large enough.
- Bring your needle up from the back of the flower, right through the very center of your i-cord coil.
- Pass the needle through your pearl bead.
- Take the needle back down through the center of the flower, close to where it came up.
- Repeat this a couple of times to ensure the bead is firmly attached.
- Secure the thread on the back of the flower with a few small knots and trim the excess thread.
Your Knitted Flower Is Ready!
And there you have it! A perfectly lovely knit flower, ready to adorn whatever you choose. Wasn’t that a rewarding little project? Think of all the places you could add such a sweet, handmade detail. Perhaps on a hat, a bag, as a brooch, or even as a charming napkin ring like in the image.
The beauty of making things by hand is the unique touch you bring to each piece. So go ahead, experiment with different yarn colors and bead choices for future blooms.
We’d be absolutely thrilled to see the beautiful flowers you fashion! Feel free to share pictures of your finished pieces – it’s always inspiring to see how everyone puts their own spin on a project. Happy knitting!