
Sunny Tomato Bulgur Pilaf
Discover the joy of preparing a truly comforting and flavorful dish with this guide to making a beautiful Sunny Tomato Bulgur Pilaf. This recipe walks through how to achieve that wonderful, fluffy texture and rich tomato taste, resulting in a dish that’s as delightful to look at as it is to eat. Imagine a warm, inviting mound of perfectly cooked bulgur, glowing with a rich orange hue, ready to grace the dinner table. This is a staple in many homes, and now it can be in yours too!
What You’ll Need
Here’s a list of the bits and pieces required to assemble this lovely pilaf:
Ingredients:
- 🧅 1 medium onion, finely chopped
- 🧄 2 cloves garlic, minced (optional, but adds lovely flavor)
- 🥄 2 tablespoons olive oil
- 🧈 1 tablespoon halal butter (optional, for extra richness)
- 🍅 2 tablespoons tomato paste (this gives that deep orange color)
- 🥫 1 can (400g / 14 oz) diced halal tomatoes, or 2 large fresh tomatoes, finely chopped
- 🍚 1 cup coarse bulgur wheat (often labelled “pilavlık bulgur”)
- 💧 2 cups hot halal vegetable broth (or hot water)
- 🧂 Salt to taste
- 🌶️ Freshly ground black pepper to taste
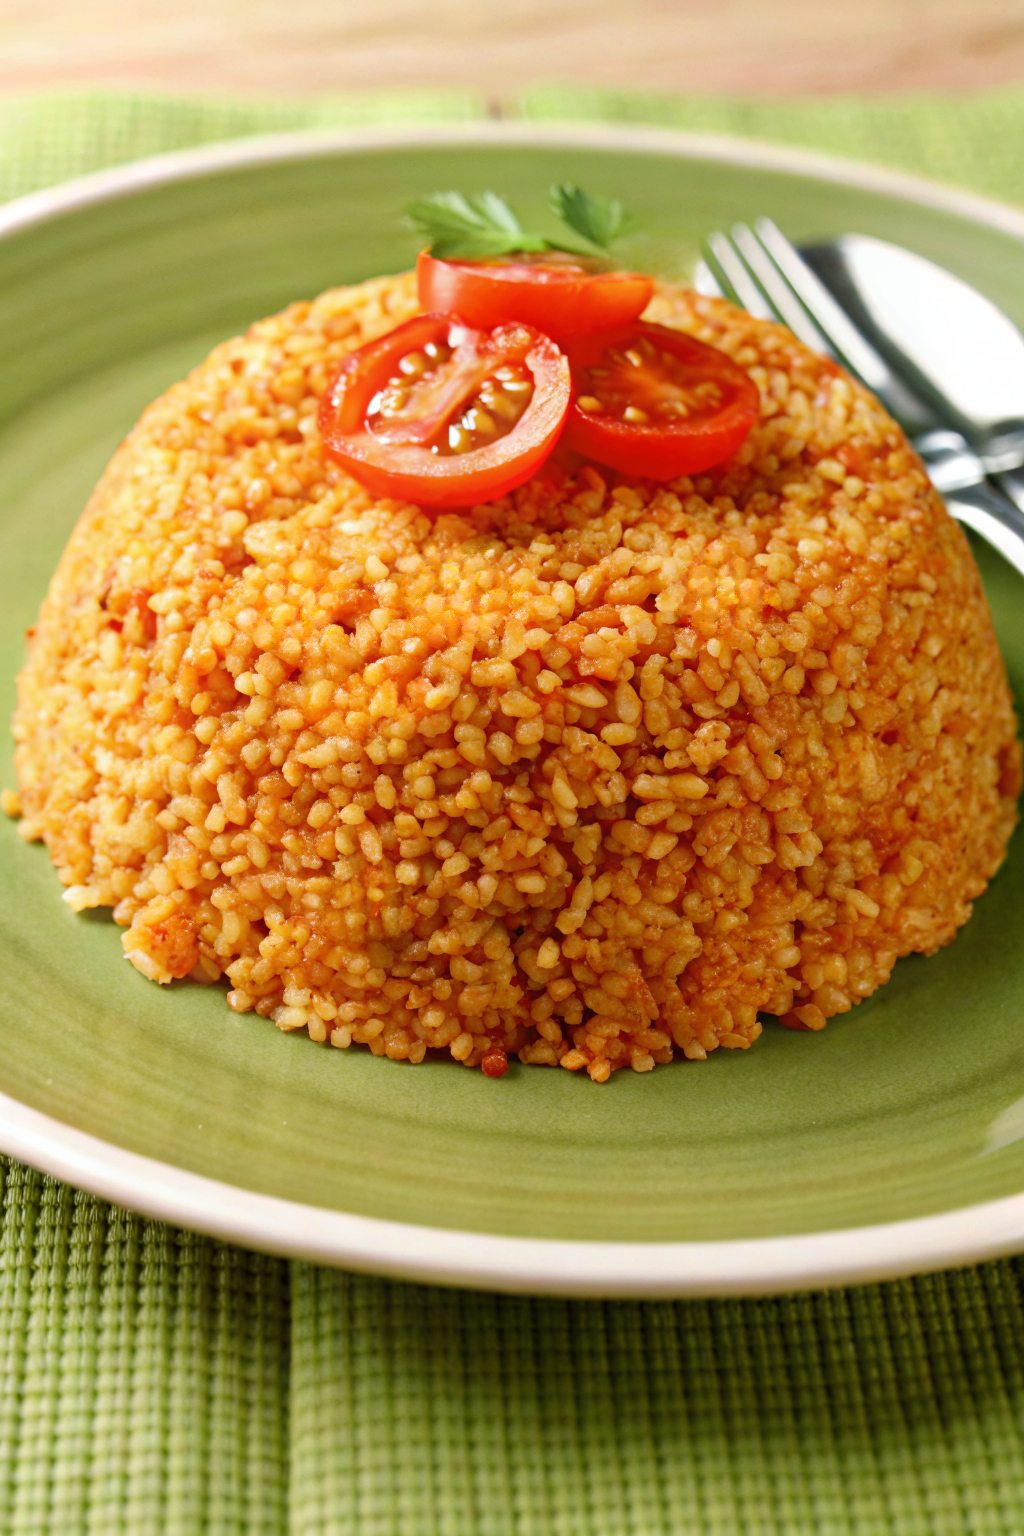
- 🍒 A few cherry tomatoes, halved (for garnish, as seen in the image)
- 🌿 A small sprig of fresh parsley (for garnish, as seen in the image)
Kitchen Equipment:
- 🔪 Sharp knife
- 🪵 Cutting board
- Medium-sized saucepan or pot with a tight-fitting lid
- 🥄 Wooden spoon or spatula for stirring
- ☕ Measuring cups
- 🥄 Measuring spoons
- 🥣 A small bowl (for shaping the pilaf, if desired)
Getting it Just Right: Step-by-Step
Follow these instructions carefully, and soon a delicious, aromatic bulgur pilaf will be ready.
- Prepare the Bulgur: Before starting, it’s a good idea to rinse the coarse bulgur. Place the bulgur in a fine-mesh sieve and run cold water over it until the water runs mostly clear. This removes any excess starch and helps achieve separate, fluffy grains. Let it drain well.
- Sauté the Aromatics: In the saucepan, warm the olive oil (and butter, if using) over medium heat. Once the oil is shimmering slightly (this means it’s hot enough), add the finely chopped onion. Cook the onion, stirring occasionally, for about 5-7 minutes, or until it becomes soft and translucent – that means it looks a bit see-through, like frosted glass. Sautéing like this builds a wonderful flavor base. If using garlic, add it in the last minute of cooking the onions to prevent it from burning.
- Introduce the Tomatoes: Stir in the tomato paste. Cook it for about 1-2 minutes, stirring constantly. This step is important as it deepens the tomato flavor and helps develop that vibrant orange color seen in the final dish. Next, add the diced tomatoes (canned or fresh). Stir everything together and let it cook for another 3-5 minutes, allowing the flavors to meld. The mixture should look rich and saucy.
- Toast the Bulgur: Add the rinsed and drained bulgur to the pot. Stir it well to coat all the grains with the tomato mixture. Let it cook for 1-2 minutes, stirring gently. This light toasting of the bulgur enhances its nutty flavor.
- Simmer to Perfection: Pour in the hot vegetable broth (or hot water). Season with salt and freshly ground black pepper. Stir once to combine everything, then bring the liquid to a gentle boil. Once it’s boiling, immediately reduce the heat to the lowest possible setting. Cover the pot with a tight-fitting lid. Now, it’s time to simmer. This means cooking it very gently, so you might see just a few tiny bubbles rising. Let it simmer for 15-20 minutes, or until all the liquid has been absorbed by the bulgur. Important: Do not lift the lid or stir the bulgur during this simmering time! Peeking can let steam escape, which is needed for the bulgur to cook properly.
- Resting is Key: Once all the liquid is absorbed (you can tilt the pot slightly to check, but try to be quick), turn off the heat. Without removing the lid, place a clean kitchen towel or a few paper towels over the top of the pot, then put the lid back on tightly over the towel. This helps absorb any excess steam and ensures the bulgur becomes perfectly fluffy. Let the pilaf rest for at least 10-15 minutes. This resting period is crucial for achieving that wonderful, separate-grain texture.
- Fluff and Serve: After resting, remove the lid and the towel. Gently fluff the bulgur pilaf with a fork. Notice how the grains are distinct and the color is a beautiful, consistent orange.
- Plate it Up: To achieve the neat, domed presentation shown in the image, you can lightly pack the warm bulgur pilaf into a small round bowl. Then, place a serving plate on top of the bowl and carefully invert them together. Lift the bowl away, and the pilaf will hold its shape. Garnish the top with the fresh, halved cherry tomatoes and the small sprig of parsley. The vibrant red of the tomatoes and the green of the parsley provide a lovely contrast to the orange pilaf.
This hearty and wholesome tomato bulgur pilaf is a testament to how simple ingredients can come together to make something truly special. The satisfaction of serving up a dish prepared with care is immense.
Why not give this wonderful recipe a go? It’s a fantastic way to explore new flavors and techniques. Sharing the experience of making and enjoying this pilaf with loved ones makes it even better. Happy cooking adventures await!