

Caramelized Bottom Bliss: Kazandibi
Here is a dessert that celebrates a beautiful contradiction: a silky, smooth milk pudding with a wonderfully rich, dark, and caramelized base. This is Kazandibi, a beloved Turkish sweet whose name literally translates to “bottom of the pot.” The magic of this dish lies in intentionally browning the bottom of the pudding to develop a deep, slightly bittersweet flavor that perfectly contrasts with the delicate, sweet pudding itself. Preparing this at home is a truly rewarding process that yields a stunning and delicious result.
Kitchen Essentials
- 🥘 Heavy-bottomed saucepan (for even heat distribution)
- 🟨 A rectangular metal baking pan (approximately 9×13 inches or 23×33 cm)
- 🥣 Whisk
- ✨ Flexible heat-proof spatula
- 🥄 Measuring cups and spoons
Halal Ingredients
- 🥛 4 cups (1 liter) full-fat halal milk
- 🍚 1 cup (200g) granulated sugar, plus 3-4 tablespoons for the pan
- 🥄 ½ cup (80g) rice flour
- 🌽 2 tablespoons (15g) cornstarch
- 🧈 2 tablespoons unsalted halal butter, softened
- 💧 1 teaspoon alcohol-free halal vanilla extract (optional)
Step-by-Step Guide to Making Kazandibi
1. Prepare the Pan for Caramelization
The first step is dedicated to preparing the foundation for that signature dark brown top. Take the softened butter and generously grease the entire bottom and sides of the rectangular metal pan. Once greased, sprinkle the extra 3-4 tablespoons of sugar evenly all over the bottom. Tilt the pan to ensure a complete, uniform layer of sugar. This sugar layer is what will transform into the dark, caramelized crust.
2. Whisk Up the Pudding Base
For a perfectly smooth pudding without any lumps, it’s best to combine the dry ingredients first. In the heavy-bottomed saucepan (while it’s still cold), add the 1 cup of sugar, the rice flour, and the cornstarch. Whisk them together until they are well combined.
Next, begin pouring the milk into the saucepan. Do this gradually—meaning in a slow, steady stream—while whisking constantly. This technique prevents the flour and starch from clumping and ensures the pudding base is silky smooth from the very start.
3. Cook the Pudding
Place the saucepan over medium heat. Now begins the most active part of the process: continuous whisking. It’s important not to walk away, as the milk mixture can stick to the bottom of the pan or develop lumps if left unstirred.
Continue to cook and whisk as the mixture heats up. It will slowly begin to thicken. After several minutes, it will transform into a thick, glossy pudding. The pudding is ready when it heavily coats the back of a spoon or spatula and thick bubbles start to form and pop on the surface. Remove it from the heat and stir in the vanilla extract, if using.
4. The “Kazandibi” Burn
Immediately pour the hot pudding into the sugar-coated pan, spreading it into an even layer with the spatula.
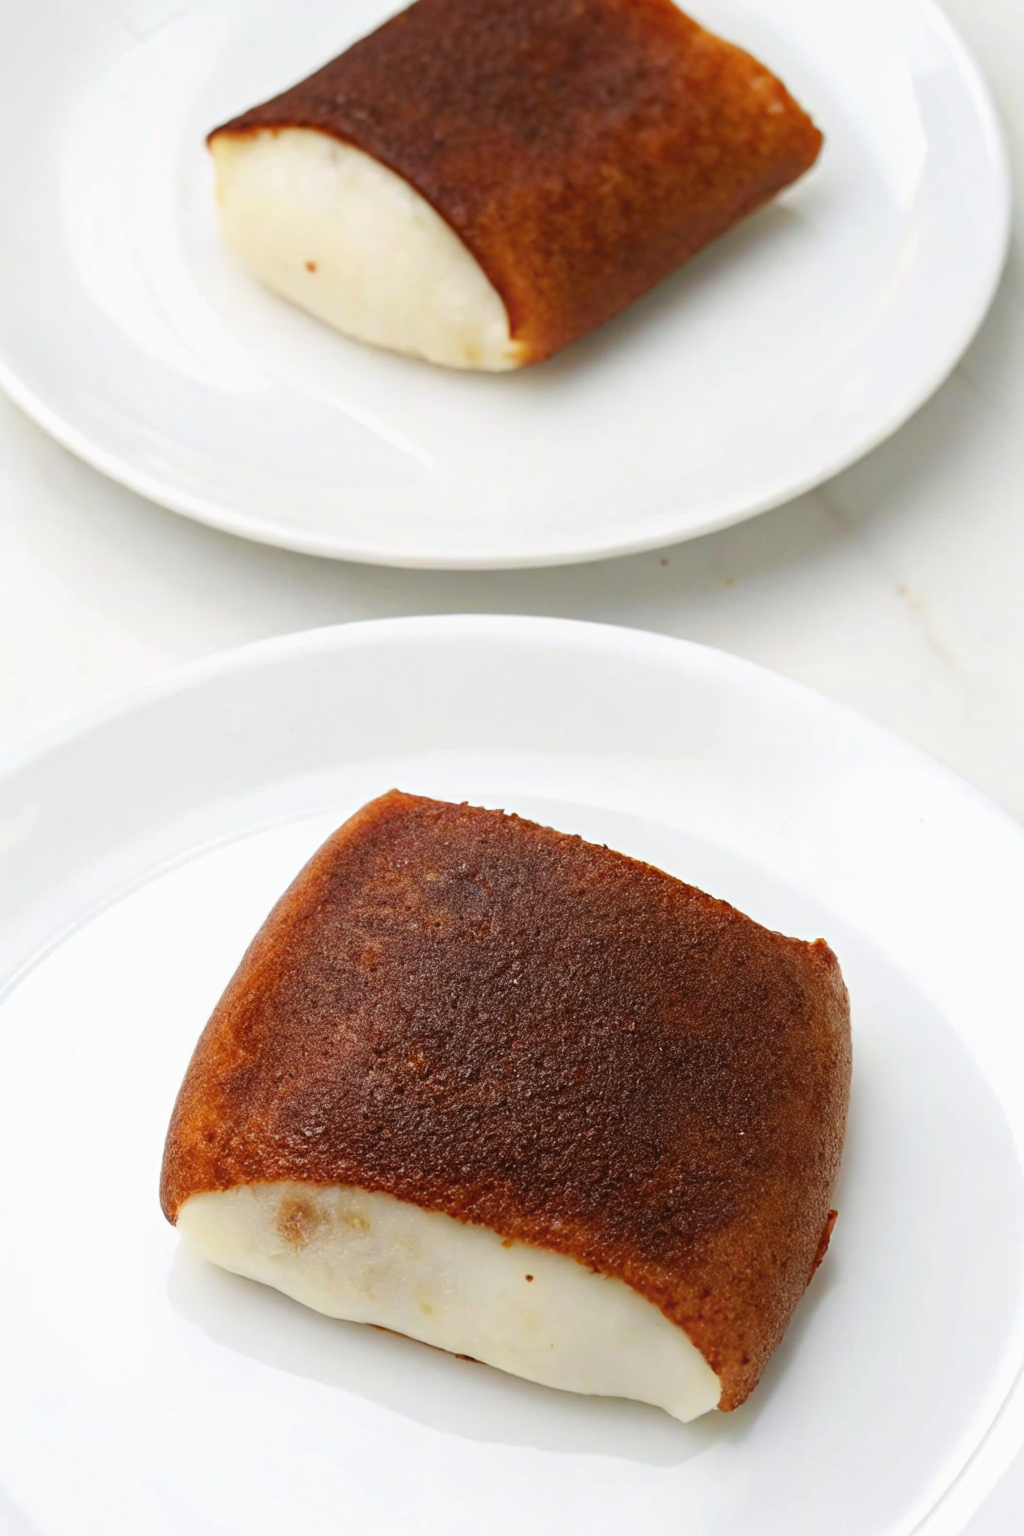
Now for the defining step. Place the metal pan directly onto a stovetop burner set to medium-low heat. This needs to be done carefully. To ensure the entire bottom caramelizes evenly, slowly slide the pan back and forth and side to side over the burner, so every part of the bottom gets direct heat. After a few minutes, the sugar underneath will begin to caramelize and brown. The aroma will be a clear indicator. To check its progress, gently lift a small corner of the pudding with a spatula to peek underneath. The process is complete when the bottom has achieved the deep, dark brown color of the dessert in the photograph. Warning: The pan will be extremely hot, so handle it with oven mitts.
5. Chill to Perfection
Once the bottom is perfectly caramelized, remove the pan from the heat. Let it cool completely on a wire rack to room temperature. Then, cover it with plastic wrap and place it in the refrigerator to chill for at least 4 hours, though overnight is even better. This chilling period is essential; it allows the pudding to set firmly, which is necessary for clean slicing and folding.
6. Slice and Fold
When the Kazandibi is fully chilled and firm, it’s time for the final presentation. Cut the pudding into long, wide rectangular strips, about 2-3 inches wide. Using a flexible spatula, carefully lift one end of a strip. Gently slide the spatula underneath and fold the strip over onto itself.
Place the folded pudding onto a serving plate with the dark, caramelized side facing up. The contrast between the dark, textured top and the smooth, white pudding revealed at the sides is the beautiful final result.
This remarkable dessert is now ready. The satisfaction of slicing through the firm pudding and revealing the caramelized layer is a wonderful moment. Feel free to share photos of your beautiful homemade Kazandibi.