

The Only Bucket Hat Pattern You’ll Ever Need
There’s a special kind of pride that comes from wearing something you’ve brought to life with your own two hands. Imagine stepping out in a stylish, cozy hat that fits you perfectly because you fashioned it yourself. This project is all about that feeling.
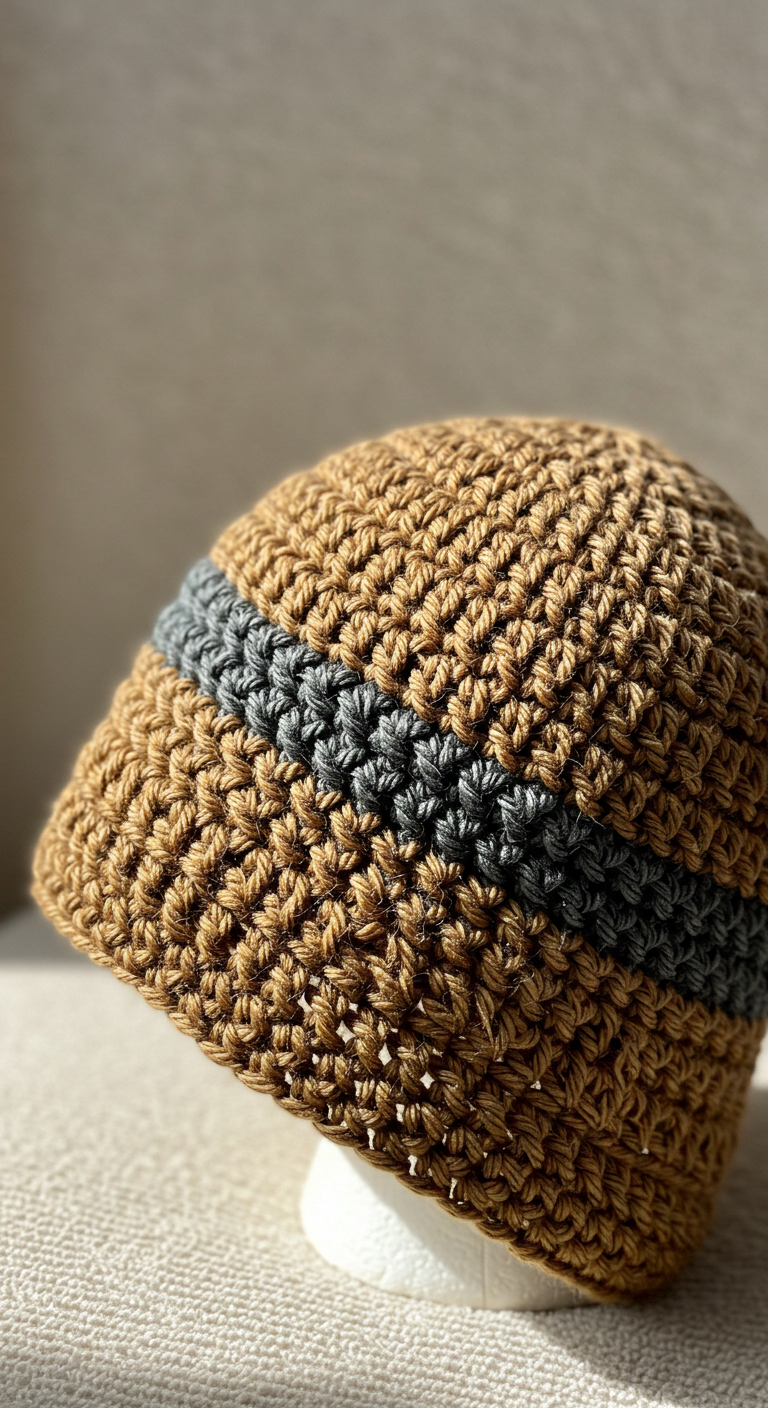
The hat in the image is a testament to how simple stitches can form a truly beautiful and modern accessory. It has a dense, woven texture in a warm tan color, punctuated by a bold charcoal gray stripe. It’s sturdy, stylish, and entirely achievable, even if you’ve never picked up a crochet hook before. We are going to walk through every single step together to assemble this exact hat.
What You’ll Need
Before we begin, let’s gather our tools. Having everything ready makes the process smooth and enjoyable.
- 🧶 Worsted-weight cotton yarn in two colors: a main color (Tan) and an accent color (Dark Gray).
- 🪝 A 4.5mm crochet hook.
- ✨ A stitch marker (a simple safety pin or a scrap of different colored yarn works wonders!).
- ✂️ A pair of scissors.
- 🪡 A tapestry needle for weaving in the ends.
Getting to Know the Stitches
This hat uses a few basic techniques that we’ll master right now. Don’t worry, they’re simpler than they sound!
The Magic Ring
This is the secret to starting a project in the round without a hole at the top. To begin, loop the yarn around your fingers twice, forming an ‘X’. Insert your hook under the first strand and pull the second strand through. Chain one stitch to secure the loop, and now you have a magic ring ready for your first stitches!
Single Crochet (sc)
This is a foundational stitch. Insert your hook into a stitch, yarn over (wrap the yarn over your hook), and pull up a loop. You’ll have two loops on your hook. Yarn over again and pull through both loops. That’s a single crochet!
The Waistcoat Stitch (wst)
This is the stitch that gives the hat its distinctive knit-like texture. It’s a variation of the single crochet. Instead of inserting your hook under the top two loops of the stitch below, you will insert your hook directly into the center of the “V” of the stitch. This might feel a bit tight at first, so maintaining a slightly looser tension helps. This one stitch is responsible for the entire fabric and look of the hat in the photo.
Changing Colors
To get that crisp stripe, you’ll need a clean color change. Work the last stitch of the old color until the final step (when you have two loops left on your hook). Then, drop the old color, pick up the new color, and pull the new color through those last two loops to finish the stitch. It’s that easy!
Let’s Build Your Hat!
We will assemble this hat from the top down, in continuous rounds. Place your stitch marker in the first stitch of each round and move it up as you go so you don’t lose your place.
The Crown
This is the flat circle at the very top of the hat.
Round 1: Begin with a magic ring. Work 6 single crochet (sc) stitches into the ring. Pull the tail to close the ring tight. (6 stitches)
Round 2: From this round forward, you will be using the waistcoat stitch (wst). Work 2 wst into the center of each stitch from the round below. (12 stitches)
Round 3: [Work 1 wst in the next stitch, then 2 wst in the following stitch]. Repeat this pattern all the way around. (18 stitches)
Round 4: [Work 1 wst in each of the next 2 stitches, then 2 wst in the following stitch]. Repeat around. (24 stitches)
Round 5: [Work 1 wst in each of the next 3 stitches, then 2 wst in the following stitch]. Repeat around. (30 stitches)
Continue this pattern of increasing—adding one more stitch between the increases each round—until your flat circle measures about 6.5 to 7 inches in diameter.
The Body
Now we will stop increasing to form the straight sides of the hat.
Next Rounds: Work 1 wst in every single stitch around. Do not add any increases. Just continue working even rounds. This will make the hat start to curve downwards and take on its shape. Continue this for about 15 rounds with your tan yarn.
The Stripe
It’s time for that pop of color.
Stripe Round 1: At the end of the last tan round, change to your gray yarn. Work 1 wst in every stitch around using the gray yarn.
Stripe Rounds 2-3: Continue working 1 wst in every stitch for two more rounds with the gray yarn. The stripe on the hat is three rounds thick.
Back to the Main Color
Next Round: At the end of the third gray round, switch back to your tan yarn. Work 1 wst in every stitch around.
Final Rounds: Continue working even rounds of wst with the tan yarn for another 5-7 rounds, or until the hat is the perfect depth for you. Try it on as you go!
Finishing Touches
The final step is to give your hat a polished look.
Cut your yarn, leaving a 6-inch tail. Yarn over and pull the tail completely through the loop on your hook to fasten it off.
Now, thread that tail onto your tapestry needle. Weave the end in and out of the stitches on the inside of the hat to secure it. Do the same for the starting tail from your magic ring and any other ends from your color changes. A well-finished inside makes all the difference!
And there it is. You just assembled a beautiful, textured hat that’s ready for any season. The combination of the sturdy waistcoat stitch and the bold stripe results in a piece that is both timeless and modern. Wear it with pride, knowing every single stitch was put there by you.