

How to Make Glorious Homemade Peach Jam
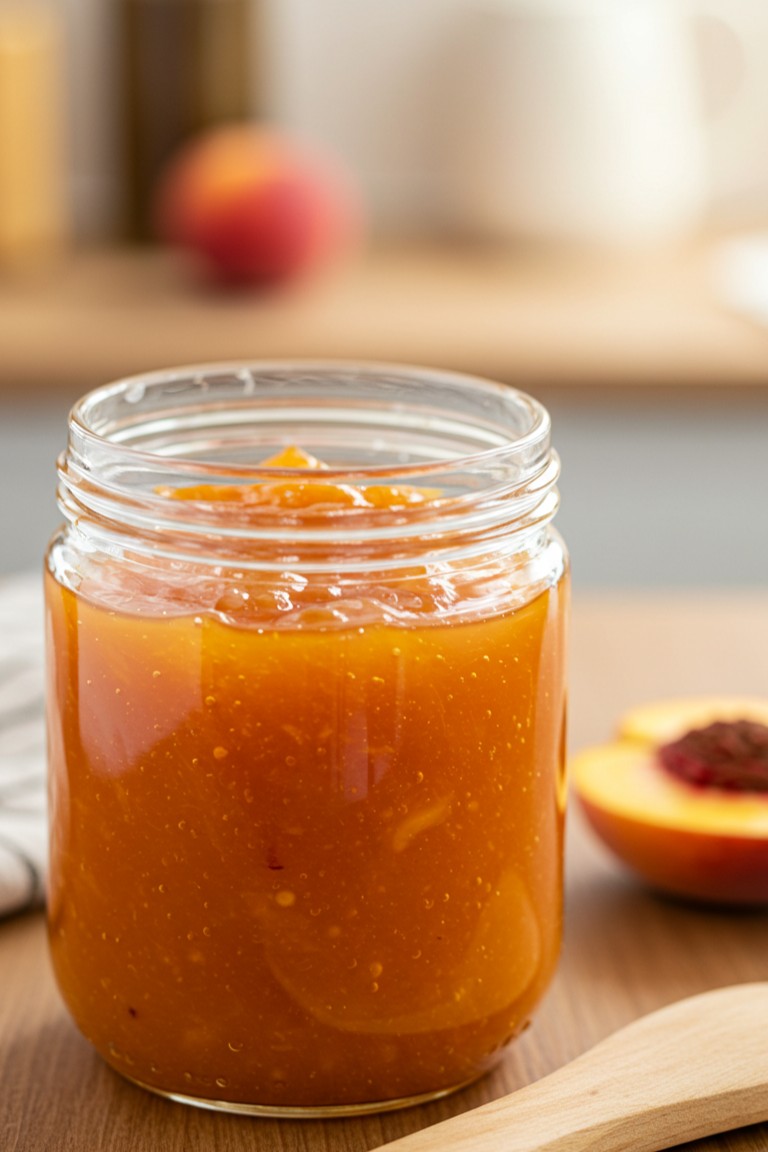
That jar of shimmering, jewel-toned peach jam seen in the photograph is not a store-bought fantasy. It’s a completely achievable kitchen project, and this guide walks through every part of the process. The final product has a stunning deep orange color and a lusciously thick consistency, filled with tender pieces of fruit. Anyone can follow these simple instructions to produce a jar of peach jam that looks and tastes exactly like this delicious example.
The Pantry and Tool Checklist
Kitchen Equipment
- A sturdy, heavy-bottomed pot or Dutch oven
- 🥣 One large bowl for mixing
- 🔪 A sharp paring knife for fruit prep
- 🪵 A wooden spoon or a heat-proof spatula
- 🧊 Two or three small plates, chilled in the freezer
- 🏺 One 16-ounce glass jar with a lid, properly sterilized
Ingredients
- 🍑 4 cups of finely chopped ripe peaches (this is about 2 lbs)
- 🍬 2 cups of halal granulated sugar
- 🍋 ¼ cup of freshly squeezed lemon juice
- 🌿 2 tablespoons of halal fruit pectin (this is optional but ensures a firm set)
A Simple Path to Perfect Peach Jam
Following these methodical stages guarantees a successful outcome, filling the home with an irresistibly sweet fragrance along the way.
1. Ready the Peaches
The journey to this delectable jam begins with the peaches themselves. To peel them without any fuss, use a method called blanching. Plunge the whole peaches into a pot of boiling water for just 30 to 60 seconds. Immediately move them to a bowl of ice water. This quick temperature change makes the skins loosen, allowing them to be slipped off with ease.
After peeling, slice the peaches open to discard the pits. The next action is key to getting the texture just right: chop the peach flesh into very small, roughly ¼-inch pieces. This precise size is what helps suspend the fruit beautifully within the finished gel, just as seen in the picture.
2. The Sweet Maceration
Place all the chopped peaches into the large bowl. Pour the sugar directly over the fruit and stir gently until every piece is glistening. Now, for a bit of kitchen patience: let the bowl sit at room temperature for about one hour.
This resting period is known as maceration. The sugar coaxes the natural juices from the fruit, forming a rich, flavorful syrup. This is a fundamental step for developing the deep, robust peach flavor that makes homemade jam so special.
3. The Cook-Down
Transfer the entire contents of the bowl—peaches and all that luscious syrup—into the heavy-bottomed pot. Stir in the lemon juice and the fruit pectin (if you are using it). The acidity from the lemon is essential; it not only brightens the fruit’s taste but also helps the jam to set properly.
Bring the mixture to a rolling boil over medium-high heat. A rolling boil is a powerful bubbling that can’t be subdued by stirring. Once it reaches this stage, stir continuously to ensure no sugar sticks and burns. Let it bubble vigorously for about 15-20 minutes. Observe as the jam thickens and transforms, its color deepening into that rich, warm orange.
4. The Gel Test: Moment of Truth
Here’s the step that ensures the perfect spreadable consistency. This test should be prepared before the cooking begins by placing a few small plates in the freezer.
To check if the jam is done, remove the pot from the heat. Drop a small spoonful of the hot liquid onto one of the chilled plates and return it to the freezer for exactly two minutes. Afterwards, push the dollop of jam with a finger. If its surface wrinkles and holds its shape, the jam is perfectly set. If it’s still runny, it needs more time. Simply return the pot to the heat and boil for another 3 to 5 minutes before testing again on a new frozen plate.
5. Bottling the Sunshine
With the jam cooked to perfection, turn off the heat. Let the pot sit for five minutes so the fruit pieces can settle and distribute evenly.
Next, carefully ladle the hot, fragrant jam into the sterilized glass jar, leaving about a half-inch of empty space at the top. The open jar in the image is a perfect visual guide for the beautiful finished product. Clean any drips from the jar’s rim, then seal it tightly with the lid. Allow it to cool down completely on the counter before moving it to the refrigerator for storage.
This jar is now a pantry staple, ready to bring a touch of summer to toast, yogurt, or pastries. Enjoy the sweet rewards of this wonderful kitchen project and consider sharing a snap of the gleaming results.
Thank you for sharing. I reviewed a few recipes and decided yours was the best because it most resembles the method I remember my mother using. Praying it will turn out well.