

Rustic Homemade Grape Jam
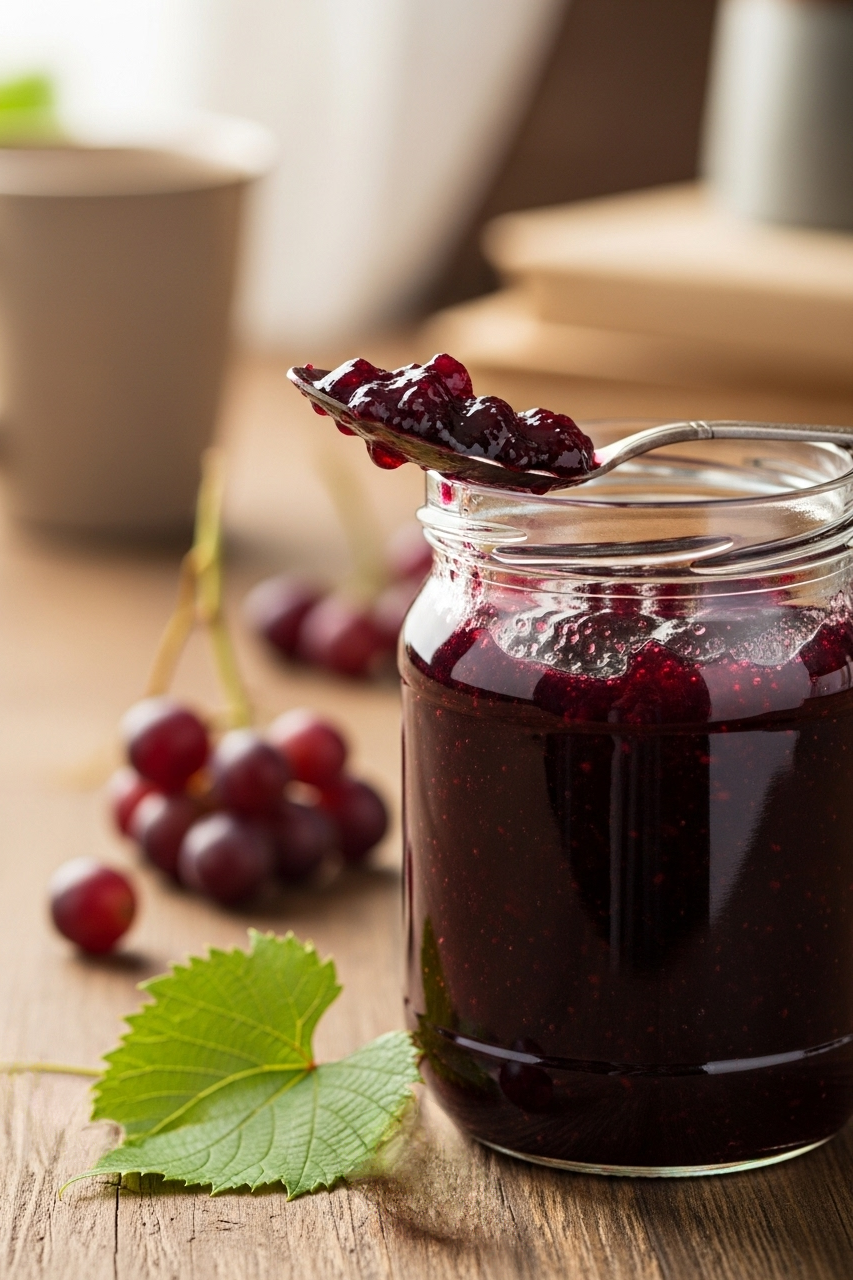
Lifting a spoonful of homemade jam from the jar reveals its true character: a condiment rich with pieces of fruit, shimmering in a deep, ruby-purple hue. It’s a rustic and heartfelt taste that captures the very essence of the vineyard.
The process of preparing it at home is a wonderfully simple and rewarding activity, turning a handful of fresh ingredients into something truly special. That specific, chunky texture seen in the photo, where pieces of grape are still distinct, comes from a gentle and careful cooking method. The final product, presented with a vibrant green grape leaf on a wooden surface, is a testament to its fresh-from-the-vine origins. This guide provides every detail needed for a novice cook to assemble this exact beautiful jar of jam.
Gathering Your Supplies
Before beginning, it’s best to have all ingredients and tools ready. This makes the entire process smooth and enjoyable.
Halal Ingredients List
- 🍇 1 kg Red Grapes (like Concord grapes for that classic deep color)
- 🍬 750g Granulated Sugar
- 🍋 1/4 cup Fresh Lemon Juice
- 🍏 2 tablespoons Halal Pectin (optional, for a thicker, faster-setting jam)
Kitchen Equipment List
- 🍲 A large, heavy-bottomed pot or Dutch oven
- 🥔 A potato masher
- 🥄 A long-handled spoon for stirring
- 🥣 A ladle
- 🫙 Several clean glass jars with tight-fitting lids
- 🥶 A small plate, kept in the freezer (for testing)
The Jam-Making Journey
Making jam is a rewarding process of heat, time, and transformation. Each step is simple, and paying attention to the details is the key to success.
Step 1: Preparing the Grapes
First, rinse the grapes thoroughly under cool water and remove all of them from their stems. Discard any grapes that are mushy or spoiled. Place the clean grapes into the large pot.
Using the potato masher, gently press down on the grapes. The goal is not to liquefy them but to break them open and release their juices. Some grapes will remain whole or in large pieces. This gentle mashing is what produces the jam’s beautiful chunky texture, as seen in the scoop of jam resting on the jar. The skins should be left in, as they contain pectin and are essential for achieving the jam’s deep, luscious purple-red color.
Step 2: Cooking the Jam
Place the pot over medium heat. Add the sugar and lemon juice to the mashed grapes and stir everything together until the sugar begins to dissolve. If using pectin for a guaranteed set, this is the time to stir it in as well.
Bring the mixture to a gentle boil, then reduce the heat so it maintains a steady simmer. A simmer is a gentle bubbling, with small bubbles breaking the surface, not a rolling, vigorous boil. This slower cooking process allows the flavors to deepen and the fruit to soften perfectly. Stir the mixture every few minutes to prevent it from sticking to the bottom of the pot. The jam will start to thicken, which can take about 20-30 minutes.
Step 3: Checking for the ‘Set’
One of the most crucial skills in jam-making is knowing when it’s done. A jam is “set” when it has reached the perfect gel-like consistency for spreading. The easiest way for a beginner to test this is with the cold plate test.
- After the jam has been simmering and looks thicker, turn off the heat.
- Take the small plate out of the freezer.
- Carefully spoon a tiny bit of the hot jam onto the cold plate.
- Return the plate to the freezer for just one minute.
- Remove the plate and gently nudge the drop of jam with a finger. If the surface wrinkles, the jam is ready! If it’s still runny and your finger runs right through it, it needs more cooking time. Return the pot to a simmer for another 5 minutes and test again.
Step 4: Jarring the Finished Jam
Once the jam has passed the cold plate test, it’s time for bottling. The mixture will be very hot, so this step requires care.
Turn off the heat. Using a ladle, carefully transfer the hot jam into the clean glass jars, leaving about a half-inch of space at the top. Wipe any drips from the rim of the jars with a clean, damp cloth before sealing them tightly with their lids.
The jam will continue to thicken as it cools down to room temperature. Once cooled, store it in the refrigerator, where it will keep well for several weeks.
This process yields a rich, flavorful preserve perfect for spreading on warm toast, swirling into plain yogurt, or serving with scones. Sharing a jar of homemade jam is a simple yet profound way to share a little bit of homemade happiness.