

The “Wax Paper” Trick for Smudge-Free Stainless Steel Faucets: A Complete Guide
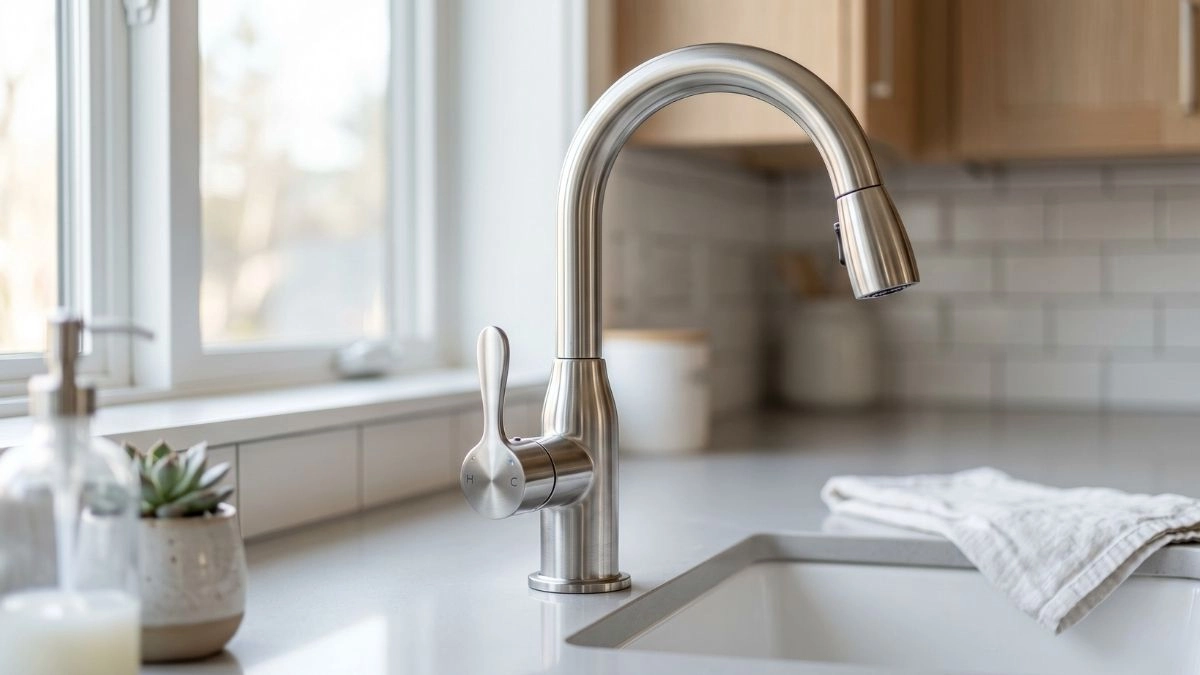
Imagine settling down at the kitchen island, sipping a hot cup of coffee, and admiring a perfectly clean space. Everything looks immaculate—until your eyes land on the kitchen sink. The stainless steel faucet, which should be the gleaming centerpiece of the room, is entirely covered in cloudy hard water spots and oily fingerprints. It is a universal and exhausting frustration. Stainless steel fixtures offer a brilliant, modern aesthetic, but maintaining that pristine, showroom appearance often feels like an impossible task. You spend valuable time wiping it down, and merely hours later, the very first person to wash their hands leaves it looking chaotic all over again.
However, a remarkably simple and cost-effective solution has been gaining significant traction across home organization communities. It involves an everyday item that is likely sitting in your pantry right now: standard wax paper. This straightforward method goes far beyond simple cleaning; it builds an invisible, water-repelling shield that keeps your fixtures looking flawless for much longer. Grab your favorite mug, get comfortable, and let’s explore the underlying science, the specific steps, and the community-approved techniques behind the highly effective wax paper trick.
Understanding the Enemy: Why Stainless Steel Attracts Smudges
To truly appreciate why this household trick works so exceptionally well, it is helpful to understand exactly what is happening on the microscopic surface of your hardware. Stainless steel, despite its name and durability, is highly susceptible to superficial marks. The two primary culprits in any household are mineral deposits and natural human oils.
Every time water splashes onto the faucet, tiny droplets are left behind. If your home has hard water—which is extremely common whether you reside in a bustling neighborhood in Istanbul or anywhere else across the globe—that water is packed with microscopic, dissolved minerals. The most prominent of these are calcium and magnesium. As the water droplet inevitably evaporates into the air, it leaves those heavy minerals behind. These crystalline structures bond tightly to the metal, forming those stubborn, chalky white spots that instantly make a clean faucet look dull and neglected.
Simultaneously, human skin naturally produces oils. When a wet or dry hand grips the faucet handle to turn it off, those natural oils transfer instantly onto the metal. Because stainless steel features a highly smooth, reflective surface, any disruption to that surface—like a microscopic smudge of oil—scatters light unevenly, making the fingerprint highly visible to the naked eye. Traditional chemical cleaning sprays only remove the existing grime; they do not synthesize any future defense. Once the liquid spray evaporates, the bare metal is completely exposed and ready to collect the very next splash of mineral-heavy water.
The Mechanics Behind the Wax Paper Method
This is where a standard piece of wax paper steps in. It might sound like a strange, unconventional concept at first, but it relies entirely on fundamental material science. Standard commercial wax paper is coated with a very thin, food-safe layer of wax, often derived from carnauba or paraffin.
When you rub this treated paper firmly over a clean stainless steel surface, friction and slight warmth cause a microscopic amount of that wax to transfer directly onto the metal. This transferred layer forms a continuous, hydrophobic (water-repelling) barrier. Because water and wax naturally repel one another, any new splashes that land on the treated faucet will immediately bead up tightly and roll straight off the metal and down into the sink drain.
By drastically minimizing the “dwell time”—the amount of time that water droplets sit on the surface—the heavy minerals never get the opportunity to crystallize and form hard water stains. Furthermore, this extremely thin wax layer actually fills in the microscopic valleys and imperfections inherently present on the metal’s surface. This smoothing effect allows incoming light to reflect perfectly evenly, developing a brilliant, polished shine that looks entirely professional. It is an ingenious way to construct a highly durable finish using an item that costs mere fractions of a penny per use.
Step-by-Step Guide to a Flawless Finish
Achieving that flawless, long-lasting shine requires a precise approach. Applying wax paper directly over a dirty surface will simply seal in the existing minerals and oils, which entirely defeats the purpose. Follow these practical steps carefully to ensure the absolute best results.
- Step 1: The Thorough Deep Clean The metallic surface must be absolutely pristine before applying any protective barrier. A highly favored approach involves mixing a simple solution of equal parts white household vinegar and filtered water. Spray this natural solvent generously over the fixture and allow it to sit undisturbed for three to five minutes. The mild acidity of the vinegar safely dissolves established limescale. If you are dealing with significant grease buildup in a kitchen environment, adding a single drop of liquid dish soap will help cut through the heavy oils. Gently scrub the entire area with a soft microfiber cloth. Strictly avoid abrasive tools like scouring pads or melamine foam sponges, as these will permanently scratch and ruin the finish.
- Step 2: The Critical Drying Phase Once the limescale and oils are completely dissolved, rinse the faucet thoroughly with plain water to remove any residual soap or vinegar. Next, take a completely dry, clean microfiber cloth and dry the fixture meticulously. Any remaining moisture or dampness will prevent the wax from adhering correctly to the stainless steel, rendering the entire application process ineffective.
- Step 3: The Wax Paper Buffing Technique Tear off a manageable square of wax paper, approximately four by four inches in size. Crumple the square slightly in your hands; this softens the stiff paper and makes it much easier to mold around the tight curves of your hardware. Apply firm, even pressure and rub the waxy side of the paper directly onto the metal. Ensure you thoroughly cover the handle base, the lever, and the main curved spout. It is essential to focus strictly on the exterior components; do not apply wax to the inside of the aerator screen where your clean drinking water flows.
- Step 4: The Final High-Gloss Polish After thoroughly rubbing the fixture with the paper, the metal might look slightly cloudy or hazy. Take a fresh, completely dry microfiber cloth and gently buff the entire surface using straight, overlapping strokes. Avoid circular motions, as straight lines align the microscopic wax particles perfectly and synthesize a high-gloss, mirror-like reflection. This protective shine can easily last for a full week, depending heavily on the household’s daily water usage.
Insights from the Cleaning Community
The internet acts as a vast repository of shared household wisdom, and this specific trick has been widely discussed, tested, and approved on platforms like Reddit. Reviewing these genuine community experiences provides excellent, unbiased insight into the long-term viability of the method.
Interestingly, many individuals who have worked in the retail clothing industry note that they have utilized wax paper for decades. Retail workers frequently rub wax paper along chrome clothing racks to keep them gleaming under bright store lights and to ensure that metal hangers glide smoothly without loudly scratching the surface. This real-world, commercial application proves the exceptional durability of the waxy barrier.
While the wax paper method is widely praised for being quick, accessible, and highly effective for weekly touch-ups, some community members prefer dedicated automotive products for a heavier, industrial shield. Users frequently discuss using carnauba-based car polish or specialized metal waxes to build a thicker defense against severe hard water problems. Another incredibly popular alternative shared in these digital forums is applying a tiny drop of pure mineral oil or baby oil. Buffing a single drop of oil into the metal also forms an effective water-repellent layer, although several users warn that oil can attract airborne dust slightly faster than dry wax.
Crucial Mistakes to Avoid for Optimal Results
To keep your kitchen and bathroom fixtures looking their absolute best and to avoid accidental damage, it is vital to keep a few common pitfalls associated with this technique in mind.
- Never Substitute with Parchment Paper: It is a very common kitchen mistake to confuse wax paper with parchment paper. Parchment paper is coated with a heat-resistant silicone layer designed specifically for non-stick baking in high-temperature ovens. It does not contain the transferable wax required to construct the hydrophobic shield. Using parchment paper will yield absolutely zero protective results.
- Keep Abrasives Away: As mentioned previously, some corners of the internet rapidly recommend using melamine foam sponges for tough bathroom stains. These sponges act exactly like ultra-fine sandpaper. While they might remove a hard water spot quickly, they will simultaneously strip the protective factory finish off your faucet, leaving it permanently cloudy, dull, and highly susceptible to rapid future rusting.
- Mind the Temperature: If your kitchen faucet dispenses exceptionally hot water on a regular basis and the exterior metal heats up significantly, the thin waxy layer may soften and wash away more rapidly. In heavily utilized kitchens, you might need to reapply the wax paper treatment twice a week to maintain the optimal barrier and keep spots at bay.
Conclusion
Maintaining a flawless, smudge-free kitchen environment does not require spending heavily on specialized chemical sprays or investing hours of your day into exhausting daily scrubbing. By simply understanding the fundamental science of water repellency and utilizing a basic, inexpensive sheet of wax paper, you can construct a brilliant, durable shine that effortlessly deflects hard water spots and daily fingerprints.
It is an incredibly practical, budget-friendly, and deeply satisfying way to upgrade your household cleaning routine. The next time you finish wiping down your kitchen counters, take an extra sixty seconds to buff your hardware with this clever method. The gleaming, mirror-like results will easily speak for themselves, leaving you with more time to sit back, relax, and enjoy your perfectly pristine space!