
Adorn Your Basket A Crocheted Liner Guide
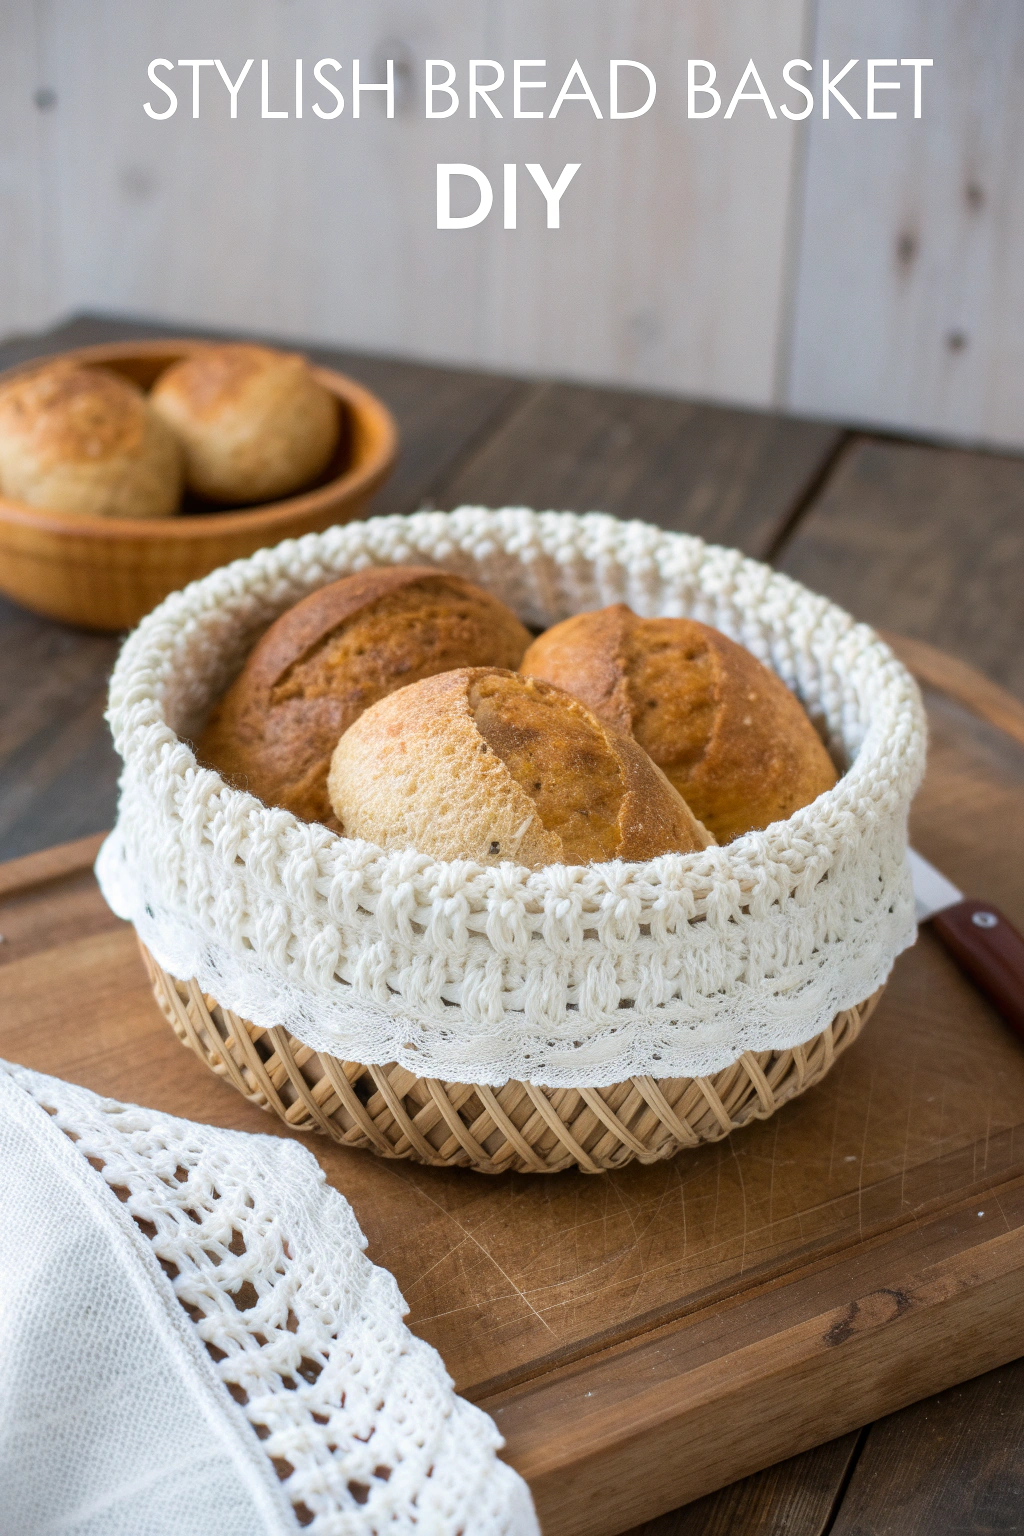
Isn’t there something wonderfully satisfying about transforming everyday items with a personal, handmade touch? Imagine your favorite bread rolls, warm from the oven, nestled not just in any basket, but in one graced with a beautiful, soft liner you’ve fashioned with your own hands! This project is perfect for adding a touch of rustic elegance to your kitchen or dining table. The image showcases a charming woven basket, its appeal elevated by a lovely off-white crocheted liner. This liner features a substantial fold-over cuff, crowned with a decorative shell-stitch border, and a delicate lace trim that peeks out enchantingly. Let’s walk through how you can produce your very own!
What You’ll Need To Gather
Before we begin, let’s get our supplies ready. For this cozy bread basket liner, you’ll want:
- 🧶 Yarn: Worsted weight (Category 4) cotton or a cotton-blend yarn in an off-white or cream color. About 150-200 yards should be plenty, depending on your basket size. The yarn in the image has excellent stitch definition.
- 🪝 Crochet Hook: A 5.0 mm (H-8) or 5.5 mm (I-9) crochet hook, or whichever size helps you get a nice fabric with your chosen yarn.
- 🧵 Lace Trim: Approximately 1 to 1.5 inches wide, with a scalloped edge. You’ll need enough to go around the circumference of your basket.
- 🧺 Basket: A round, woven bread basket. This tutorial will guide you to make a liner fitted to your specific basket.
- ✂️ Scissors: For cutting yarn.
- 🪡 Tapestry Needle: For weaving in those yarn ends neatly.
- 📏 Measuring Tape: Essential for getting the fit just right!
- 🧷 Stitch Markers (Optional): Helpful for marking the beginning of your rounds.
- 🪡 Sewing Needle and Thread (matching lace or liner): For attaching the lace trim.
Getting the Right Fit: Gauge and Sizing
Because baskets come in all shapes and sizes, we won’t aim for a strict gauge. Instead, we’ll focus on measuring your specific basket and building the liner to fit it perfectly. The goal is a liner that sits snugly inside and has a cuff that folds comfortably over the rim.
Learning the Lingo: Basic Crochet Stitches
If you’re new to crochet, welcome! These are the stitches we’ll be using. Don’t worry, they’re simpler than they sound, and I’ll explain as we go!
- ch: Chain stitch. This is the most basic stitch and how most projects begin. You’ll make a slip knot on your hook, yarn over (wrap yarn around your hook), and pull the yarn through the loop on your hook. That’s one chain!
- sl st: Slip stitch. This is a very short stitch used to join work, finish edges, or move your yarn across stitches without adding much height. Insert your hook into a stitch, yarn over, and pull the yarn through both the stitch and the loop on your hook in one motion.
- sc: Single crochet. A short, sturdy stitch. Insert your hook into a stitch, yarn over, pull up a loop (you’ll have two loops on your hook), yarn over again, and pull through both loops on your hook.
- hdc: Half double crochet. This stitch is taller than a single crochet but shorter than a double crochet. It produces a lovely, slightly textured fabric that is what the main body of the liner in the image displays. To make it: yarn over, insert your hook into a stitch, yarn over, pull up a loop (three loops on your hook), yarn over again, and pull through all three loops on your hook.
- dc: Double crochet. A taller stitch, great for making fabric quickly and for decorative stitches like shells. Yarn over, insert your hook into a stitch, yarn over, pull up a loop (three loops on hook), yarn over, pull through two loops (two loops left on hook), yarn over again, and pull through the remaining two loops.
- MC: Magic Circle (also known as Magic Ring). A technique to start crocheting in the round that allows you to pull the starting hole completely closed. If you’re not comfortable with this yet, you can start with a “ch 2, work stitches into the 2nd ch from hook” method.
- st(s): An abbreviation for “stitch” or “stitches”.
- rep: An abbreviation for “repeat”.
- BLO: Back Loop Only. When a stitch has two loops at the top (front and back), working in the BLO means you insert your hook only under the loop that is furthest away from you. This makes a nice defined line.
Let’s Get Stitching: Your Basket Liner
We’ll construct this liner in three main parts: the base, the walls, and the decorative fold-over cuff with its lace accent.
Part 1: The Liner Base (A Flat Circle)
This will be the bottom of your liner. We want it to be the same diameter as the inside base of your woven basket. We’ll use hdc stitches for a soft but substantial fabric.
- Start: Make a Magic Circle (MC), or ch 2.
- Round 1: Work 8 hdc into the MC (or into the 2nd ch from the hook if you used the ch-2 method). Pull the MC tail tight to close the hole. Join to the first hdc with a sl st. (8 sts)
- Beginner Tip: Place a stitch marker in the first stitch of each round to help you keep track of where the round begins and ends. Move it up as you complete each round.
- Round 2: Ch 1 (this does not count as a stitch here or throughout the hdc sections), work 2 hdc in each st around. Join with a sl st to the first hdc. (16 sts)
- What’s happening here? We’re increasing – putting two stitches into each stitch from the previous round – to make the circle get wider.
- Round 3: Ch 1, [1 hdc in the next st, 2 hdc in the next st]. Rep from [ to ] around. Join with a sl st. (24 sts)
- Round 4: Ch 1, [1 hdc in each of the next 2 sts, 2 hdc in the next st]. Rep from [ to ] around. Join with a sl st. (32 sts)
- Continue Increasing: Keep working in rounds, increasing the number of hdc stitches between the “2 hdc in one st” increases by one each round. For example:
- Round 5: [1 hdc in each of next 3 sts, 2 hdc in next st] around.
- Round 6: [1 hdc in each of next 4 sts, 2 hdc in next st] around.
- And so on.
- Tip for a flatter circle: Stagger your increases. Instead of always putting the 2-hdc increase at the very end of the repeat, try placing it in the middle of the single hdc stitches sometimes. This helps prevent the circle from becoming too angular.
Continue until your flat circle matches the diameter of the inside bottom of your basket. Measure frequently!
Part 2: The Liner Walls (Working Upwards)
Now we’ll stop increasing and start working upwards to form the sides of the liner.
- Transition Round: Ch 1. Work 1 hdc in the Back Loop Only (BLO) of each stitch around. Join with a sl st to the first hdc. (Same number of stitches as your last base round).
- Why BLO? This helps to give a nice, defined edge between the base and the walls of your liner, making it sit neatly in the basket.
- Building Height: Ch 1. Work 1 hdc in both loops of each stitch around. Join with a sl st to the first hdc.
- Repeat this round until the liner walls are tall enough to come up the inside of your basket and fold over the rim by about 2 to 3 inches. This fold-over section is the prominent cuff you see in the image. Try the liner in your basket as you go to check the height.
Part 3: The Beautiful Fold-Over Border
This is where we add the lovely decorative edge that is the scalloped finish on the upper edge of the cuff in the image. This will be the final round of your crocheted piece.
- Shell Stitch Round: Ch 1. [Skip the next st, work 5 dc all into the next st (this forms a shell), skip the next st, sl st into the next st]. Rep from * to * all the way around your liner’s top edge.
- Depending on your stitch count, you might need to adjust slightly at the end (e.g., skip 1 or 2 stitches) to make the pattern fit evenly. Aim for a neat join.
- Once you’ve worked all the way around, join with a sl st to the first skipped stitch or the base of the first shell.
- Fasten off your yarn and weave in this end securely with your tapestry needle.
Part 4: Adding the Delicate Lace Touch
The image distinctly shows a separate, store-bought lace trim with a scalloped edge. This is meticulously attached beneath the crocheted cuff, so it peeks out when the cuff is folded over the basket’s exterior.
- Prepare your lace: Measure the lace trim around the circumference of your basket, adding about an inch for overlap. Cut the lace.
- Position the lace: Turn your crocheted liner so the wrong side (the inside) of the fold-over cuff section is facing you. You’ll be attaching the lace to what will be the underside of the cuff when it’s folded over the basket. Position the top edge of your lace trim along the line where the plain hdc stitches of the cuff end, just before the shell stitch border begins. The decorative edge of the lace should point downwards (towards the base of the liner).
- Sew it on: Using your sewing needle and thread that matches either the lace or your liner, carefully hand-sew the lace trim to the crocheted cuff. Use small, neat stitches. You can use a simple running stitch or a whip stitch.
Finishing Flourishes
The only thing left is to weave in any remaining yarn ends (like the starting tail from your Magic Circle if you haven’t already) using your tapestry needle. Make sure they’re secure so your beautiful liner lasts.
A Few Friendly Pointers
- Counting is Key: Especially for the base, count your stitches at the end of each round to make sure your increases are correct.
- Yarn Choice Matters: Cotton or a cotton blend is great for kitchen items as it’s durable and often washable (check your yarn label!).
- Tension: Try to keep your stitches consistent for an even look. If your fabric is too stiff, try a larger hook. Too loose? Go down a hook size.
- Washability: Consider if you want your liner to be washable. If so, choose yarn and lace that can handle gentle washing.
Show Off Your Handiwork!
And there you have it! A simply gorgeous, handmade liner to bring a little extra warmth and personality to your bread basket. Imagine the quiet pride each time you use it or a guest admires it. That feeling of “I made this!” is truly special.
We’d be so thrilled to see how your bread basket liner turns out! Please do share photos of your finished piece. Happy stitching!