
The Best Homemade Almond Cookies (Crisp & Chewy)
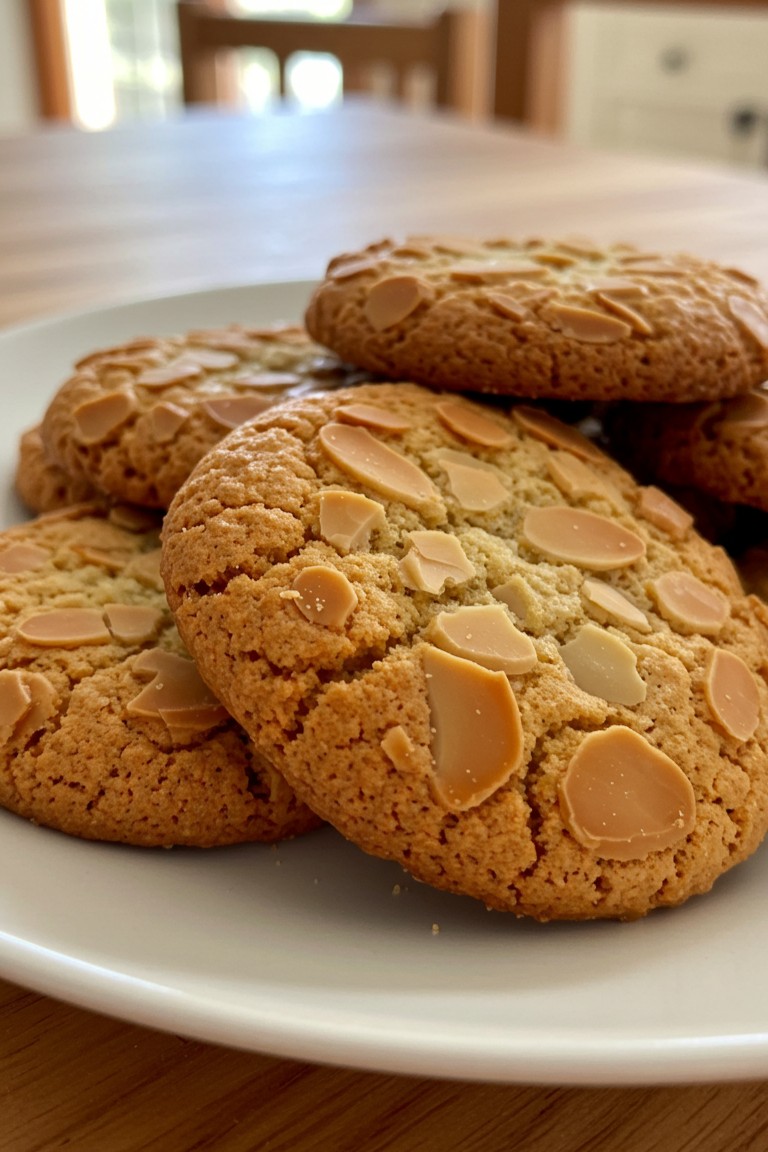
Few moments are as satisfying as pulling a tray of perfectly golden-brown cookies from the oven. This recipe for almond cookies delivers that exact moment of pure accomplishment. With a wonderfully chewy center and crisp, golden edges, each cookie is a delight. The toasted flaked almonds on top provide the beautiful, rustic finish seen in the photograph, promising a memorable treat that is surprisingly straightforward to prepare.
What You’ll Need
Putting these cookies together requires a few key items. Here are the tools and ingredients for this wonderful baking project.
Kitchen Equipment
- 🥣 Two mixing bowls (one medium, one large)
- 🥄 A whisk
- 🎛️ An electric mixer (handheld or stand mixer)
- ↔️ A rubber spatula
- 🍪 Two baking sheets
- 📜 Parchment paper
- 📏 Measuring cups and spoons
- ⚖️ A kitchen scale (recommended for accuracy)
- 🧊 A cooling rack
Halal Ingredients
- 🧈 1/2 cup (113g) unsalted halal butter, softened to room temperature
- 🍚 1/2 cup (100g) granulated sugar
- 🟤 1/4 cup (50g) packed light brown sugar
- 🥚 1 large egg, at room temperature
- 💧 1 teaspoon alcohol-free vanilla extract
- 🌰 1/2 teaspoon halal almond extract
- 🌾 1 cup (120g) all-purpose flour
- 🥜 1 cup (96g) almond flour, finely ground
- 🥄 1/2 teaspoon baking soda
- 🧂 1/4 teaspoon salt
- 🍂 1/2 cup (45g) flaked almonds for the topping
Step-by-Step Guide
Follow these instructions closely to prepare cookies that have the same chewy texture and golden, crackled top as the ones pictured.
1. Prepare the Baking Station
First, position an oven rack in the middle of the oven and preheat it to 350°F (175°C). Next, line two baking sheets with parchment paper. Using parchment paper is a fantastic trick for beginners, as it prevents the cookies from sticking and makes cleanup incredibly easy.
2. Combine the Dry Ingredients
In a medium-sized bowl, whisk together the all-purpose flour, almond flour, baking soda, and salt. Whisking these ingredients first is an important step because it ensures the baking soda and salt are evenly distributed throughout the flour. This prevents any single cookie from being too salty or rising unevenly. Set this bowl aside for later.
3. Mix the Wet Ingredients
In the large mixing bowl, combine the softened butter with both the granulated and brown sugars. Using an electric mixer on medium speed, beat them together for about 2-3 minutes. This technique is called creaming. The goal is to whip air into the mixture, making it look pale, light, and fluffy. This step is essential for giving the cookies their wonderfully tender and chewy structure.
Once the butter and sugar are creamed, add the room-temperature egg, vanilla extract, and almond extract. Beat on low speed until everything is just combined. Be careful not to over-mix here; mix only until the yellow streaks of the egg disappear.
4. Bring the Dough Together
Pour the dry ingredient mixture into the wet ingredients in the large bowl. Now, switch from the mixer to a rubber spatula. Gently fold the dry ingredients into the wet. To do this, scrape down the sides and bottom of the bowl, bringing the mixture up and over itself. Continue this motion until there are no dry streaks of flour left. This gentle folding method prevents the development of too much gluten, which is the secret to a chewy, not tough, cookie. Do not over-mix!
5. Shape the Cookies
Scoop out portions of dough, about 1.5 tablespoons each, and roll them into smooth balls. Place them on the prepared baking sheets, leaving about 2 inches of space between each one to allow for spreading.
Now for the decorative topping seen in the photo. Pour the flaked almonds into a small, shallow bowl. Take each ball of dough and gently press the top into the almonds, making sure a generous amount sticks. This gives the cookies their signature rustic, almond-covered finish.
6. Bake to Golden Perfection
Place the baking sheets in the preheated oven. Bake for 10-12 minutes. The cookies are ready when the edges are a firm, golden brown and the tops are set with fine cracks across the surface, just like the cookies pictured. The centers will still be a little soft, which is exactly what is needed for a chewy interior.
7. Cool Completely
Remove the baking sheets from the oven and let the cookies rest on the hot sheets for about 5 minutes. This allows them to set up and finish baking from the residual heat. After 5 minutes, carefully transfer the cookies to a wire rack to cool completely. This final step is crucial for achieving that perfect chewy texture.
The aroma of sweet, toasted almonds filling the kitchen is one of the best parts of this process. Once cooled, these cookies are ready to be shared and enjoyed. Feel free to arrange them on a simple white plate to let their beautiful golden color shine. Happy baking.