

Crochet Your Own Chic Striped Tote Bag
re you ready to dive into a fun and rewarding crochet project? Today, we’re going to make this absolutely adorable striped tote bag! This project is perfect for beginners who are eager to develop their skills and create something beautiful and practical. Imagine strolling around with your own handmade tote – how wonderful is that? Let’s get started on this exciting journey of stitches and stripes!
Materials You’ll Need to Get Started
Before we begin, let’s gather all the supplies we need. Having everything ready will make the process smooth and enjoyable. For this project, you will need:
- Finished Measurements: Approx. 12″ wide x 10″ tall (30cm x 25cm) excluding handles.
- 🧶 Yarn: You’ll need medium-weight cotton yarn (e.g., Aran weight) or a soft macrame cord/ribbon yarn for that sturdy look. For a bag of this size, you will need approximately 400-450 grams in total.
- Main Color (Pink): 100g (for base and top border)
- Stripe Color 1 (Mint Green): 150g (for stripes and handles)
- Stripe Color 2 (Creamy White): 100g
- Stripe Color 3 (Yellow): 50g
- 🪡 Crochet Hook: A 4.0 mm or 4.5 mm crochet hook is a great size. This size will help you create a fabric that is dense enough to hold its shape.
- ✂️ Scissors: For snipping yarn ends.
- 🧵 Yarn Needle: Also known as a tapestry needle, for weaving in loose ends neatly and sewing the handles.
- 📌 Stitch Markers (optional): Helpful for marking the beginning of rounds.
Getting Ready: Understanding Basic Crochet Stitches
If you’re completely new to crochet, don’t worry! We’ll go through the basics. Think of crochet as building fabric using yarn and a hook. We use different types of loops, called stitches, to achieve different textures and patterns. For this tote bag, we’ll mainly use a very simple stitch called the single crochet.
Imagine you’re forming a chain of loops – that’s the very first step in crochet, called a chain stitch. We’ll use this to start our project. To make a chain stitch, you first make a slip knot on your hook. Then, you use your hook to catch the yarn and pull it through the loop on your hook.
The single crochet stitch is our main stitch for the bag. It’s a short, dense stitch that produces a sturdy fabric. To make a single crochet, you insert your hook into a stitch, catch the yarn (yarn over), pull the yarn back through the stitch (two loops on hook), yarn over again, and pull through both loops.
Another stitch we will use is the slip stitch. This is a very simple stitch used to join rounds together.
Let’s Make the Tote Bag – Step-by-Step
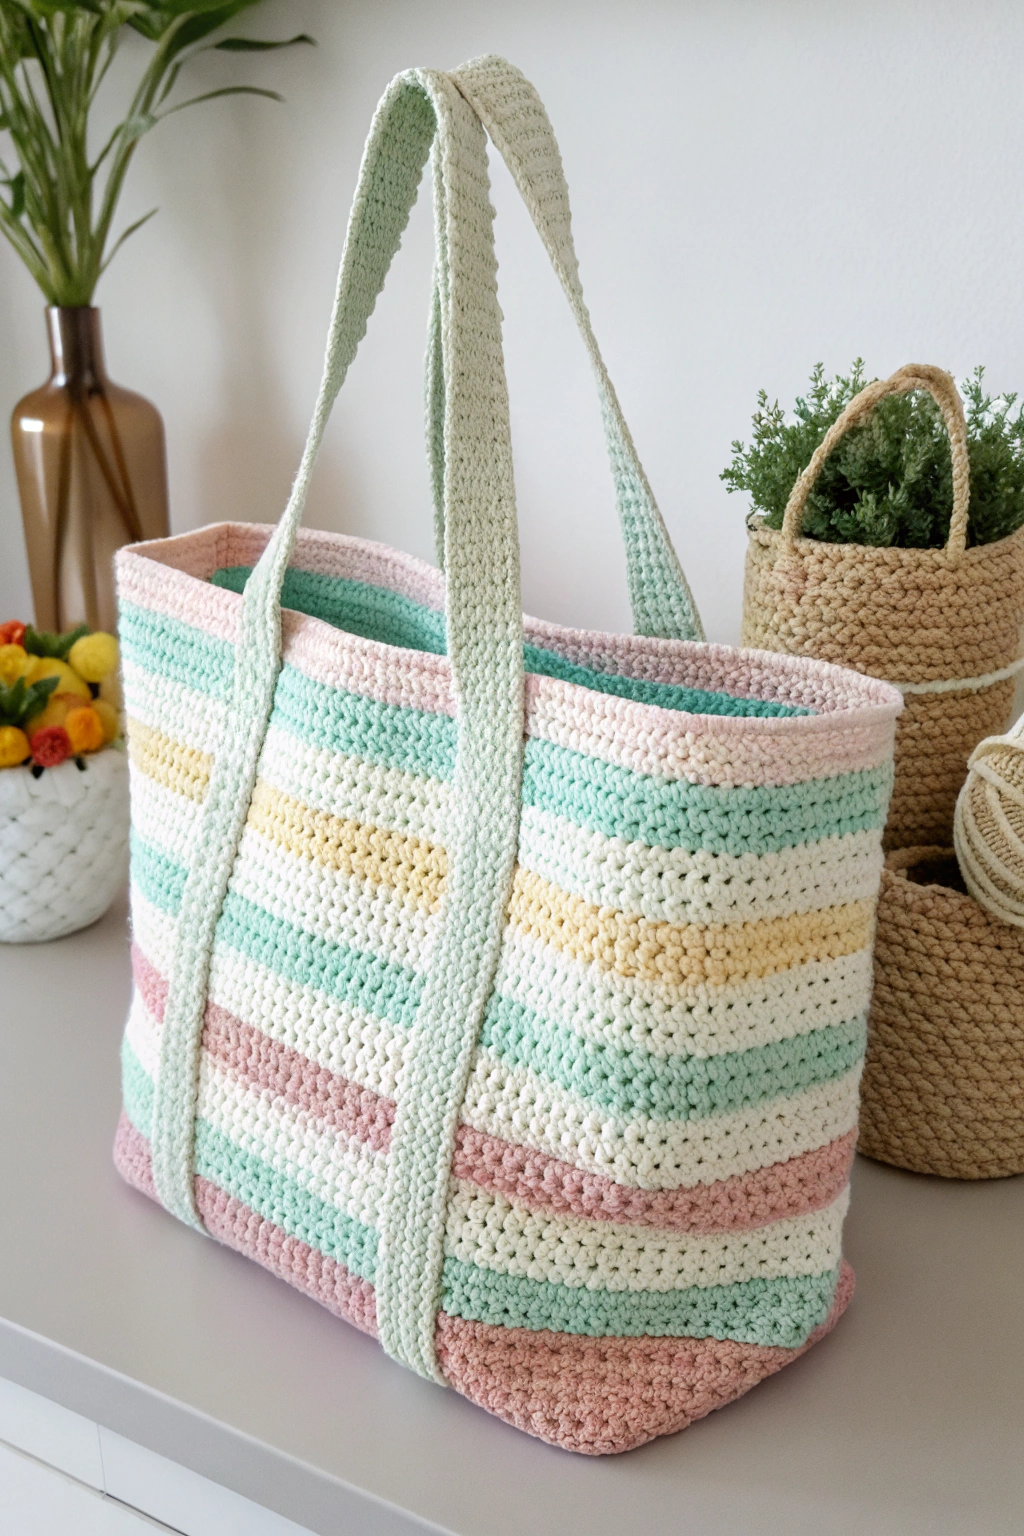
Now for the fun part – actually making our striped tote bag! We’ll start from the bottom and work our way up. Refer to the image to see how the different parts come together.
Forming the Base
The base of our tote bag is a solid rectangle, made in single crochet with soft pink yarn.
- Row 1: Using your soft pink yarn, chain 46. Starting in the second chain from the hook, work one single crochet (sc) in each chain across. (45 stitches)
- Row 2: Chain 1 (does not count as a stitch) and turn. Work 1 sc in each stitch across.
- Rows 3 – 14: Repeat Row 2 for a total of 14 rows. Do not fasten off.
Building the Bag Body
Now we will construct the main body, working in rounds.
- Round 1 (Transition): Do not turn your work after the final row of the base. Chain 1. Continue with Pink yarn to create a seamless edge. Work sc evenly around the entire perimeter of the rectangle (along the top, down the side, along the bottom, and up the other side).
- Tip: Place 3 sc in each corner stitch to help the corners turn smoothly. (Total approx. 120-126 stitches). Join with a slip stitch to the first sc.
- Round 2: Switch to Mint Green. Chain 1, sc in each stitch around. Join with a slip stitch.
The Stripe Pattern (As seen in the photo): We will change colors to create the beautiful striped effect.
- Rounds 3 – 6 (Mint Green): Work rounds of single crochet with Mint Green. Fasten off Mint, attach Cream.
- Rounds 7 – 10 (Creamy White): Work rounds of single crochet with Cream. Fasten off Cream, attach Yellow.
- Rounds 11 – 14 (Yellow): Work rounds of single crochet with Yellow. Fasten off Yellow, attach Cream.
- Rounds 15 – 18 (Creamy White): Work rounds of single crochet with Cream. Fasten off Cream, attach Mint Green.
- Rounds 19 – 22 (Mint Green): Work rounds of single crochet with Mint Green. Fasten off Mint Green, attach Pink.
Crafting the Top Edge
To finish the bag, we go back to our main color.
- Rounds 23 – 25 (Pink): Work rounds of single crochet with Pink to create the top border.
- Optional Finish: For the very last round, you can do a “Reverse Single Crochet” (Crab Stitch) for a textured, rope-like edge, or simply slip stitch around for a smooth finish. Fasten off and weave in ends.
Fashioning the Handles (Stylish Detail)
As seen in the photo, the handles run down the sides of the bag, giving it extra support and a chic look.
Handle 1 & 2 (Make Two): With the Mint Green yarn, we need long straps. Chain approximately 100-110 (measure against your bag; it needs to go up the side, over your shoulder, and down the other side).
- Row 1: Sc in 2nd chain from hook and each chain across. Ch 1, turn.
- Row 2-4: Sc in each st across. Fasten off, leaving a long tail for sewing.
Attaching the Handles:
- Lay your bag flat. Position the first handle on the front (outside) of the bag.
- Align the ends of the handle straps near the bottom of the bag (just above the pink base).
- Ensure the straps run vertically straight up to the top rim, spacing them evenly apart.
- Using your yarn needle, sew the handle straps onto the outer body of the bag securely. Leave the middle section (the loop) free for your shoulder.
- Repeat on the back side.
Finishing Touches and Tips for Success
Congratulations! You’ve created your own striped crochet tote bag!
- Weave in ends: Secure all tails inside the bag using your tapestry needle.
- Color Play: You can use any color combination you like!
- Mini Version: As requested by our readers, to make a mini version of this bag, simply reduce your starting chain (try 30 chains) and reduce the number of rounds for each color stripe. It works up faster and makes a cute gift!
Share Your Makes!
We hope you had a wonderful time making this striped crochet tote bag! We would absolutely love to see your finished tote bags! Please share photos of your bags on social media. Happy crocheting!
Saw this pattern and had cotton yarn ready so thought I would give it a go. Decided that I was going to do all one colour.
I have made a few crochet things before, so am not a beginner. The directions for the base confused me. You say chain 28 and that us the width of the base…..I assumed that is actually the depth of the base and so I began the single crochet. You say to do 12 rows approx. If that is the base it gives a tiny bag base…28 chain x 12 rows?
Thank you so much for your comment and your sharp eye! You’ve raised a very important point. Thanks to your valuable feedback, we have reviewed and updated the pattern to ensure the instructions are perfectly clear and match the bag in the photo.
You’ll now find the corrected stitch counts in the ‘Forming the Base’ section. We truly appreciate feedback like yours—it helps us make our patterns better for everyone. Happy crocheting, and we’d love to see how your single-color version turns out
How much yarn did you use to complete this bag? It’s gorgeous!
Thank you so much for the kind words! We’re so glad you think it’s gorgeous.
To complete this bag, we used approximately 400-450 grams of medium-weight cotton yarn in total. You can find a detailed breakdown of the amount needed for each color in the ‘Materials You’ll Need’ section near the top of the post. We hope you enjoy making it.
Happy crocheting
This looks like such an easy to follow pattern – thanks for sharing! What are the dimensions of this bag?
I’d love to make a mini version of this! What are the finished measurements of this one? Have you made any other sizes? Thanks for the pattern!
Hello! Thank you for your comment. The finished measurements for this bag are approximately 12″ wide x 10″ tall (30cm x 25cm). While this pattern is designed for this specific size, a mini version can easily be created by reducing the starting chain to 30 stitches, as mentioned in the ‘Finishing Touches’ section. Happy crocheting!
I am working on this now. It’s a lovely pattern. My only question is that your picture looks more like 34-40 rows. That’s about how many I’ve planned out. But the pattern only goes to 25 or so. Am I reading this wrong?