
Dreamy Raspberry Custard Shortcakes
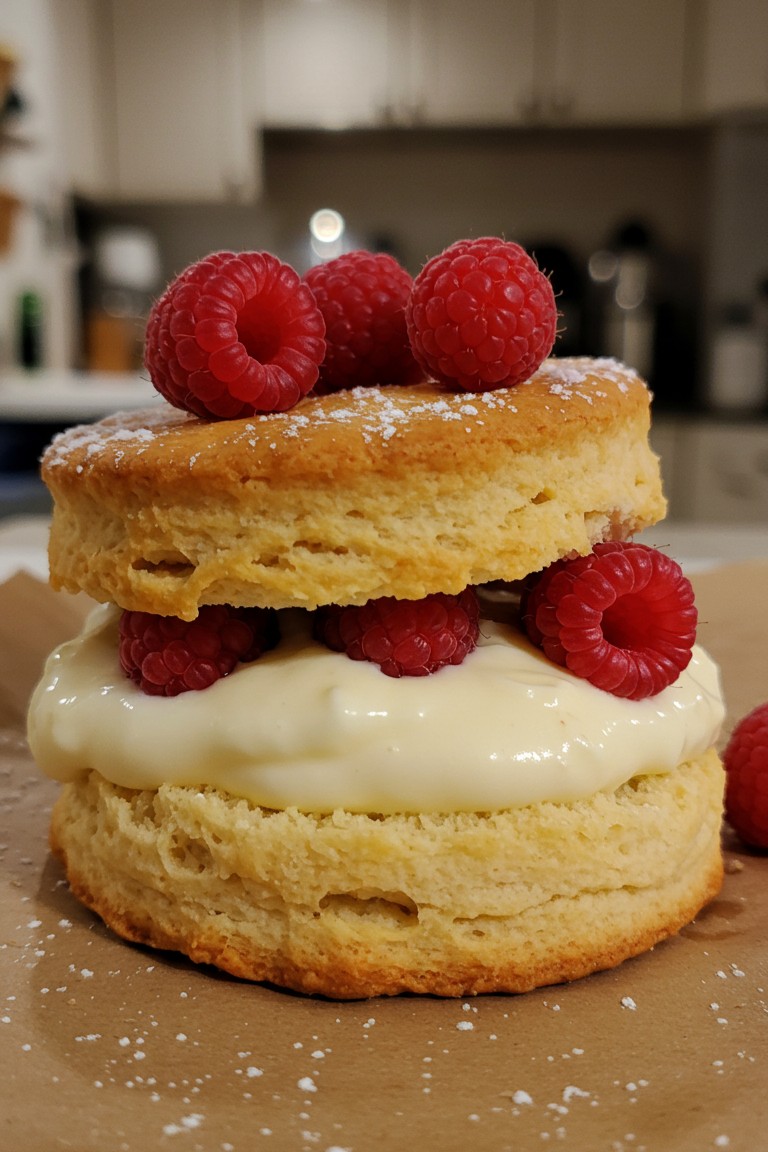
Here is a dessert that brings pure joy to the kitchen and the table. Picture this: two layers of a tender, golden-brown shortcake, sandwiched with a thick, velvety, pale yellow custard. Tucked into the cream and perched on top are vibrant, fresh raspberries, all finished with a light snowfall of powdered sugar. This is more than just a sweet treat; it’s a delightful project that results in a stunningly beautiful and delicious dessert, perfect for sharing.
Getting this beautiful stack of deliciousness just right is surprisingly straightforward, even for those new to baking. The process is broken down into three simple parts: whipping up the creamy custard, baking the soft shortcakes, and finally, assembling it all into the lovely dessert seen in the photograph.
What You’ll Need
Before beginning, gather these kitchen tools and ingredients. Having everything ready makes the entire process smooth and enjoyable.
Kitchen Tools
- 🥣 Two medium mixing bowls
- Whisk
- Saucepan Heavy-bottomed saucepan
- Sieve Fine-mesh sieve
- ✨ Plastic wrap
- 🍪 Round biscuit cutter (about 3 inches)
- 📜 Baking sheet
- Parchment paper or silicone mat
- 🍴 Pastry blender or two knives
- 🥄 Spatula
Halal Ingredients
- For the Custard Filling:
- 🥛 2 cups whole milk
- 🍦 1 tsp halal vanilla extract
- 🥚 4 large egg yolks
- 🍚 2/3 cup granulated sugar
- 🌽 1/4 cup cornstarch
- 🧈 2 tbsp unsalted halal butter, cut into small pieces
- For the Tender Shortcakes:
- 🌾 2 cups all-purpose flour
- 🍚 1/4 cup granulated sugar
- 🥄 1 tbsp baking powder
- 🧂 1/2 tsp salt
- 🧈 1/2 cup cold, unsalted halal butter, cut into small cubes
- 🥛 3/4 cup heavy cream or buttermilk
- For Assembly:
- 🍓 1 pint fresh raspberries
- 🍥 2 tbsp halal confectioners’ sugar (powdered sugar) for dusting
Let’s Get Baking! Step-by-Step Guide
Follow these instructions carefully to assemble the exact Raspberry Custard Shortcakes shown in the image.
Part 1: Preparing the Luscious Custard Filling
The heart of this dessert is its rich, creamy custard. It needs to be made first so it has plenty of time to cool and set.
- Pour the milk into the heavy-bottomed saucepan. Warm it over medium heat until it just begins to simmer around the edges. Do not let it boil. Once it’s warm, remove it from the heat and stir in the vanilla extract.
- In a separate medium bowl, whisk together the egg yolks and granulated sugar until the mixture becomes pale yellow and slightly thickened. Whisk in the cornstarch until no lumps remain.
- Now for a key technique called tempering. This prevents the eggs from scrambling. While whisking the egg mixture constantly, slowly pour about half of the warm milk into the bowl in a thin, steady stream. This gently warms the eggs.
- Pour the warmed egg mixture back into the saucepan with the rest of the milk. Return the saucepan to the stove over medium-low heat.
- Cook the mixture, whisking constantly and making sure to scrape the bottom and corners of the pan, for about 5-7 minutes. The custard will thicken noticeably until it has the consistency of a thick pudding.
- Remove the saucepan from the heat. Add the pieces of butter and whisk until they are completely melted and incorporated. This gives the custard a lovely sheen and rich flavor.
- Pour the finished custard through the fine-mesh sieve into a clean bowl. This step is essential for a perfectly smooth texture, catching any small bits that may have formed.
- Press a piece of plastic wrap directly onto the surface of the custard. This prevents a skin from forming as it cools. Refrigerate for at least 3 hours, or until completely chilled and firm.
Part 2: Making the Tender Shortcakes
These shortcakes are wonderfully soft and buttery, providing the perfect base.
- Preheat the oven to 400°F (200°C). Line a baking sheet with parchment paper.
- In a large bowl, whisk together the flour, granulated sugar, baking powder, and salt.
- Add the cold, cubed butter to the flour mixture. Now it’s time to cut in the butter. Using a pastry blender, two knives, or your fingertips, work the butter into the flour until the mixture resembles coarse crumbs with some pea-sized pieces of butter still visible. These little pockets of butter are what will make the shortcakes tender and flaky.
- Pour in the heavy cream or buttermilk and stir with a spatula just until a soft, slightly sticky dough comes together. Be careful not to overmix! A shaggy dough is what you’re looking for; overworking it will result in tough shortcakes.
- Turn the dough out onto a lightly floured surface. Gently pat it down to about 3/4-inch thickness.
- Using a round biscuit cutter, press straight down to cut out the shortcakes. Do not twist the cutter, as this can seal the edges and prevent them from rising tall. Place them on the prepared baking sheet.
- Bake for 12-15 minutes, or until the tops are a beautiful golden brown, just as seen in the photo. Let them cool on the baking sheet for a few minutes before transferring them to a wire rack to cool completely.
Part 3: Assembling Your Masterpiece
This is the final, rewarding step where everything comes together.
- Once the shortcakes and custard are completely cool, gently slice each shortcake in half horizontally.
- Take the bottom half of a shortcake and place it on a serving surface. Spoon a generous layer of the chilled custard on top.
- As shown in the image, carefully nestle four to five fresh raspberries into the custard, arranging them around the outer edge so they are visible from the side.
- Place the top half of the shortcake over the filling.
- For the final touch, arrange a small cluster of three raspberries in the center of the top shortcake.
- Using a small sieve, dust the entire dessert with a light and even layer of confectioners’ sugar.
There it is—a perfectly assembled shortcake, ready to be admired and enjoyed. Feel the satisfaction of having put together such a delightful treat from scratch. We hope you have fun with this recipe and share the beautiful results.