

Foolproof Orange Marmalade Recipe
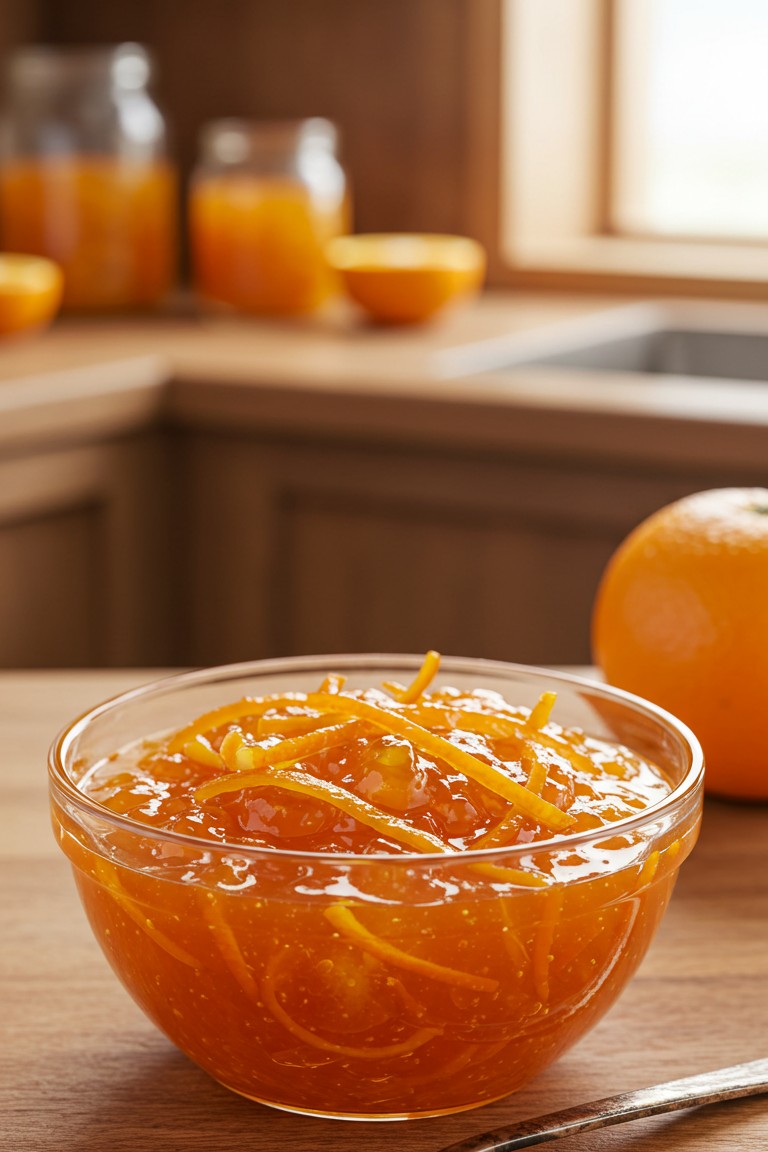
Making homemade orange marmalade for the first time can seem like a big undertaking. It’s a classic preserve that many home cooks find intimidating. This guide changes that. The following is a detailed, foolproof marmalade recipe designed specifically to help absolute beginners succeed. It explains every part of the process in simple terms to get a result just like the vibrant, peel-filled marmalade in the photograph. This step-by-step method removes the guesswork, making it possible for anyone to prepare a perfect jar.
What You’ll Need
Gathering the right ingredients and tools is the first step to success. Here’s a list of everything required to produce a perfect batch of marmalade.
Essential Ingredients
- 🍊 1 kg Seville Oranges (or other unwaxed oranges if Seville are unavailable)
- 🍋 2 Lemons
- 🧊 2 kg Granulated Sugar
- 💧 2.5 Litres Water
Kitchen Equipment
- 🔪 Sharp knife
- 🟨 Cutting board
- 🥣 Large, heavy-bottomed pot or preserving pan
- ⚖️ Kitchen scale
- 🥤 Measuring jug
- 🥄 Large spoon for stirring
- ⬜ A piece of muslin cloth (cheesecloth) and string
- 🥣 A small bowl or two
- 🧊 A small plate (to be kept in the freezer)
- Ladle
- 🫙 Sterilized glass jars with tight-fitting lids
The Step-by-Step Guide to Marmalade
Follow these instructions carefully to end up with a wonderfully tangy and sweet marmalade that has the perfect texture and appearance.
Step 1: Prepare the Citrus
First, give the oranges and lemons a good scrub under running water and pat them dry.
Working with one orange at a time, slice it in half. Squeeze all the juice into your large pot. As you go, pick out the pips (seeds) and place them in a small bowl. Then, use a spoon to scoop out all the remaining membrane and pith—the soft white stuff inside the peel—and add it to the bowl with the pips. These parts are packed with natural pectin, which is what will make the marmalade set into a lovely jelly.
Now for the peel. Lay each hollowed-out peel half flat on the cutting board and, using a sharp knife, carefully scrape away any excess white pith left inside. The goal is to be left with just the orange part of the peel. Slice these peels into very fine strips. This technique is called julienne, and it results in the delicate strands you see suspended in the final marmalade in the image. Add these peel strips to the big pot with the juice. Repeat this entire process for all the oranges and lemons.
Step 2: Extract the Pectin
Spoon all the collected pips and membranes onto the center of your square of muslin cloth. Gather the corners and tie it up tightly with string to form a little bag. Drop this bag into the pot with the juice and peels.
Step 3: The Initial Simmer
Pour the 2.5 litres of water into the pot. Place it over medium heat and bring it to a simmer. Let it bubble away gently for about 2 hours, or until the peel is completely soft and tender when you test a piece. This long, slow cook is essential for a soft peel and for drawing all the pectin out of the bag.
Step 4: Add the Sugar
Turn off the heat. Carefully lift out the muslin bag, squeezing it against the side of the pot with a spoon to release every last drop of that precious, pectin-rich liquid back into the pan. You can let the bag cool a bit first to make it easier to handle.
Now, pour the sugar into the pot. Stir gently over low heat until every single sugar crystal has completely dissolved. Don’t rush this step! Bringing the mixture to a boil before the sugar is dissolved is what causes a grainy texture. Run a spoon along the bottom of the pot to feel for any undissolved granules.
Step 5: The Final Boil to Setting Point
Once the sugar is fully dissolved, turn up the heat and bring the mixture to a rapid, rolling boil. This is a vigorous boil that cannot be stirred down. Start timing now. The marmalade needs to boil hard to reach what’s known as the setting point—the temperature at which it will turn into a jelly as it cools. This typically takes 15-25 minutes.
To check if it’s ready, use the wrinkle test. After about 15 minutes of boiling, put a spoonful of the hot liquid onto the cold plate you put in the freezer earlier. Return it to the freezer for a minute. Then, gently push the marmalade with your finger. If the surface wrinkles, it has reached the setting point. If it’s still liquid and your finger goes straight through it, continue boiling and test again every few minutes.
A crucial tip: It’s better to slightly undercook it and re-boil than to overcook it, which results in a stiff, dark, and sometimes caramelized preserve.
Step 6: Skim, Settle, and Jar
Once the setting point is reached, turn off the heat. A layer of scum or foam might have formed on the surface. Carefully skim this off with a spoon for a crystal-clear finish.
Let the marmalade sit in the pot for 10-15 minutes before jarring. This short cooling period allows the peel to distribute evenly throughout the liquid, preventing all those lovely strands from floating to the top of the jars.
Carefully ladle the hot marmalade into your warm, sterilized jars, leaving about 1 cm of space at the top. Wipe any drips from the rims and seal immediately with the lids. The heat will help form a vacuum seal as the jars cool, preserving the marmalade for months to come.
There’s immense satisfaction in seeing a row of these gleaming jars on the counter, knowing they were put together with care. Feel proud of your work and be sure to snap a photo to share the results of your kitchen adventure.