
Golden Chocolate Crumble Tart
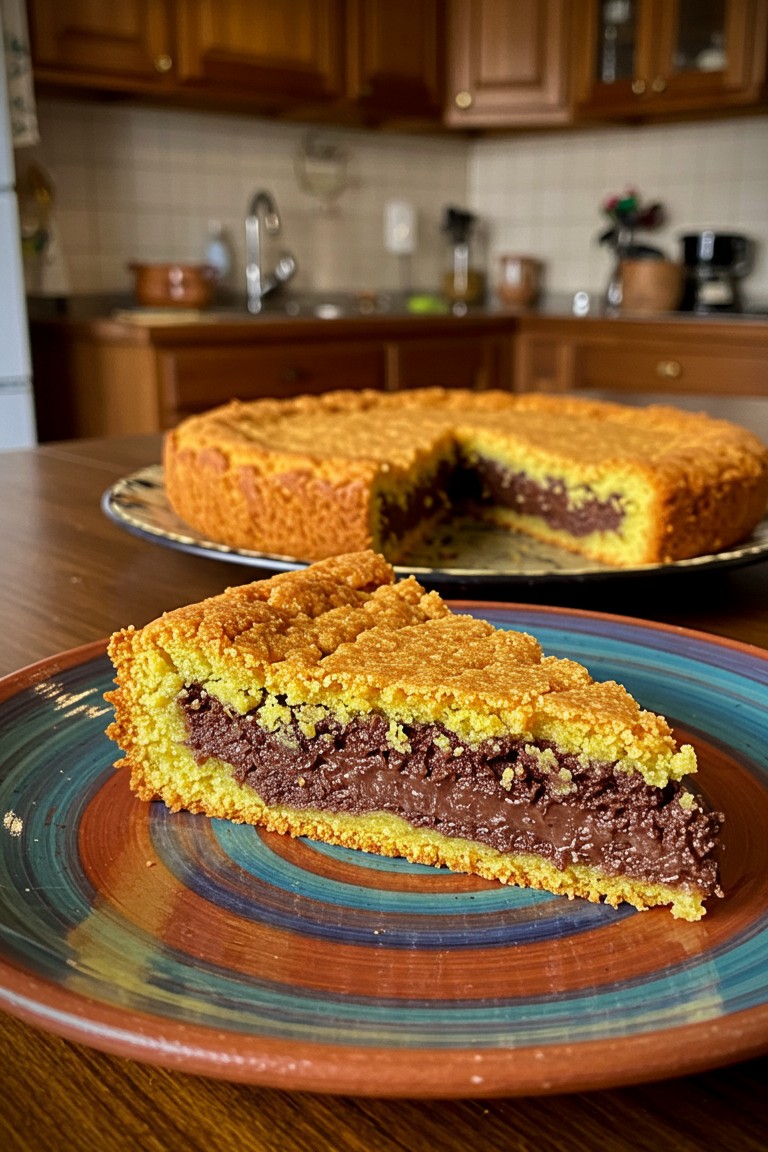
Some of the most beloved desserts come from simple, rustic traditions, and this Italian crumble tart is a perfect example. It features a thick, decadent layer of chocolate held within a buttery, crumbly crust. The cobbled, golden-brown surface offers a wonderful textural contrast that makes each bite truly memorable. Assembling this beautiful dessert is both uncomplicated and deeply satisfying, offering a fantastic introduction to the joys of home baking.
What You’ll Need
Here are the simple tools and halal ingredients required for this delicious tart.
Kitchen Tools
- 🥣 Large mixing bowl
- 📏 Measuring cups and spoons
- 🍴 Fork or pastry blender
- 🎂 9-inch (23 cm) round springform pan or tart pan
- spatula
- 🌬️ Wire cooling rack
Halal Ingredients
- 🌾 2 ½ cups (320g) all-purpose flour
- 🍬 ½ cup (100g) granulated sugar
- 🧈 ⅔ cup (150g) halal cold unsalted butter, cut into small cubes
- 🥚 2 large eggs
- 🥄 2 teaspoons baking powder
- 🧂 ¼ teaspoon salt
- 🍫 1 ½ cups (400g) halal chocolate-hazelnut spread
Step-by-Step Guide to Perfection
Follow these instructions to put together the exact tart shown in the picture, from the golden crust to the rich chocolate center.
Preparing the Crumble Dough
- Begin by preparing the baking pan. Lightly grease the bottom and sides of the 9-inch springform or tart pan. Set the oven to preheat to 350°F (180°C).
- In the large mixing bowl, combine the all-purpose flour, granulated sugar, baking powder, and salt. Whisk them together with a fork for a moment to ensure they are evenly distributed.
- Add the cold, cubed butter to the flour mixture. Now, it’s time for a technique called rubbing in. Using just your fingertips, rub the butter into the flour. The goal is to break down the butter and coat it in flour until the entire mixture has a texture like coarse, sandy breadcrumbs. Work quickly to keep the butter from melting. This step is the secret to the tart’s tender, crumbly crust.
- In a small bowl, lightly beat the two eggs. Pour them into the butter and flour mixture. Use a fork to mix everything together until large, shaggy clumps of dough form. Do not overmix or try to form a smooth ball of dough. The mixture should remain very crumbly—this is essential for the “sbriciolata,” or “crumbled,” style of the tart.
Assembling the Tart
- Take about two-thirds of the crumbly dough mixture and press it firmly and evenly into the bottom and slightly up the sides of the prepared pan. Use your fingers or the back of a spoon to compact it into a solid base. This will form the sturdy golden-yellow crust that holds the filling.
- Spoon the chocolate-hazelnut spread onto the crust. Gently spread it into an even layer with a spatula, stopping about half an inch from the edge. This small border helps seal the filling inside. For easier spreading, the chocolate-hazelnut spread can be warmed for a few seconds in the microwave. This step produces the thick, distinct chocolate layer visible in the finished slice.
- Take the remaining one-third of the dough. Using your hands, crumble it loosely over the top of the chocolate filling, making sure to cover the entire surface. The pieces should be irregular in size to achieve that lovely, cobbled texture seen on the finished tart.
Baking and Cooling
- Place the tart in the preheated oven and bake for 30-35 minutes. The tart is done when the top is a beautiful golden brown and feels firm to the touch.
- Once baked, remove the tart from the oven and place it on a wire rack to cool completely in the pan. This is a very important step, as the tart needs to set fully before it can be sliced cleanly. Attempting to slice it while warm may cause it to fall apart.
Serving Your Masterpiece
Once completely cool, you can release the tart from the springform pan. It is ready to be served just as it is, showcasing its rustic beauty. Slice it into wedges and notice the perfect contrast between the crumbly crust and the soft, rich filling.
Every slice of this tart is a wonderful reward for the care put into making it. It’s a joy to share with family and friends, so be sure to snap a picture of your gorgeous bake and share the happiness.