

Golden Oven-Baked Cheese Bread
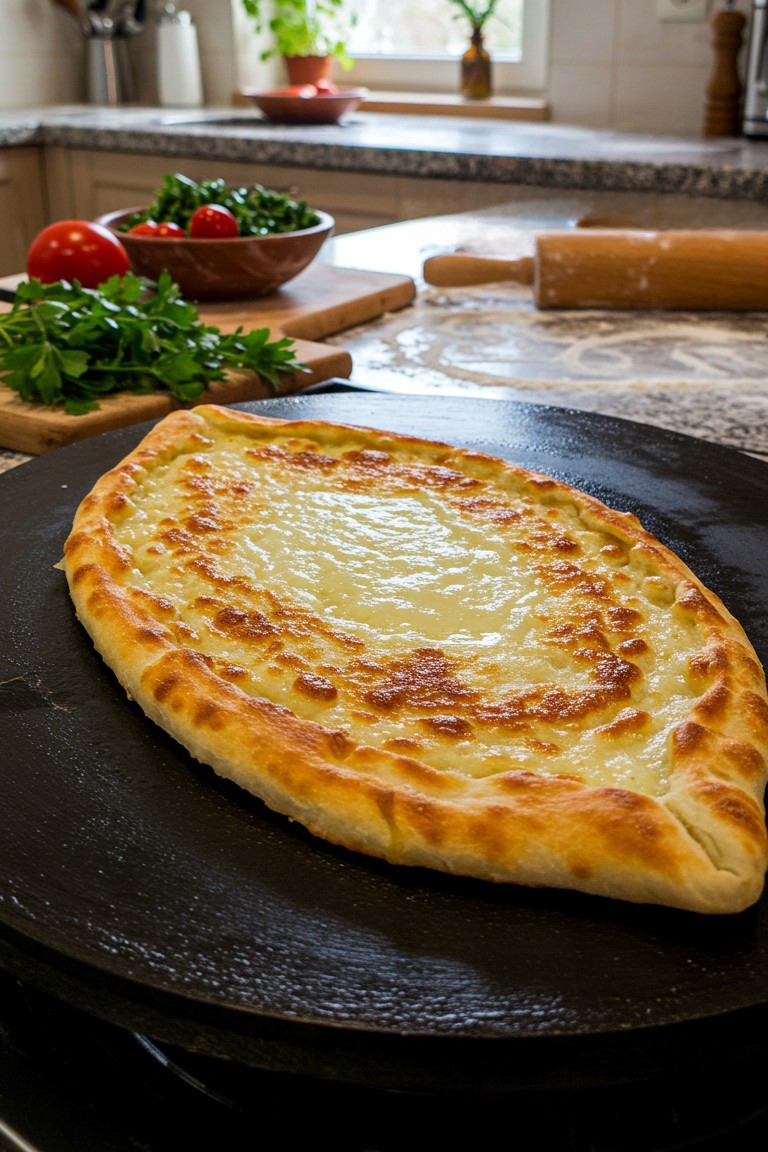
A perfectly baked, golden-brown cheese bread is a truly satisfying sight. The stunning dish in the photograph features a puffy, tender crust giving way to a rich, molten cheese topping that extends to every edge. This guide provides a detailed, step-by-step path for preparing this exact dish in a home kitchen. As a fantastic project for new bakers, it culminates in a truly impressive meal. Anyone can replicate this beautiful bread by following these instructions.
What You’ll Need
A perfect result starts with the right equipment and ingredients. Here is a complete list of what is required to get going.
Essential Equipment
- 🥣 A large mixing bowl
- ✨ A rolling pin
- 🪨 A pizza stone or a heavy-duty baking sheet
- Parchment paper
- 🖌️ A pastry brush
Halal Ingredients
- 🌾 2 ½ cups (300g) all-purpose flour, plus extra for dusting
- 🍞 1 teaspoon instant yeast
- 🥛 ½ cup (120ml) warm milk
- 💧 ¼ cup (60ml) warm water
- 🍬 1 teaspoon granulated sugar
- 🧂 1 teaspoon salt
- 🫒 2 tablespoons olive oil
- 🧀 1 ½ cups (170g) grated, low-moisture halal mozzarella cheese
- 🥛 ½ cup (75g) crumbled halal feta cheese
- 🥚 1 large egg, for the cheese mixture
- 🧈 1 tablespoon unsalted butter, melted, for finishing
Assembling Your Masterpiece
This beautiful bread comes together in a few clear stages: preparing the soft dough, mixing the cheesy filling, shaping the bread, and baking it to golden perfection in the oven.
Step 1: Preparing the Soft Dough
The soul of this bread is its soft, pillowy dough.
First, the yeast must be activated. This is a process called blooming, which proves the yeast is alive and ready to work. In a small bowl, the warm milk, warm water, sugar, and yeast are gently stirred together. The mixture is set aside for 5-10 minutes. It’s ready when it becomes foamy and fragrant.
In the large mixing bowl, the flour and salt are whisked together. The activated yeast mixture and olive oil are then added. The ingredients are combined until a cohesive dough forms.
The dough is turned out onto a lightly floured surface for kneading. Kneading is the process of working the dough with your hands for about 8-10 minutes. This develops gluten, which gives the bread its signature soft and chewy structure. The finished dough will be smooth and elastic.
Finally, the dough must proof, or rise. It’s placed in a lightly oiled bowl and covered. Let it rest in a warm place for about 1 to 1.5 hours, or until it has doubled in size.
Step 2: Mixing the Rich Cheese Filling
While the dough proofs, the delicious filling can be prepared. In a medium bowl, combine the grated halal mozzarella, crumbled halal feta, and the egg. The egg acts as a binder and adds richness, helping the cheeses melt together into the gorgeous, unified layer seen in the photo.
Step 3: Shaping the Oval Bread
Once the dough has doubled, it’s gently pressed down to release the air. On a lightly floured surface, the dough is rolled out into a large oval shape, about 12-14 inches (30-35 cm) long.
The shaped dough is transferred onto a sheet of parchment paper. The cheese filling is spread evenly over the surface, leaving a 1-inch (2-3 cm) border all around. To form the puffy edge, the border of the dough is simply folded up and over the outer edge of the cheese filling, creating a distinct, raised crust. This is how the beautiful puffy rim in the photo is formed.
Step 4: Baking to a Golden Finish
This step is where the transformation occurs, and the bread gets its perfect color.
Place the pizza stone or baking sheet in the oven and preheat it to 430°F (220°C). It’s very important that the oven and the baking surface are fully heated before the bread goes in. This ensures a well-cooked, crisp-bottomed crust.
Carefully slide the parchment paper with the prepared bread onto the hot pizza stone or baking sheet.
Bake for 12-15 minutes. The bread is done when the crust is puffed up and a deep golden brown, and the cheese on top is completely melted and has developed the even, beautiful golden-brown color seen in the picture. This uniform top color is the result of the consistent heat of the oven.
As soon as the bread comes out of the oven, use a pastry brush to apply the melted butter all over the hot crust and the cheesy surface. This final touch provides the irresistible shine visible in the photo and adds a final layer of rich flavor.
Serve it hot and enjoy the wonderful experience of tearing into a piece. There’s a special satisfaction in sharing food that has been made with care, and this recipe is a perfect way to experience it.