
Golden Peanut Praline Layer Cake
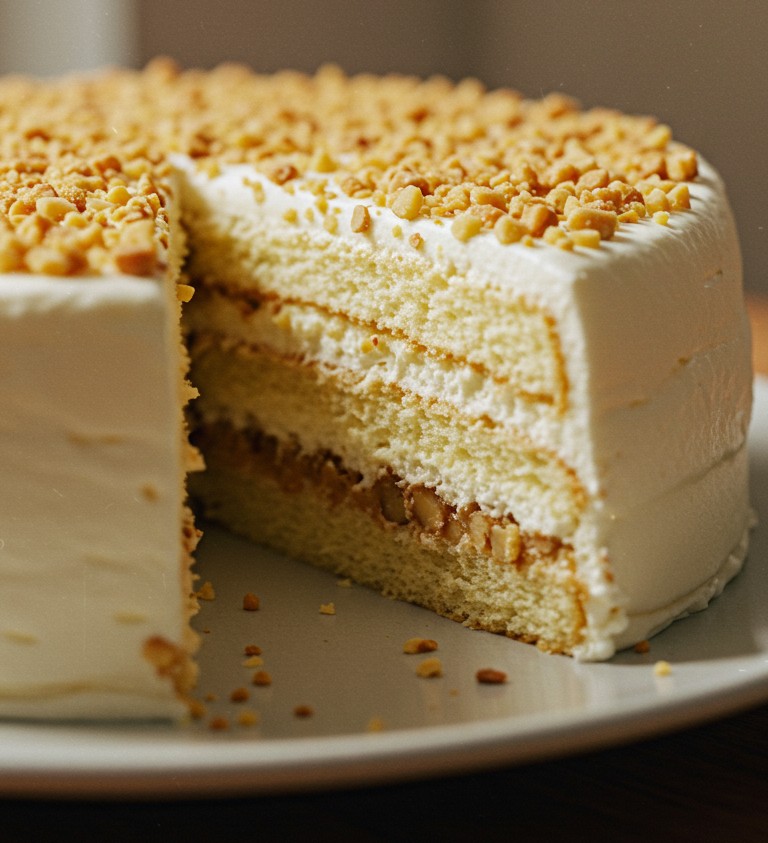
This delightful cake, captured beautifully in the image, presents layers of soft sponge, rich nutty filling, and smooth frosting, all generously topped with crunchy peanuts. It’s a wonderful baking project that results in a truly satisfying dessert. This guide walks beginners through preparing this exact cake, ensuring halal ingredients are used for a treat everyone can enjoy. The process involves careful preparation of each component – the sponge, the praline filling, and the buttercream – followed by precise assembly to mirror the pictured dessert.
Getting Started: What You’ll Need
Gathering the right ingredients and tools beforehand makes the baking process smooth and enjoyable.
Halal Ingredients
- For the Sponge Cake:
- 🥚 4 large Halal Eggs (at room temperature)
- 🍚 1 cup Granulated Sugar
- 🥄 1 teaspoon Halal Vanilla Extract (alcohol-free)
- 🥛 ½ cup Whole Milk (at room temperature)
- 🧈 ¼ cup Unsalted Butter (melted and slightly cooled)
- 🌾 1 ½ cups All-Purpose Flour (sifted)
- 🥄 1 ½ teaspoons Halal Baking Powder
- 🧂 ¼ teaspoon Salt
- For the Peanut Praline Filling:
- 🍚 ½ cup Granulated Sugar
- 💧 2 tablespoons Water
- 🥜 ¾ cup Chopped Roasted Peanuts (unsalted)
- 🧈 2 tablespoons Unsalted Butter
- For the Buttercream Frosting:
- 🧈 1 ½ cups Unsalted Butter (softened to room temperature)
- 🍚 3-4 cups Powdered Sugar (sifted)
- 🥄 1 teaspoon Halal Vanilla Extract (alcohol-free)
- 🥛 2-3 tablespoons Whole Milk or Cream
- For the Topping:
- 🥜 ½ cup Chopped Roasted Peanuts (unsalted)
Kitchen Equipment
- 🥣 Several Mixing Bowls (Large, Medium, Small)
- 🥄 Measuring Cups and Spoons
- ⚖️ Kitchen Scale (optional, for precision)
- 🔌 Electric Mixer (Handheld or Stand Mixer)
- 🧱 Rubber Spatula
- 🗑️ Sifter or Fine-Mesh Sieve
- 🎂 Three 8-inch Round Cake Pans
- 📄 Parchment Paper
- 🥅 Wire Cooling Racks
- 🍳 Small Saucepan (for praline)
- 🔪 Serrated Knife (for leveling cakes, optional)
- 🧊 Offset Spatula or Palette Knife (for frosting)
- 🍴 Whisk
Preparing the Peanut Praline Layer Cake Step-by-Step
Patience and following the steps carefully are key to achieving the lovely result shown in the image.
Making the Sponge Cake Layers
The foundation of this cake is its light, pale yellow sponge layers, visible in the cross-section.
- Prepare the Pans and Oven: Set an oven rack to the middle position and preheat the oven to 350°F (175°C). Preheating means turning the oven on ahead of time so it reaches the correct temperature, which is crucial for even baking. Grease the bottom and sides of the three 8-inch round cake pans with butter or non-stick spray. Line the bottom of each pan with a circle of parchment paper, then grease the parchment paper as well. Lightly flour the pans, tapping out any excess. This preparation prevents the cakes from sticking.
- Combine Dry Ingredients: In a medium bowl, sift together the all-purpose flour, baking powder, and salt. Sifting involves passing the ingredients through a fine sieve to remove lumps and incorporate air, leading to a lighter, more tender sponge. Set this mixture aside.
- Mix Wet Ingredients: In a large bowl, using an electric mixer on high speed, beat the room-temperature eggs and granulated sugar together. Continue beating for about 5-7 minutes, or until the mixture is very pale, thick, and significantly increased in volume. When the beaters are lifted, the mixture should fall back in ribbons that sit on the surface for a moment. This process incorporates a lot of air, essential for the sponge’s texture. Beat in the vanilla extract.
- Combine Wet and Dry: Reduce the mixer speed to low. Add about one-third of the sifted dry ingredients to the egg mixture, mixing just until incorporated. Add half of the milk and half of the melted butter, mixing gently. Repeat with another third of the dry ingredients, the remaining milk and butter, and finally the last third of the dry ingredients. Mix only until combined – overmixing can develop the gluten too much, making the cake tough. For the final additions, it might be best to fold the ingredients gently using a rubber spatula. Folding means using a large spatula to lift the mixture from the bottom and fold it over the top, rotating the bowl, until just combined, preserving the air whipped into the eggs.
- Divide and Bake: Divide the batter evenly among the three prepared cake pans. Smooth the tops lightly with the spatula. Bake in the preheated oven for 20-25 minutes. The cakes are done when they are golden brown, spring back when lightly touched in the center, and a wooden skewer or toothpick inserted into the center comes out clean.
- Cool the Layers: Let the cakes cool in their pans on wire racks for about 10 minutes. Then, carefully run a thin knife around the edges of the pans and invert the cakes onto the wire racks. Peel off the parchment paper and let the cakes cool completely. Complete cooling is essential before frosting; warm cakes can melt the buttercream.
Whipping Up the Buttercream Frosting
This cake features a smooth, pure white buttercream frosting covering the sides and top.
- Beat the Butter: Ensure the unsalted butter is at room temperature – soft enough to easily indent with a finger but not melted. Place the softened butter in a large bowl and beat with an electric mixer on medium-high speed for several minutes until it’s very pale and fluffy.
- Add Sugar and Liquid: Gradually add the sifted powdered sugar, about one cup at a time, beating well after each addition. Start on low speed to avoid a sugar cloud, then increase to medium-high. Once all sugar is incorporated, the mixture might look thick. Add the vanilla extract and 2 tablespoons of milk or cream. Beat again until the frosting is light, airy, and smooth. If it’s too stiff, add the remaining tablespoon of milk/cream; if too thin, add a bit more powdered sugar. The goal is a smooth, spreadable consistency.
Cooking the Peanut Praline Filling
The image reveals distinct layers of a brownish, nutty filling between the sponges. This peanut praline provides texture and flavour contrast.
- Make Caramel: In a small, heavy-bottomed saucepan, combine the granulated sugar and water. Stir just until the sugar is moistened. Place over medium heat and bring to a boil without stirring. Let it boil, swirling the pan occasionally, until the sugar melts and turns a deep amber color. Watch it carefully, as caramel can burn quickly.
- Add Nuts and Butter: Once the caramel reaches the desired color, immediately remove the pan from the heat. Carefully stir in the chopped roasted peanuts and the 2 tablespoons of unsalted butter. The mixture will bubble. Stir until the butter is melted and the nuts are coated.
- Cool Slightly: Pour the hot praline mixture onto a sheet of parchment paper or a lightly greased surface. Spread it out slightly. Let it cool for about 10-15 minutes, until it’s still slightly warm and pliable but not hot enough to melt the buttercream. It should be firm enough to hold its shape but soft enough to spread. If it hardens too much, it can be gently warmed for a few seconds.
Assembling the Cake
Precision during assembly yields the clean layers and smooth finish seen in the picture.
- Level the Cakes (Optional): If the cake layers have domed tops, use a long serrated knife to carefully trim them flat. This leveling ensures the layers stack evenly and the finished cake is stable.
- First Layer: Place one cooled cake layer onto a serving plate or cake stand. Spread half of the slightly cooled peanut praline filling evenly over the top, going almost to the edge.
- Second Layer: Carefully place the second cake layer on top of the filling. Spread the remaining half of the peanut praline filling evenly over this layer.
- Third Layer: Place the third cake layer on top. Gently press down to ensure the layers are stable.
- Crumb Coat: Apply a thin, even layer of the prepared buttercream frosting over the entire cake (top and sides). This is called a crumb coat, and its purpose is to trap any loose crumbs from the sponge, preventing them from mixing into the final layer of frosting. Refrigerate the cake for about 20-30 minutes to allow the crumb coat to firm up.
- Final Frosting: Remove the cake from the refrigerator. Apply the remaining buttercream frosting generously over the top and sides. Use an offset spatula or palette knife to smooth the frosting as neatly as possible, aiming for the clean, white finish shown in the image.
- Garnish: Take the final portion of chopped roasted peanuts. Sprinkle them generously and evenly over the entire top surface of the cake, fully covering the white frosting underneath, just as depicted in the photograph.
Serving Your Masterpiece
The image shows a slice already removed, revealing the beautiful interior structure. Use a sharp, clean knife to slice the cake. Wiping the knife clean between cuts helps maintain neat slices. This Golden Peanut Praline Layer Cake is perfect for celebrations or as a special homemade treat.
Share the Sweetness
Preparing a cake like this from scratch offers a unique sense of accomplishment. The combination of soft sponge, crunchy-sweet praline, and smooth buttercream is truly rewarding. Consider sharing pictures of the finished cake; seeing homemade successes can inspire others to embark on their own baking adventures. Enjoy every step of the process and the delicious outcome!