
Halal Beef & Veggie Pizza Perfection
Embarking on a homemade pizza adventure is a truly rewarding experience, and this recipe guides beginner cooks to assemble a stunning Halal Beef & Veggie Pizza, just like the one pictured. Imagine pulling a slice away to reveal that incredible, gooey, golden-yellow cheese stretch – it’s a moment of pure culinary joy, and it’s absolutely achievable in your own kitchen! This guide breaks down every step, ensuring anyone can put together this delightful meal.
The Star of Your Table
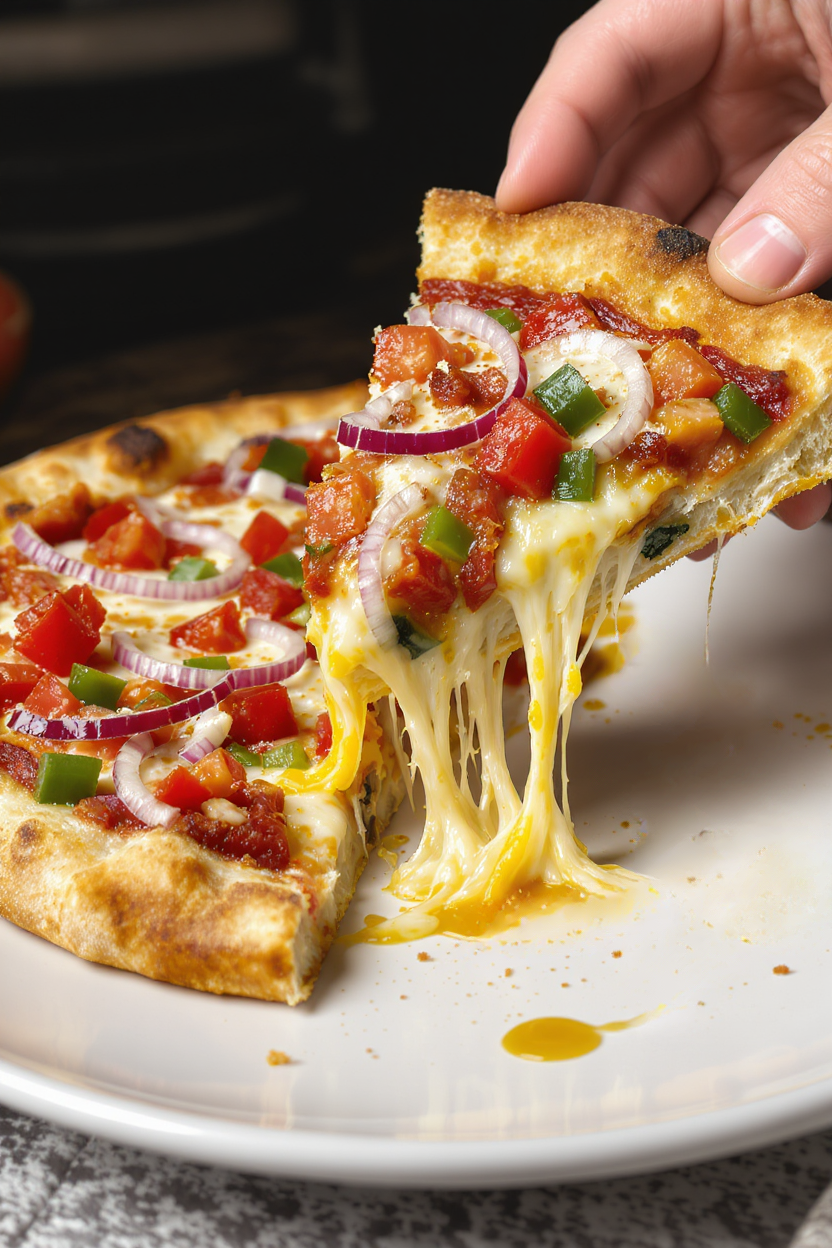
This isn’t just any pizza; it’s a feast for the eyes and the palate. The pizza showcases a beautifully baked golden-brown crust with inviting, slightly charred spots along its puffy edge. A generous blanket of perfectly melted, stretchy cheese – primarily mozzarella, achieving a beautiful golden-yellow hue in its molten state as seen in the photo – covers a rich tomato sauce base seasoned with fine herbs. The toppings are a vibrant mix: bright red and green diced bell peppers, distinct rings of purple onion, and savory, reddish-brown crumbles of cooked beef bacon, all harmoniously distributed. The cheese pull, as a slice is lifted, is gloriously long, yellow, and tempting.
Gathering Your Supplies
Before beginning, it’s helpful to have all the components ready. This preparation, known in cooking as mise en place (a French term meaning “everything in its place”), makes the whole process smoother and more enjoyable.
🛒 Halal Ingredients You’ll Need
- For the Dough (for one 12-inch pizza):
- 🍚 1 ½ cups (180g) bread flour (provides a chewier crust)
- 💧 ¾ cup (180ml) warm water (around 105-115°F or 40-46°C – like a warm bath)
- 🥄 1 teaspoon instant yeast
- 🧂 ½ teaspoon salt
- 🍯 1 teaspoon sugar (food for the yeast)
- 🫒 1 tablespoon olive oil, plus extra for greasing
- For the Toppings:
- 🍅 ½ cup pizza sauce (store-bought or homemade), seasoned with fine herbs like oregano or basil (visible as small dark flecks in the photo). If your sauce is plain, add ½ teaspoon of dried oregano or Italian seasoning to it.
- 🧀 1 ½ – 2 cups (170-225g) shredded low-moisture, whole milk halal mozzarella cheese. To achieve the distinct golden-yellow cheese pull seen in the photo, use a mozzarella that melts to a rich yellow, or blend your mozzarella with ¼ to ½ cup (replacing an equal amount of mozzarella) of shredded mild yellow cheddar or a similar good-melting yellow cheese. This combination is key for that amazing color and stretch.
- 🥓 4-5 slices halal beef bacon, cooked until crisp and then crumbled
- 🫑 ½ medium green bell pepper
- 🌶️ ½ medium red bell pepper
- 🧅 ¼ medium red onion
- 🌽 Cornmeal or semolina flour, for dusting (optional, helps prevent sticking)
🛠️ Kitchen Tools
- 🥣 Large mixing bowl
- 🍴 Measuring cups and spoons
- 🔪 Sharp knife
- 🪵 Cutting board
- 🍳 Frying pan (for the beef bacon)
- 🍕 Pizza pan, baking stone, or inverted baking sheet (a baking stone or steel absorbs and radiates heat, helping to get that desirable crispy, charred crust)
- 🥄 Spoon or ladle for spreading sauce
- ♨️ Oven
Getting Started: Step-by-Step to Pizza Perfection
Follow these instructions carefully, and a delicious, homemade pizza will be the proud result.
Preparing the Pizza Dough
A good pizza starts with good dough. This simple recipe yields a fantastic base.
- Activate the Yeast (if using active dry yeast; for instant yeast, skip to step 2): In a small bowl, combine the warm water and sugar. Sprinkle the yeast on top and let it sit for 5-10 minutes until it becomes foamy. This foamy appearance means the yeast is alive and ready to work its magic.
- Mix Dry Ingredients: In the large mixing bowl, whisk together the bread flour and salt. If using instant yeast, whisk it in here too.
- Combine Wet and Dry: Pour the yeast mixture (or warm water if using instant yeast directly with flour) and olive oil into the flour mixture. Stir with a wooden spoon or your hands until a shaggy dough forms – this means it’s just coming together but isn’t smooth yet.
- Knead the Dough: Turn the dough out onto a lightly floured surface. Now for the kneading. This involves repeatedly pushing the dough down and away with the heel of your hand, then folding it over and giving it a quarter turn. Continue this rhythmic motion for about 8-10 minutes. The dough should become smooth, elastic, and less sticky. Kneading develops gluten, which gives the crust its structure and chewiness. If the dough is too sticky, add a tiny bit more flour; if too dry, a tiny bit more water.
- First Rise (Proofing): Lightly oil the mixing bowl. Place the kneaded dough into the bowl, turning it once to coat it with oil (this prevents a dry skin from forming). Cover the bowl with a clean kitchen towel or plastic wrap. Let it rest in a warm, draft-free spot for 1 to 1.5 hours, or until it has doubled in size. This resting period is called proofing. The yeast consumes the sugars and produces carbon dioxide, causing the dough to rise and develop a light, airy texture.
Crafting the Toppings
While the dough is proofing, it’s the perfect time to get the toppings ready.
- Cook the Beef Bacon: Place the beef bacon slices in a cold frying pan. Cook over medium heat, turning occasionally, until they are browned and crispy, about 8-10 minutes. Transfer the cooked bacon to a paper towel-lined plate to drain excess fat. Once cool enough to handle, crumble it into small, reddish-brown pieces. The pieces visible in the image are about 1/4 to 1/2 inch in size.
- Prepare the Vegetables:
- Wash the bell peppers. Remove the stems, seeds, and white membranes from the inside. Dice both the red and green bell peppers into small, uniform cubes, roughly ¼-inch. Dicing means cutting them into these small, even pieces, which ensures they cook evenly and are distributed nicely.
- Peel the red onion. Slice it thinly into rings. The image shows distinct, fairly thin rings.
Assembling Your Masterpiece
Once the dough has risen and the toppings are prepped, the fun part of assembly begins!
- Preheat the Oven: At least 30 minutes before baking, place your pizza stone or steel (if using) on an oven rack positioned in the lower third of the oven. If not using a stone/steel, an inverted baking sheet can work, or just your regular pizza pan. Preheat the oven to a high temperature, 475-500°F (245-260°C). A very hot oven is essential for achieving that golden, slightly charred crust seen in the image.
- Shape the Dough: Gently punch down the risen dough to release the air. Transfer it to a lightly floured surface. Gently stretch and press the dough into a 12-inch circle. You can use your fingertips to press from the center outwards, leaving a slightly thicker rim for the crust (this puffy edge is called the cornicione). Avoid using a rolling pin if possible, as hand-stretching preserves more of the air bubbles for a lighter crust. If using cornmeal, sprinkle it lightly on your pizza peel or the pizza pan to prevent sticking and add a little crunch.
- Add the Sauce: Carefully transfer the shaped dough to your prepared pizza pan or a pizza peel dusted with cornmeal (if using a stone). Spread the herb-seasoned pizza sauce evenly over the dough, leaving about a ½-inch border for the crust.
- Layer the Cheese: Distribute your chosen shredded cheese (mozzarella or mozzarella-yellow cheese blend as specified in ingredients) generously and evenly over the sauce. The image shows abundant, melted golden-yellow cheese, so don’t be shy! This quantity and type of cheese are key to the magnificent color and pull.
- Distribute the Toppings: Scatter the crumbled beef bacon, diced red bell pepper, and diced green bell pepper over the cheese. Arrange the red onion rings on top of the other toppings. The image shows the onion rings as the topmost vegetable layer.
Baking to Golden Glory
The final step to pizza nirvana!
- Bake the Pizza: Carefully slide the pizza onto the hot baking stone or steel using the pizza peel (if applicable), or place the pizza pan directly into the preheated oven.
- Bake for 10-15 minutes. The exact time will depend on your oven’s temperature and the thickness of your crust.
- Check for doneness: The crust should be golden brown, with some lovely charred spots on the edges, as seen in the image. The cheese should be fully melted, bubbly, and have a rich golden-yellow color, possibly slightly browned in places. The toppings will be tender.
- Achieving the Char: The high oven temperature and placement on a preheated stone/steel are crucial for these desirable charred spots. If your crust isn’t browning enough but the toppings are done, you can move the pizza to a higher rack for the last minute or two, watching carefully to prevent burning.
- Rest and Serve: Once baked, carefully remove the pizza from the oven. Let it rest for a few minutes before slicing. This allows the cheese to set slightly, making it easier to cut and preventing the toppings from sliding off. Then, slice and serve immediately, marveling at that fantastic golden-yellow cheese pull when the first piece is lifted. The golden oil spots on the plate in the image are normal and come from the delicious cheese and toppings.
Tips for Pizza Triumph
- Flour Power: Bread flour has a higher protein content than all-purpose flour, which helps to develop more gluten, resulting in a chewier crust. However, all-purpose flour can be used if that’s what is on hand.
- Water Temperature is Key: For yeast to activate properly, the water should be warm, not hot. Too hot, and it will kill the yeast; too cold, and it won’t activate efficiently.
- Don’t Rush Proofing: Allowing the dough to double in size is important for a light and airy crust. Patience here pays off in flavor and texture.
- Cheese Choice for the Pictured Result: For the best melt, stretch, and distinct golden-yellow color as seen in the image, use low-moisture, whole-milk mozzarella that melts to a golden hue, or blend it with a bit of mild yellow cheddar or a similar cheese as recommended in the ingredients. Pre-shredded cheese often contains anti-caking agents that can affect its meltability, so shredding a block of cheese is often preferred.
Share Your Delicious Handiwork!
There’s immense satisfaction in pulling a homemade pizza from the oven, especially one that looks as enticing as this Halal Beef & Veggie Pizza. Give this recipe a go, and experience the delight of crafting something truly special. When your pizza is ready, take a picture of your magnificent result—especially that golden-yellow cheese pull—and share it with friends and family!
Happy cooking, and enjoy every delicious, cheesy bite!