
Homemade Chocolate Sprinkle Donut Joy
You know that feeling when you bite into a perfectly fresh donut? It’s pretty special, right? Especially when it’s as inviting as this gorgeous chocolate-glazed one in the photo. Seriously, with its yummy, glossy chocolate top and a happy little party of colorful sprinkles, this treat is just begging to be enjoyed. And here’s a secret: making these donuts at home is a super rewarding (and fun!) thing to do. Your kitchen will smell incredible, and you’ll have a batch of goodies that are sure to make people happy. So, let’s dive into how to make these classic ring donuts – they’re awesome for sharing, or for keeping all to yourself (we won’t tell!).
What You’ll Need
Before beginning this sweet adventure, gather all the necessary components. Precision in measurement is a good friend in baking, so having everything ready makes the process smoother.
🛒 Halal Ingredients
- 🥛 1 cup (240ml) Whole Milk (ensure it’s halal if specific certification is sought in your region, otherwise plain whole milk)
- 🍚 ¼ cup (50g) Granulated Sugar, plus 1 tsp for yeast
- 🍂 2 ¼ tsp (7g or 1 packet) Active Dry Yeast (halal certified)
- 🥚 2 large Eggs (halal, from a trusted source)
- 🧈 ¼ cup (57g) Unsalted Butter, melted (halal certified)
- 🍦 1 tsp Vanilla Extract (ensure non-alcoholic or halal certified)
- 🧂 ½ tsp Salt
- 🌾 3 ½ to 4 cups (420g-480g) All-Purpose Flour (halal), plus more for dusting
- 🛢️ 4-6 cups Vegetable Oil, for frying (halal)
For the Rich Chocolate Glaze (as seen in the image):
- 🍫 2 cups (240g) Powdered Sugar, sifted
- ☕ ½ cup (45g) Unsweetened Cocoa Powder (halal certified), sifted
- 🥛 4-6 tbsp Milk or Cream (halal)
- 🧈 2 tbsp Unsalted Butter, melted (halal certified)
- 🍦 ½ tsp Vanilla Extract (ensure non-alcoholic or halal certified)
- ½ cup Rainbow Sprinkles (halal certified – check for non-shellac, non-carmine options.
🛠️ Kitchen Tools
- 🥣 Large Mixing Bowl
- 🥣 Medium Mixing Bowl
- 🥄 Measuring Cups & Spoons
- 🌀 Whisk
- 🤏 Stand Mixer with Dough Hook (optional, hand kneading is fine)
- 📏 Rolling Pin
- 🍩 Donut Cutter (approx. 3-inch for outer, 1-inch for inner hole) or two round biscuit cutters
- 🍳 Large, Heavy-Bottomed Pot or Deep Fryer
- 🌡️ Cooking Thermometer
- 🕷️ Slotted Spoon or Spider Skimmer
- 📜 Parchment Paper, cut into 4-inch squares
- 🧺 Wire Cooling Rack
- 🍲 Small Saucepan (for glaze)
Let’s Get These Donuts Ready
Preparing these yeasted donuts involves a few key stages: making the dough, letting it rise, shaping the donuts, a second rise, frying them to golden perfection, and finally, dipping them in that luscious chocolate glaze.
Preparing the Donut Dough
- Activate the Yeast: Gently warm 1 cup of milk to about 105-115°F (40-46°C). It should feel like a warm bath, not hot. Pour it into the large mixing bowl. Stir in 1 tsp of granulated sugar and then sprinkle the yeast over the top. Let it stand for 5-10 minutes until it becomes foamy. This blooming process shows the yeast is alive and active. If it doesn’t foam, the yeast might be old, and it’s best to start over with fresh yeast.
- Combine Wet Ingredients: To the foamy yeast mixture, add the remaining ¼ cup of granulated sugar, the eggs, melted butter, and vanilla extract. Whisk them together until well combined.
- Add Dry Ingredients: In the medium mixing bowl, whisk together 3 ½ cups of the all-purpose flour and the salt. Gradually add this dry mixture to the wet ingredients in the large bowl, mixing with a wooden spoon or the dough hook of a stand mixer on low speed until a shaggy dough begins to form.
- Knead the Dough:
- By Hand: Turn the dough out onto a lightly floured surface. Knead for about 8-10 minutes. Kneading is the process of working the dough to develop gluten, which gives the donuts their structure and chewy texture. To knead, fold the dough over itself and push down with the heel of your hand, then turn the dough a quarter turn and repeat. The dough should become smooth and elastic. If it’s too sticky, add a little more flour, one tablespoon at a time.
- With a Stand Mixer: Use the dough hook and knead on medium-low speed for 6-8 minutes, until the dough is smooth, elastic, and pulls away from the sides of the bowl.
- First Rise (Proofing): Lightly grease a large, clean bowl with a bit of oil or cooking spray. Place the kneaded dough into the bowl, turning it once to coat all sides with oil. Cover the bowl tightly with plastic wrap or a damp kitchen towel. Let the dough proof, or rise, in a warm, draft-free place for 1 to 1 ½ hours, or until it has doubled in size. This rising time allows the yeast to work its magic, producing air bubbles that make the donuts light and airy.
Shaping and Frying the Donuts
- Prepare for Shaping: Once the dough has doubled, gently punch it down to release the air. Turn it out onto a lightly floured surface.
- Roll and Cut: Roll the dough out to about ½-inch thickness. Using the donut cutter, cut out as many donuts as possible. If using two round cutters, cut the larger circles first, then use the smaller cutter to make the holes in the center. The small cut-out pieces are donut holes – they can be fried too! Gather the scraps, gently re-roll (avoid overworking), and cut more donuts until all the dough is used. The aim is to achieve the classic ring shape seen in the image.
- Second Rise: Place each donut (and donut hole) onto an individual square of parchment paper. This makes it easier to transfer them to the hot oil later. Arrange them on baking sheets, cover loosely with plastic wrap or a light kitchen towel, and let them rise again in a warm place for another 30-45 minutes, or until they are puffy. They won’t quite double this time.
- Heat the Oil: While the donuts are having their second rise, pour the vegetable oil into the large, heavy-bottomed pot or deep fryer to a depth of at least 2-3 inches. Heat the oil over medium heat until it reaches 365-375°F (185-190°C). A cooking thermometer is highly recommended here to maintain the correct temperature. If the oil is too cool, the donuts will absorb too much oil and be greasy; if it’s too hot, they will brown too quickly on the outside and be raw inside.
- Fry the Donuts: Carefully, using the parchment paper squares to help, lower 2-3 donuts at a time into the hot oil, making sure not to overcrowd the pot. The parchment paper might detach and can be removed with tongs. Fry for about 1-2 minutes per side, or until they are a beautiful golden brown. The donuts will puff up significantly and develop a distinct lighter band around their middle, a hallmark of a well-fried yeast donut, just like the one in the photograph.
- Drain: Using a slotted spoon or spider skimmer, carefully remove the fried donuts from the oil, allowing excess oil to drip back into the pot. Transfer them to the wire cooling rack placed over a baking sheet (to catch drips). Let them cool slightly before glazing. Repeat with the remaining donuts and donut holes, ensuring the oil temperature remains consistent.
Glazing and Sprinkling Perfection
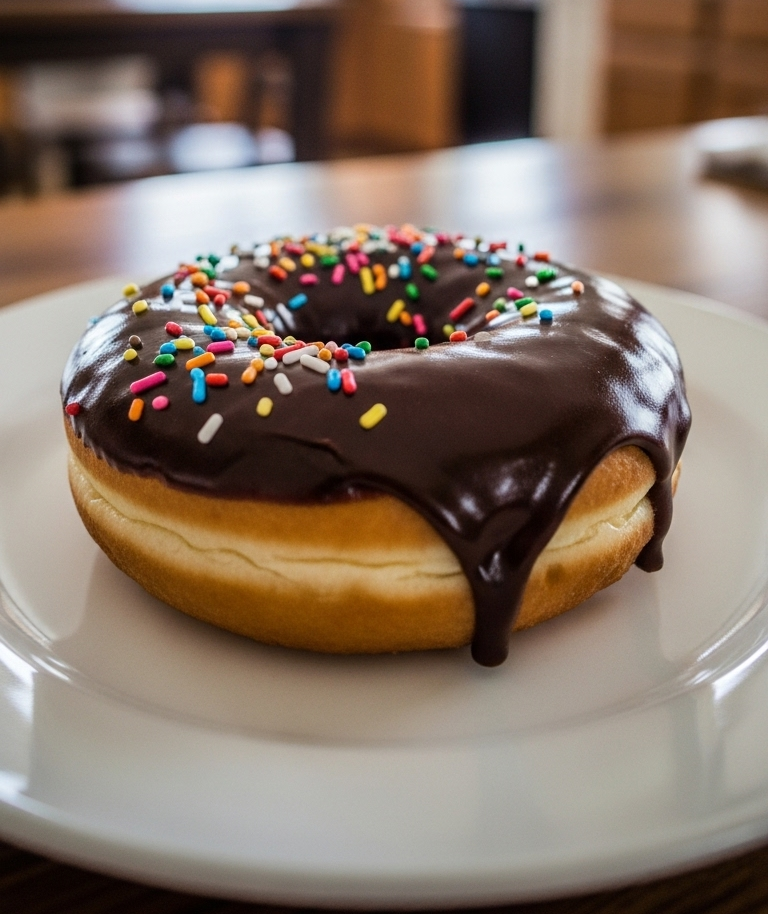
The image showcases a donut with a generous, glossy, dark chocolate glaze that has tantalizing drips down its sides, topped with a vibrant array of sprinkles.
- Prepare the Chocolate Glaze: In the small saucepan, combine the sifted powdered sugar and sifted cocoa powder. Whisk in 4 tablespoons of milk (or cream) and the melted butter until smooth. If the glaze is too thick, add more milk, one teaspoon at a time, until it reaches a good dipping consistency – it should be thick enough to coat the donut generously but fluid enough to drip appealingly, matching the glaze seen directly in the image. Stir in the vanilla extract. Keep the glaze warm over very low heat if needed, or place the saucepan over a bowl of warm water.
- Dip the Donuts: Once the donuts are cool enough to handle but still slightly warm, hold a donut by its sides and dip the top half into the warm chocolate glaze. Lift and allow any excess glaze to drip off. For the distinct drips visible on the pictured donut, let the glaze naturally flow down the sides.
- Add Sprinkles Immediately: While the glaze is still wet and glossy, immediately scatter the rainbow sprinkles over the glazed top. The image shows a festive mix of rod-shaped jimmies and smaller round sprinkles in bright colors including red, orange, yellow, green, blue, and white, generously applied. The wet glaze will act as an adhesive, holding the sprinkles firmly in place.
- Set: Place the glazed and sprinkled donuts back on the wire rack to allow the glaze to set completely, which usually takes about 20-30 minutes.
Tips for Donut Success
- Yeast is Key: Ensure the yeast is fresh and properly activated. The warm milk should not be too hot, or it will harm the yeast.
- Don’t Rush the Rise: Allowing the dough to proof fully is crucial for a light, airy texture.
- Oil Temperature Control: This is perhaps the most critical part of frying. Use a thermometer. Adjust the heat as needed to maintain the target temperature range.
- Glaze Consistency: If the glaze is too thin, it will be transparent; too thick, and it will be difficult to dip. Adjust with more powdered sugar (to thicken) or milk (to thin) until it’s just right to replicate the thick, opaque, and drippy coating that characterizes the donut in the image.
- Work Quickly with Glaze: Have the sprinkles ready to go as soon as the donuts are dipped, as the glaze begins to set fairly quickly.
The satisfaction of biting into a homemade chocolate-glazed sprinkle donut, knowing the care that went into its preparation, is a truly delightful experience. These donuts, with their soft, pillowy interior and rich chocolatey top, are a testament to the simple joys of home baking.
Feel free to share snapshots of your beautifully finished donuts. Witnessing others enjoy the process and the delicious outcome is always a wonderful part of the culinary journey!