
Homemade Pistachio Raspberry Swirl Ice Cream Recipe
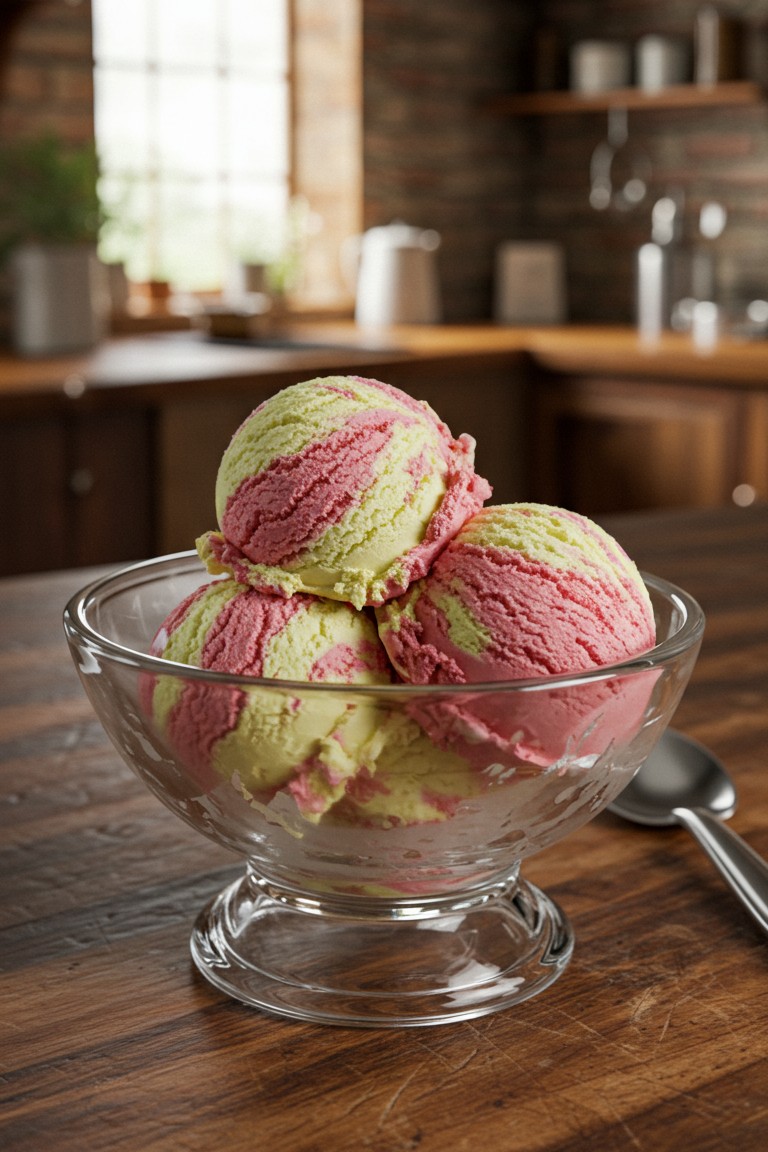
This beautiful dessert features ribbons of tangy raspberry and nutty pistachio swirled together in a rich, homemade ice cream. This guide breaks down the steps to preparing a classic custard base, making it achievable for even the most novice cook. The final result is a perfect balance of flavors and colors, scooped into a classic footed glass bowl, offering a treat that is as delightful to look at as it is to eat.
Essential Kitchen Tools
- 🍦 Ice cream maker
- 🥣 2 medium saucepans
- 🧊 3 medium bowls (one for an ice bath)
- 🥄 Whisk
- Spatula
- Strainer
- Airtight freezer-safe container
Halal Ingredients You’ll Need
- 🥛 1 ½ cups whole milk
- 🍶 1 ½ cups heavy cream
- 🍬 1 cup granulated sugar, divided
- 🥚 6 large egg yolks
- 🫙 1 teaspoon halal vanilla extract
- 🥜 ¾ cup shelled, unsalted pistachios (for paste) OR ½ cup of pre-made, high-quality pistachio paste
- 🍓 1 ½ cups fresh or frozen raspberries
- 🍋 1 tablespoon lemon juice
Assembling Your Ice Cream Masterpiece
This recipe involves preparing two separate flavor bases that get churned and then combined. Patience is key, especially during the chilling stages, as this ensures the creamiest possible texture.
Step 1: Prepare the Flavors
First, get the two star flavors ready.
For the pistachio flavor, if using whole nuts, begin by blanching them. This just means boiling them for a minute and then plunging them into ice water. The skins will slip right off. Toast the blanched, dried pistachios in a dry pan over medium heat for 3-5 minutes until fragrant, then let them cool completely. Grind the cooled nuts in a food processor with 2 tablespoons of the sugar until a smooth, thick paste forms. This may take several minutes. Set this pistachio paste aside.
For the raspberry flavor, combine the raspberries, 2 tablespoons of sugar, and the lemon juice in a small saucepan. Cook over medium heat, stirring and mashing the berries with a spoon, until they have broken down and the mixture has thickened slightly, about 5-8 minutes. Press this mixture through a fine-mesh strainer into a bowl to remove all the seeds, leaving behind a smooth, vibrant raspberry sauce. Let it cool.
Step 2: Make the Custard Base
This ice cream gets its rich texture from a custard base, which is made by gently cooking egg yolks.
- In a medium saucepan, warm the milk, heavy cream, and the remaining sugar over medium heat. Stir occasionally until the sugar dissolves and the mixture is hot, with steam rising from the surface. Do not let it boil.
- While the milk is heating, whisk the egg yolks in a separate bowl until they are pale and slightly fluffy.
- Now comes a technique called tempering. This is a very important step to prevent the eggs from scrambling. Slowly pour about one cup of the hot milk mixture into the egg yolks while whisking constantly. This gently warms the yolks.
- Pour the warmed egg yolk mixture back into the saucepan with the rest of the milk.
- Cook the custard over low heat, stirring constantly with a spatula, making sure to scrape the bottom and corners of the pan. Continue until the custard thickens enough to coat the back of the spatula. A simple way to test this is to run a finger through the custard on the spatula; if the line holds its shape and doesn’t run, it’s ready. This usually takes 5-7 minutes.
Step 3: Flavor and Chill the Bases
- Immediately pour the finished custard through the fine-mesh strainer into a clean bowl. This catches any tiny bits of cooked egg and guarantees a silky-smooth ice cream.
- Divide the strained custard evenly between two bowls. Into one bowl, whisk in the pistachio paste and the vanilla extract until fully combined. Into the second bowl, whisk in the cooled raspberry sauce.
- Cover both bowls with plastic wrap, pressing it directly onto the surface of the custards to prevent a skin from forming. Refrigerate both bases for at least 4 hours, but overnight is even better. They must be completely cold before churning.
Step 4: Churn and Swirl
The final stage is where the mixture transforms into ice cream. Churning incorporates air and freezes the base into ice cream.
- Pour the chilled pistachio custard into the bowl of an ice cream maker and churn according to the manufacturer’s instructions. It should reach the consistency of soft-serve ice cream.
- Spread about half of the freshly churned pistachio ice cream into the bottom of your airtight freezer container.
- Without cleaning the machine, churn the chilled raspberry custard until it also reaches a soft-serve consistency.
- Drop large spoonfuls of the raspberry ice cream over the pistachio layer. Add the remaining pistachio ice cream in spoonfuls, then top with the rest of the raspberry. This layering is what helps form the distinct swirls seen in the image.
- Take a spatula or a knife and gently drag it through the container two or three times to swirl the flavors together. Be careful not to overmix, or the colors will blend into a single shade instead of remaining as separate pink and pale-green ribbons.
- Cover the container and place it in the freezer for at least 4-6 hours, or until the ice cream is firm and scoopable.
When it’s ready, those perfect scoops can be put into a lovely glass dish. The reward is a wonderfully rich, flavorful ice cream that tastes as delightful as it looks. Feel free to share pictures of your finished dessert—seeing homemade successes is always a joy.