

Hook Up Your Dreamy Sleep Mask
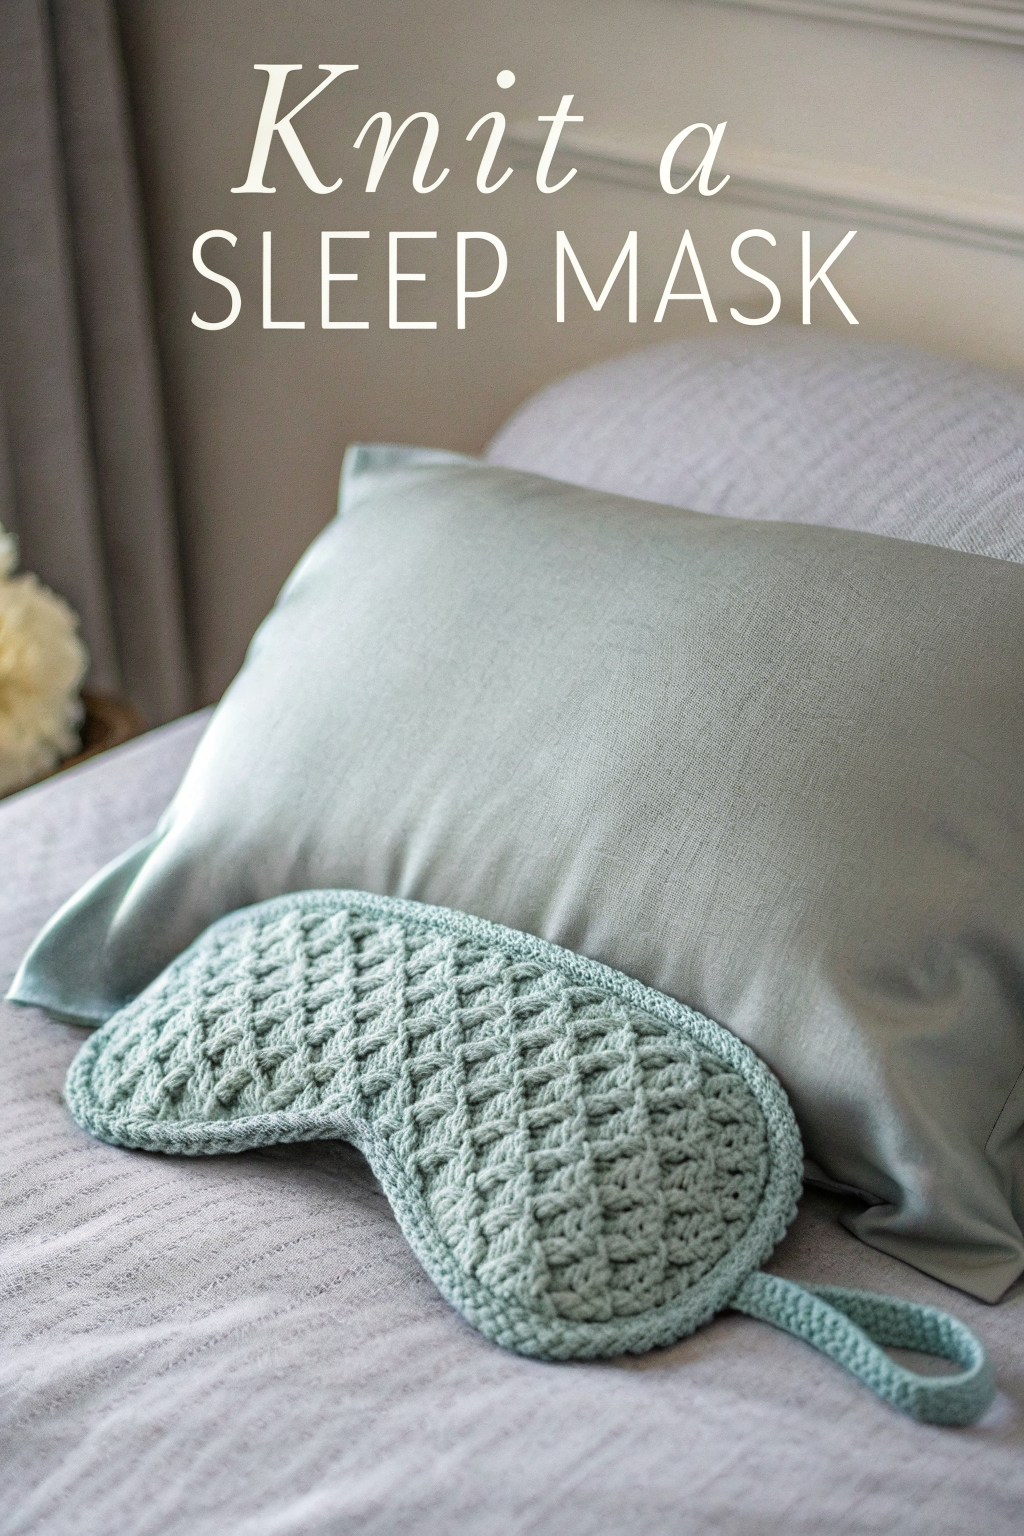
Isn’t there something wonderfully calming about the soft, textured sleep mask in the picture? That beautiful light teal item features a distinct, cushiony pattern perfect for blocking out the world. And guess what? You can absolutely make one just like it using crochet, even if you’re new to the craft! This guide will walk you through bringing this cozy accessory to life, step by simple step. Imagine the satisfaction of resting with something handmade and beautiful. Let’s grab our hooks and yarn!
What You’ll Need
Let’s gather the essentials for this crochet project:
- 🧶 Soft Yarn: About 50g of DK or Worsted weight yarn. A smooth cotton or cotton blend is ideal for comfort against your face. The mask pictured is a soft, light teal shade.
- 🪝 Crochet Hook: Size appropriate for your yarn (e.g., G/4.0mm or H/5.0mm often work well for DK/Worsted).
- ✂️ Scissors
- 🪡 Tapestry Needle: For weaving in those yarn ends and attaching the strap.
- 📏 Measuring Tape (Optional, but handy)
Getting Started: Your Crochet Basics
Before we begin the main event, let’s quickly introduce the stitches that form this mask. They’re the building blocks of crochet!
- Chain (ch): This is your starting point, a series of linked loops that forms the foundation.
- Yarn Over (yo): Simply wrapping the yarn over your crochet hook.
- Double Crochet (dc): A common taller stitch that works up fabric quickly. We’ll detail how to make it.
- Front Post Double Crochet (FPdc): This special stitch is worked around the vertical post of a stitch from the row below, making it pop forward. This is the key to the mask’s textured Waffle Stitch pattern.
- Single Crochet (sc): A shorter, denser stitch. We’ll use this for the neat border and sturdy strap you see in the image.
- Slip Stitch (sl st): Used to join rounds or move across stitches without adding much height.
- Weaving in Ends: Securing and hiding the loose yarn tails for a polished look.
Fashioning Your Crochet Sleep Mask: Step-by-Step
Let’s begin constructing the main textured part of the mask. We aim for a width of about 7-8 inches. The pattern used is the Crochet Waffle Stitch.
1. Starting Chain: Chain (ch) 33. This number gives us a base suitable for the Waffle Stitch pattern multiple (multiple of 3 + 1, plus 1 initial turning ch considered as part of the first dc foundation).
2. Foundation Row (Row 1): Work 1 Double Crochet (dc) into the 4th chain from the hook (the skipped 3 chains count as your first dc). Then, work 1 dc into each remaining chain across. You should have 31 dc stitches in total (counting the initial ch-3).
- How to Double Crochet (dc): Yarn over (yo), insert hook into the specified stitch/chain, yo, pull up a loop (3 loops on hook), yo, pull through 2 loops (2 loops on hook), yo, pull through the remaining 2 loops.
3. Establish the Waffle Stitch (Row 2): Chain (ch) 2 (this does not count as a stitch here and throughout). Turn your work. Work 1 dc in the very first stitch. Now, work 1 Front Post Double Crochet (FPdc) around the post of the next stitch. Work 1 dc in each of the next 2 stitches. Repeat the sequence (FPdc around next st, dc in next 2 sts) across the row until you have 1 stitch remaining. Work 1 dc in the top of the turning chain from the previous row. (31 stitches total).
- How to Front Post Double Crochet (FPdc): Yo, insert your hook from front to back to front again around the vertical post (the main body) of the indicated stitch from the row below, yo, pull up a loop, yo, pull through 2 loops, yo, pull through remaining 2 loops. This makes the stitch stand out on the front.
4. Continue the Waffle Stitch (Row 3): Ch 2, turn. Work 1 dc in the very first stitch. Now, work 1 dc in the next stitch (which was an FPdc in the row below). Work 1 FPdc around the post of each of the next 2 stitches (these were the regular dcs in the row below). Repeat the sequence (dc in next st, FPdc around next 2 sts) across the row until you have 1 stitch remaining. Work 1 dc in the top of the turning chain from the previous row. (31 stitches total).
5. Build the Mask Height: Repeat Rows 2 and 3 alternately until the mask piece measures about 3-3.5 inches high (or your preferred height). You’ll see the waffle texture emerge beautifully! Tip: The side facing you after completing a Row 2 repeat is the ‘right side’ with the defined waffles. End after completing a Row 3 repeat. Do not fasten off yet if adding the border immediately.
6. Add the Border: The mask in the image has a simple, clean Single Crochet (sc) border. Round 1: Ch 1. Turn your work so the right side is facing you. Work sc stitches evenly around the entire outer edge of the mask.
- Work 1 sc in each stitch across the top edge.
- Work approximately 2 sc stitches evenly spaced along the side edge for each row-end (adjust as needed to keep it flat).
- Work 1 sc in each stitch across the bottom edge (the starting chain).
- Work sc stitches evenly up the remaining side edge. Join with a slip stitch (sl st) to the first sc of the round.
- How to Single Crochet (sc): Insert hook into stitch, yo, pull up a loop (2 loops on hook), yo, pull through both loops.
- How to Slip Stitch (sl st): Insert hook, yo, pull directly through the stitch and the loop already on your hook. (Optional Round 2): Ch 1, work 1 sc in each sc around for a slightly thicker border. Join with sl st. Fasten off and weave in this end.
7. Make the Strap
- Chain (ch) a length that will comfortably stretch around the back of your head (approx. 12-14 inches is common, but measure!). Tip: Crochet straps stretch less than knit ones, but still allow a little ease.
- Row 1: Work 1 sc in the 2nd chain from the hook, and in each chain across.
- (Optional Row 2): Ch 1, turn. Work 1 sc in each sc across for a slightly wider/sturdier strap. Fasten off, leaving a long tail (about 8-10 inches) for sewing.
8. Assemble Your Mask:
- Using the tapestry needle and the long yarn tails on the strap, securely sew the ends of the strap to the sides of the sleep mask, positioning them evenly along the border edge. Make sure the strap isn’t twisted.
- Carefully weave in all remaining yarn ends on the wrong side of the mask using the tapestry needle. Trim any excess yarn close to the fabric.
Enjoy Your Handmade Comfort!
There you have it – your very own crocheted sleep mask, mirroring the lovely waffle texture and shape of the one in the picture! Feel the satisfying texture and admire the stitches you formed. Using something you’ve personally made brings a unique kind of joy and relaxation.
We hope this guide helped you successfully fashion your mask. Try experimenting with different yarn colors for future versions! We would be thrilled to see pictures of the wonderful sleep masks you produce – happy hooking and sweet dreams!