
Perfectly Layered Buttermilk Biscuits
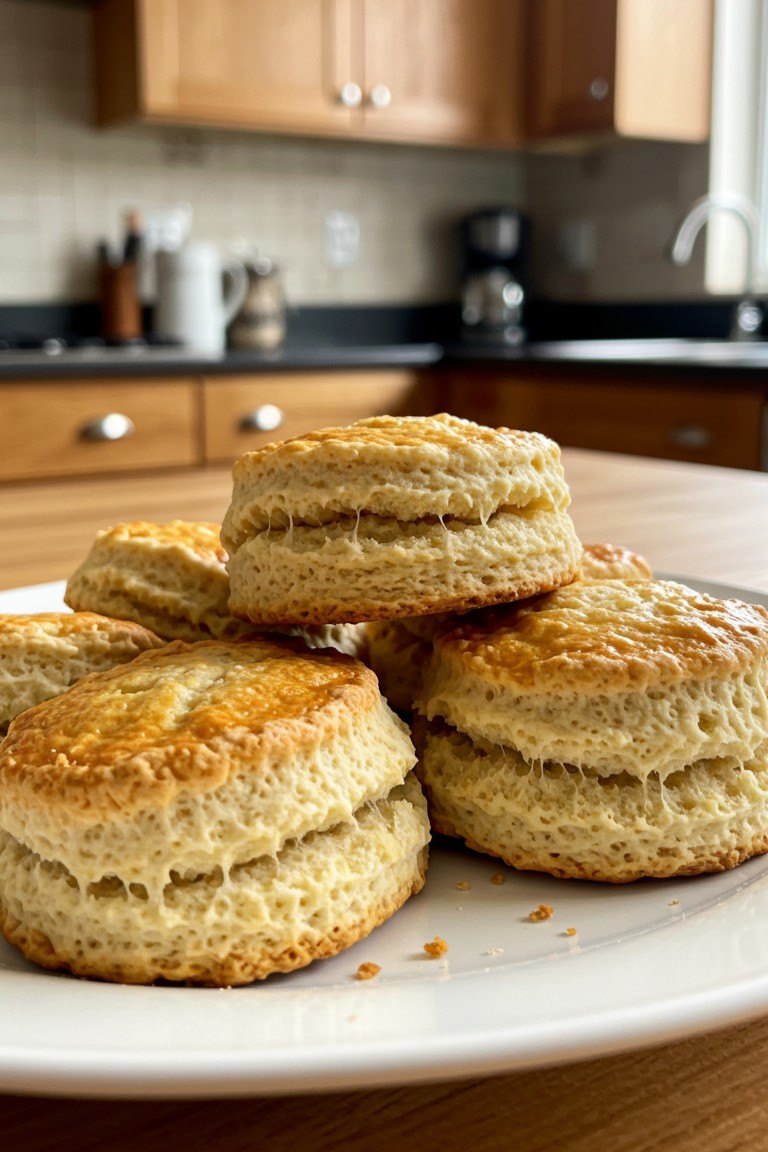
The satisfaction of a warm, freshly baked biscuit is one of life’s simple joys. Picture a biscuit with a beautiful golden top, so tender it pulls apart to show off its soft, steamy layers. This straightforward guide is designed to help any home baker achieve that exact result. By following each step, one can prepare the very same tall, flaky, and comforting biscuits seen in the photograph.
What You’ll Need
Here are the simple tools and ingredients required for this recipe. Keeping the butter and buttermilk very cold is a key secret to success!
Kitchen Tools
- 🥣 Large mixing bowl
- 🍴 Pastry blender (or two knives/your fingertips)
- 📏 Rolling pin (optional, hands work too!)
- 🍪 2.5-inch (6 cm) round biscuit cutter
- 🧑🍳 Baking sheet
- 📜 Parchment paper
- 🖌️ Pastry brush
Ingredients
- 🌾 2 ½ cups (300g) all-purpose flour
- 🥄 1 tablespoon baking powder
- 🥄 ½ teaspoon baking soda
- 🧂 1 teaspoon salt
- 🍚 1 tablespoon granulated sugar
- 🧊 ½ cup (113g) halal unsalted butter, very cold and cut into small cubes
- 🧀 ½ cup (50g) halal sharp cheddar cheese, finely shredded
- 🥛 1 cup (240ml) halal buttermilk, cold
Step-by-Step Guide
This method focuses on building flaky layers, resulting in biscuits that are tall and light, with a savory hint of cheese just like the ones pictured.
Preparing the Foundation
- Begin by preheating the oven to 425°F (220°C). A hot oven helps the biscuits rise quickly. Line a baking sheet with parchment paper to prevent sticking.
- In the large mixing bowl, combine the all-purpose flour, baking powder, baking soda, salt, and sugar. Whisk them together for about 30 seconds. This step is important because it evenly distributes the leavening agents (baking powder and soda), which ensures every biscuit rises beautifully.
Incorporating the Fat and Flavor
- Scatter the small cubes of cold butter over the flour mixture. Now it’s time to cut in the butter. This technique involves breaking down the butter into small, flour-coated pieces. Use a pastry blender, two knives in a crisscross motion, or your fingertips to press and cut the butter into the flour. Keep going until the mixture has the texture of coarse crumbs with some pea-sized pieces of butter still visible. These little pockets of butter will melt in the hot oven, releasing steam that pushes the dough up and forms flaky layers.
- Gently stir the shredded sharp cheddar cheese into the mixture. The cheese adds a wonderful savory flavor and is responsible for the delicate, stringy wisps seen between the layers of the finished biscuits.
Bringing the Dough Together
- Make a well in the center of the flour-butter mixture and pour in all of the cold buttermilk. Use a fork or spatula to mix everything together until a shaggy, slightly sticky dough just begins to form. Be very careful not to overmix. A few dry floury patches are okay. Overworking the dough develops gluten, which would make the biscuits tough instead of tender.
- Turn the dough out onto a lightly floured, clean surface. The dough will look messy, but that’s a good sign! Gently press it together into a 1-inch thick rectangle. Now for the step that gives the biscuits their signature layers: fold one-third of the dough over the center, then fold the opposite third over that, just like folding a letter. This is a simple form of lamination.
- Rotate the folded dough a quarter turn. Gently pat or roll it out into a rectangle again and repeat the letter fold. Do this a total of three times. This process builds up thin, alternating layers of butter and dough, which is the secret to a perfect pull-apart biscuit.
Cutting and Baking to Golden Perfection
- After the final fold, pat the dough out to a uniform thickness of about 1 inch. Dip the biscuit cutter in flour, then press it straight down into the dough with firm pressure. Do not twist the cutter! Twisting the cutter as it’s pressed down or pulled up can seal the edges of the dough, which prevents the biscuits from rising to their full height.
- Place the cut biscuits on the prepared baking sheet with their sides just touching. Huddling them together helps them support one another, encouraging a taller, straighter rise with soft, tender sides.
- For that beautiful, deep golden-brown top seen in the photo, lightly brush the tops of the biscuits with a little extra buttermilk.
- Bake in the hot oven for 12-15 minutes. They are ready when they have risen high and are a lovely, even golden brown across the top.
These biscuits are absolutely best when enjoyed warm, fresh from the oven. They are a wonderful testament to the satisfaction that comes from transforming a few simple ingredients into something truly delicious. Feel free to try this recipe and share the delightful results of your baking adventure.