

Precious Purl Booties
After some invaluable feedback and a deep dive into the details, we are thrilled to present the final, truly definitive guide to making these beautiful booties. This version has been perfected to leave no room for guesswork. Every row is detailed, every step is clear. This is the pattern that will give you a result identical to the photograph.
Let’s begin.
What You’ll Need
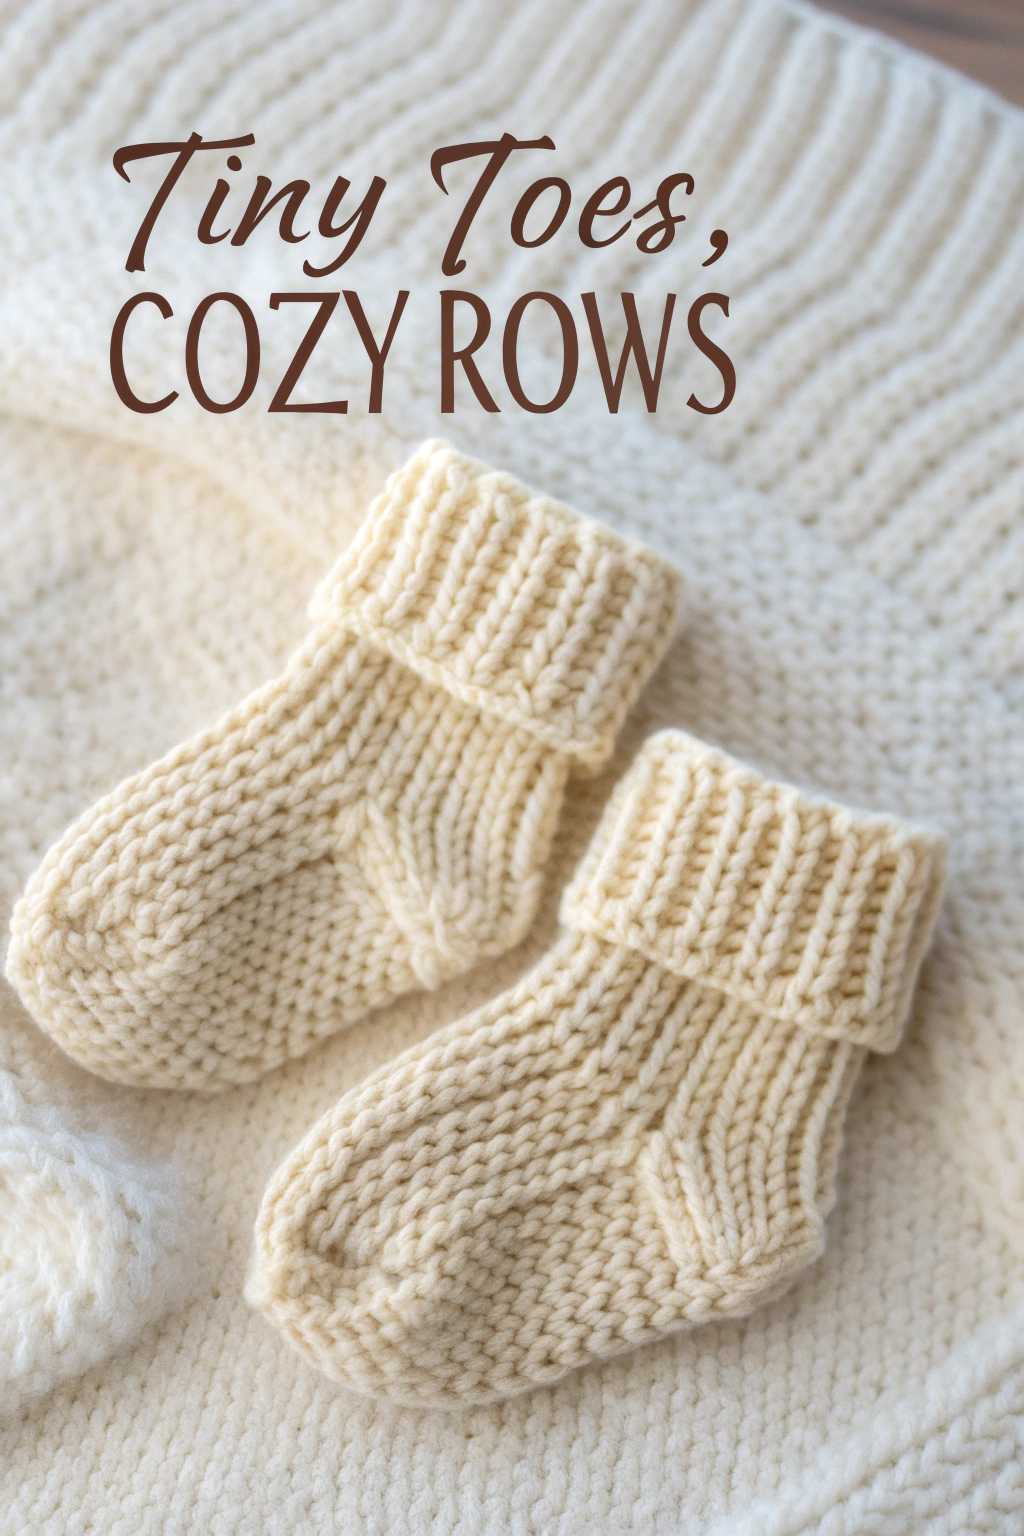
- Yarn: Approximately 60 yards (55 meters) of a heavy worsted or Aran weight yarn. A plump, round, 100% Merino wool is recommended for its softness and stitch definition. The color is a warm, creamy off-white.
- Needles: A set of US size 5 (3.75mm) Double-Pointed Needles (DPNs), or the size needed to obtain gauge.
- Notions: Stitch markers, a tapestry needle, and scissors.
Gauge & Sizing
- Gauge: Approximately 5.5 stitches per inch in stockinette stitch. A dense, firm fabric is essential for the structured look.
- Size: Fits approximately 0-6 months.
The Complete, Unabridged Pattern
The Cuff
- Cast on 28 stitches.
- Distribute the stitches evenly across your DPNs (7 stitches on each of 4 needles). Place a marker for the beginning of the round and join, being careful not to twist.
- Work in 2×2 rib (k2, p2) for 16 rounds. (This creates a foldable cuff of approximately 2.5 inches / 6.5 cm).
The Leg
This is the crucial step to match the photograph.
- Knit 5 rounds on all 28 stitches.
The Heel Flap
Work flat (back and forth) on the first 14 stitches of the round. Leave the other 14 stitches resting on their needles.
- Row 1 (Right Side): (sl1pw, k1) repeat 7 times. Turn your work.
- Row 2 (Wrong Side): sl1pw, p13. Turn.
- Repeat Rows 1 and 2 six more times, for a total of 14 rows. You will end having just completed a Wrong Side row.
Turning the Heel
Continue working back and forth on the 14 heel stitches.
- Row 1 (RS): k8, ssk. Turn.
- Row 2 (WS): sl1pw, p2, p2tog. Turn.
- Row 3 (RS): sl1pw, k3, ssk. Turn.
- Row 4 (WS): sl1pw, p4, p2tog. Turn.
- Row 5 (RS): sl1pw, k5, ssk. Turn.
- Row 6 (WS): sl1pw, p6, p2tog. You now have 8 stitches remaining.
The Gusset
- With the right side facing, knit across the 8 heel stitches.
- Using the same needle, pick up and knit 7 stitches along the chain edge of the heel flap.
- With a new needle, knit the 14 instep stitches.
- With another new needle, pick up and knit 7 stitches along the other side of the heel flap. Knit the first 4 heel stitches onto this needle to center the round. You have 36 stitches total.
- Round 1: Knit.
- Round 2 (Decrease Round): Knit to 3 sts before instep, k2tog, k1. Knit 14 instep sts. k1, ssk, knit to end. (34 sts).
- Round 3: Knit.
- Repeat Rounds 2 & 3 until you are back to 28 stitches.
The Foot & Toe
- Work in stockinette stitch (knit every round) until the foot measures approx. 3 inches (7.5 cm) from the back of the heel.
- Begin Toe Decreases: Arrange your 28 stitches with 7 on each of 4 DPNs.
- Round 1 (Decrease Round): On Needles 1 & 3, knit to last 3 sts, k2tog, k1. On Needles 2 & 4, k1, ssk, knit to end. (24 sts).
- Round 2: Knit.
- Repeat Rounds 1 & 2 until 8 stitches remain.
Finishing
- Cut yarn, leaving an 8-inch tail.
- Graft the final 8 stitches with the Kitchener stitch.
- Weave in all ends. Make the second bootie and admire your flawless work.