
Rich Chocolate Strawberry Dream Cake
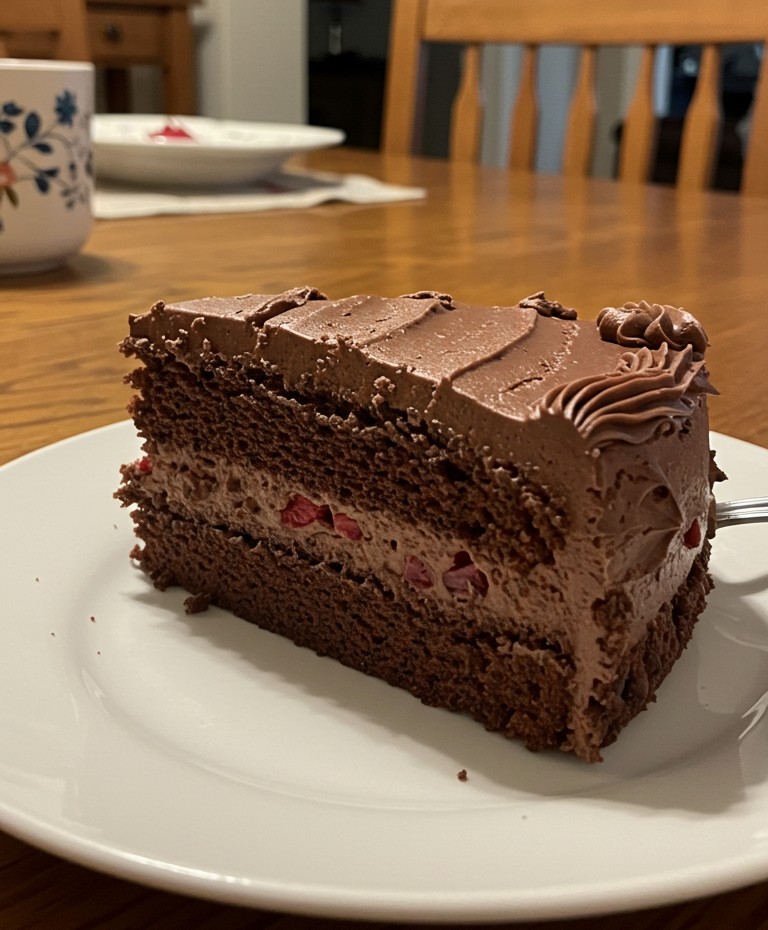
Embarking on the journey of baking a layer cake from scratch offers immense satisfaction. This guide focuses on preparing a stunning Rich Chocolate Strawberry Layer Cake, just like the one pictured. Observe its deep chocolate cake layers, the generous chocolate mousse filling dotted with vibrant strawberries, and the smooth, rich chocolate frosting crowned with an elegant swirl. This walkthrough provides detailed, step-by-step instructions, making the process approachable even for absolute beginners aiming for halal-friendly treats. Get ready to assemble a truly memorable dessert.
Gathering Your Supplies
Success in baking begins with having everything ready. Below are the necessary tools and halal ingredients for this chocolate strawberry cake adventure.
Kitchen Tools
- 🥣 2 x 8-inch Round Cake Pans
- 📄 Parchment Paper
- 🥄 Measuring Cups & Spoons
- ⚖️ Kitchen Scale (Recommended for accuracy)
- 💨 Electric Mixer (Handheld or Stand)
- 🌀 Whisk
- 🧱 Rubber Spatula
- 🌬️ Wire Racks for Cooling
- 🔪 Serrated Knife (for leveling cake, optional)
- 🛠️ Offset Spatula (for frosting)
- 🛍️ Piping Bag
- ⭐ Star Piping Tip (e.g., Wilton 1M)
- 🍲 Large Mixing Bowls (at least 3)
- 🥘 Small Saucepan (if making ganache elements)
Halal Ingredients
- 🌾 1 ¾ cups All-Purpose Flour
- 🟫 ¾ cup Unsweetened Cocoa Powder (good quality for deep flavor)
- ✨ 1 ½ tsp Baking Soda
- 🧂 ¾ tsp Salt
- 🍚 1 ½ cups Granulated Sugar
- 🧈 ½ cup Halal Unsalted Butter, softened to room temperature
- 🥚 2 Large Eggs, room temperature
- 🥛 1 cup Halal Buttermilk (or milk + 1 tsp vinegar, let sit 5 mins)
- 🌡️ 1 cup Hot Water or Hot Brewed Coffee (enhances chocolate flavor)
- 🌱 2 tsp alcohol free Vanilla Extract
- 🍫 8 oz Halal Semi-Sweet Chocolate, chopped (for frosting)
- 🍦 1 cup Halal Heavy Cream (for frosting/filling)
- 🍚 ½ cup Powdered Sugar (for frosting/filling)
- 🍓 1 cup Fresh Strawberries, hulled and chopped
Note: Bringing butter and eggs to room temperature is important. Cold ingredients don’t combine smoothly, which can affect the cake’s final texture. Simply leave them out on the counter for about 30-60 minutes before starting.
Preparing the Chocolate Cake Layers
The foundation of this dessert is its moist, dark chocolate cake. Precision here yields the best results.
- Preheat and Prepare: Set the oven to 350°F (175°C). Grease the two 8-inch round cake pans thoroughly with butter or shortening. Line the bottom of each pan with a circle of parchment paper. This prevents sticking and ensures the cakes come out cleanly. Dust the insides lightly with flour, tapping out any excess.
- Combine Dry Ingredients: In a large bowl, whisk together the flour, cocoa powder, baking soda, and salt. Whisking helps distribute everything evenly and removes lumps.
- Mix Wet Ingredients: In a separate large bowl, using an electric mixer, beat the softened butter and granulated sugar together on medium speed for about 2-3 minutes. This process, called creaming, incorporates air and makes the cake lighter. The mixture should become pale and fluffy.
- Add Eggs: Beat in the room-temperature eggs one at a time, mixing well after each addition. Then, mix in the vanilla extract.
- Alternate Wet and Dry: With the mixer on low speed, add about one-third of the dry ingredient mixture to the butter mixture, followed by half of the buttermilk. Mix until just combined. Repeat, adding another third of the dry ingredients, the remaining buttermilk, and finally the last third of the dry ingredients. Do not overmix at this stage; mix only until no large streaks of flour remain. Overmixing develops gluten, which can make the cake tough.
- Incorporate Hot Liquid: Carefully pour the hot water (or coffee) into the batter and mix on low speed until smooth. The batter will be thin – this is normal and helps produce a moist cake.
- Bake: Divide the batter evenly between the two prepared cake pans. Bake for 30-35 minutes, or until a wooden toothpick inserted into the center of each cake comes out clean.
- Cool Completely: Let the cakes cool in their pans on wire racks for about 15 minutes. Then, carefully invert them onto the wire racks, remove the pans and parchment paper, and let them cool completely before proceeding. This can take 1-2 hours. Attempting to frost a warm cake will cause the frosting to melt.
Whipping Up the Chocolate Strawberry Filling
This layer provides creamy texture and bursts of strawberry flavor, visible between the dark cake layers in the image.
- Prepare the Base: A simple chocolate mousse or stabilized whipped cream works well. For a quick version, whip ¾ cup of the heavy cream with ¼ cup of the powdered sugar and 2 tablespoons of cocoa powder until stiff peaks form. Stiff peaks mean that when you lift the beaters out of the cream, the peaks hold their shape and point straight up without curling over. Be careful not to overwhip, or it can turn grainy.
- Fold in Strawberries: Gently fold the hulled, chopped strawberries into the chocolate cream mixture using a rubber spatula. Folding is a technique where you gently lift the mixture from the bottom and fold it over the top, rotating the bowl, to combine ingredients without deflating the whipped cream.
Mastering the Chocolate Frosting
The cake features a rich, smooth chocolate frosting covering the exterior, complete with a decorative swirl.
- Melt Chocolate: Gently melt the chopped semi-sweet chocolate. This can be done in a double boiler (a heatproof bowl set over a saucepan of simmering water, ensuring the bowl doesn’t touch the water) or in the microwave in short bursts (30 seconds), stirring between each burst, until smooth. Let the melted chocolate cool slightly for about 5-10 minutes so it doesn’t melt the other ingredients.
- Combine Frosting: In a bowl, beat the remaining ¼ cup heavy cream with the remaining ¼ cup powdered sugar until soft peaks form. Gradually beat in the slightly cooled melted chocolate until fully incorporated and the frosting is smooth and spreadable. If it seems too thick, a tiny splash more cream can be added. If too thin, chilling it briefly can help it firm up.
Assembling Your Masterpiece
Bringing all the elements together transforms them into the beautiful cake shown.
- Level the Cakes (Optional but Recommended): If the cake tops are domed, use a long serrated knife to carefully slice off the domes, making the tops flat. This ensures the layers sit evenly.
- First Layer: Place one completely cooled cake layer onto the serving plate.
- Add Filling: Spread the chocolate strawberry filling evenly over the top of the first cake layer, right up to the edges. The distinct layer of filling with visible chopped strawberries seen in the photograph is achieved here.
- Second Layer: Carefully place the second cake layer on top of the filling.
- Apply Crumb Coat: Using an offset spatula, apply a thin layer of the chocolate frosting all over the top and sides of the cake. This is called a crumb coat. Its purpose is to trap any loose crumbs, preventing them from mixing into the final frosting layer and ensuring a smooth finish like the one pictured. Chill the cake in the refrigerator for about 20-30 minutes to set the crumb coat.
- Final Frosting: Once the crumb coat is firm, apply the remaining chocolate frosting generously over the top and sides of the cake. Use the offset spatula to smooth the top and sides.
- Decorate: Transfer a small amount of the remaining frosting to a piping bag fitted with a star tip. Pipe a decorative swirl or rosette onto one corner of the cake top, replicating the detail in the image.
Serving Suggestions
This Rich Chocolate Strawberry Dream Cake stands beautifully on its own. It pairs wonderfully with a cup of coffee or tea, perfect for an afternoon treat or dessert after a meal. The richness of the chocolate and the bright sweetness of the strawberries offer a delightful contrast.
Preparing a layer cake requires patience, but the process is deeply rewarding. Taking the time to follow each step carefully results in a delicious, homemade dessert that is sure to impress. Feel encouraged to embark on this baking project and enjoy the delightful outcome – a slice of pure chocolate strawberry bliss. Consider sharing photos of the finished cake; witnessing others’ baking success is always inspiring!