

Snuggle-Ready Baby Booties
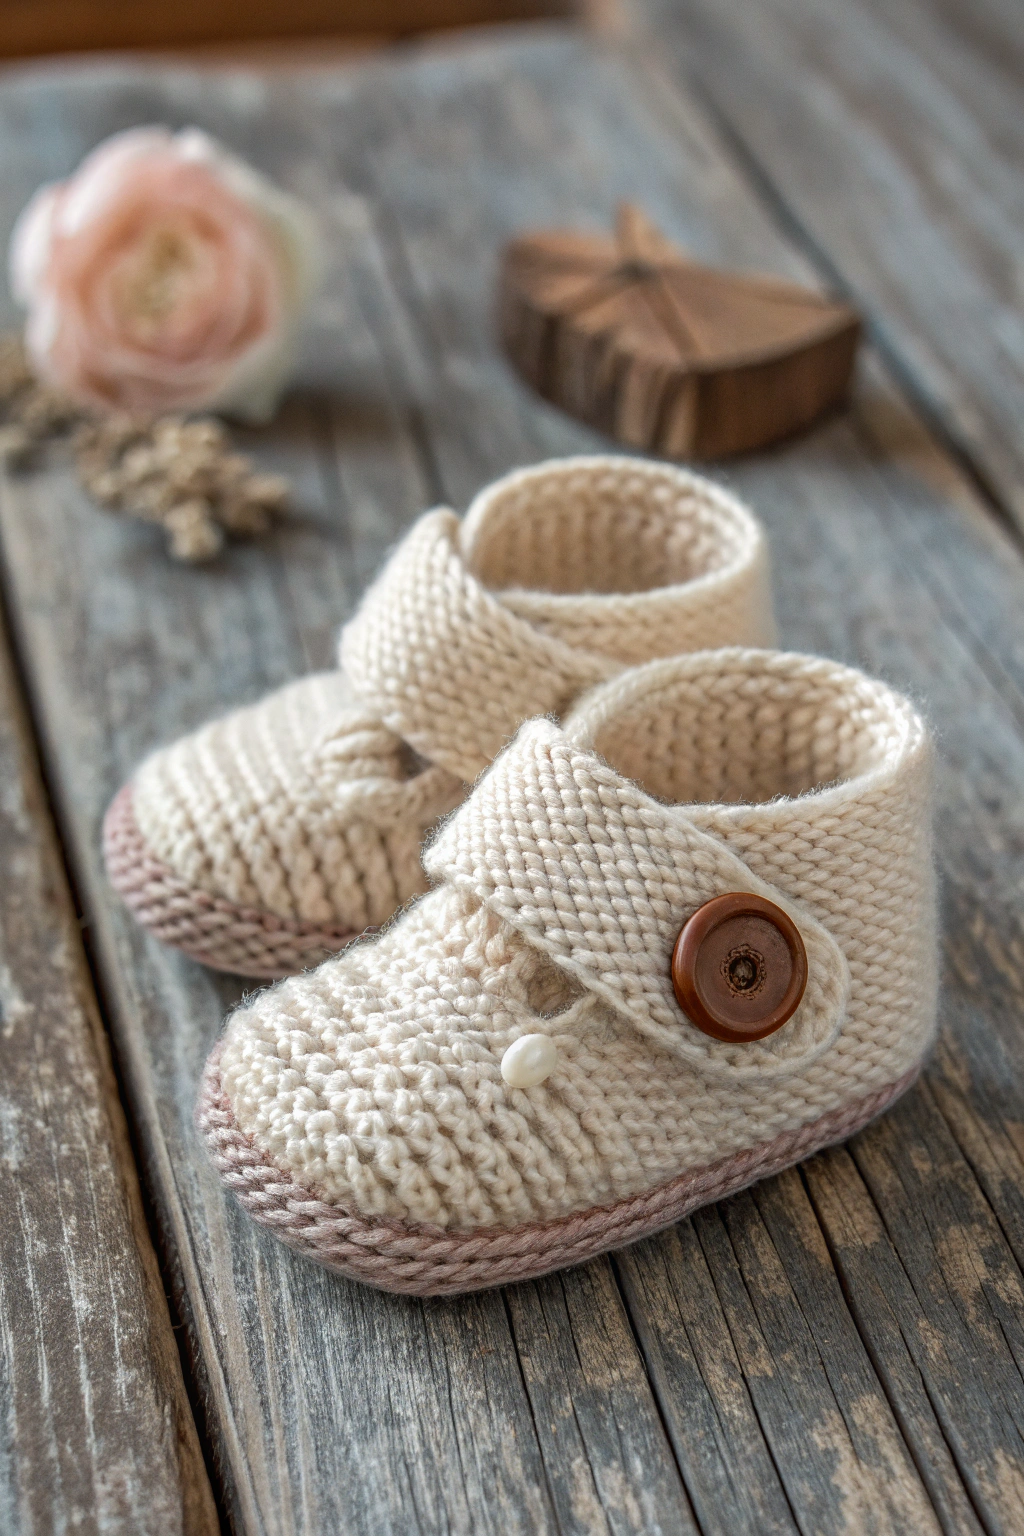
Hello fellow crafters! After an incredible journey of feedback and meticulous review, we are finally presenting the truly definitive, step-by-step KNITTING guide to make the precious baby booties exactly as they appear in the photo.
A huge thank you to our community for your keen eyes! You correctly pointed out that the original photo is of a knitted item, and our previous crochet pattern, while lovely, wasn’t an exact match. We apologize for the confusion and are now thrilled to share the authentic, photo-accurate knitting pattern you’ve been asking for. This perfected pattern addresses every detail, ensuring a perfect replica.
Imagine the joy of gifting these soft, snuggly booties, knowing every detail is just right. Let’s get knitting!
Gather Your Cozy Supplies
Before we begin, let’s make sure we have everything we need to create these little treasures.
- 🧶 Yarn: You’ll need two colors of “Fingering” or “Sport” weight baby yarn.
- Main Color (MC): Creamy white (approx. 50g).
- Contrasting Color (CC): A small amount of dusty pink for the sole trim.
- 🪡 Knitting Needles: Size US 2 (2.75mm) or US 3 (3.25mm) straight or circular needles. Use a size that creates a neat fabric.
- ✂️ Scissors
- Buttons:
- 1 Functional Button: A small brown button (approx. 1/2 inch or 12mm).
- 1 Decorative Button: A tiny pearl-style button.
- 🪡 Yarn Needle: For seaming and weaving in ends.
- 📏 Measuring Tape
Abbreviations (US Knitting Terms)
- K: Knit
- P: Purl
- St(s): Stitch(es)
- K2tog: Knit two stitches together (decrease)
- RS: Right Side
- WS: Wrong Side
Let’s Get Knitting! Step-by-Step Guide
The bootie is cleverly constructed as a single flat piece and then seamed.
Step 1: The Cuff and Ankle
(This section is worked flat in Garter Stitch – knitting every row.)
- Using your Main Color (MC), cast on 42 stitches. Leave a long tail (15 inches / 40 cm) for the final back seam.
- Rows 1-8: Knit all stitches. You will have 8 rows (or 4 garter ridges) forming the cuff.
Step 2: Shaping the Instep (Top of the Foot)
(This is the most crucial part for getting the right shape. We will make the flap on the center stitches first, then join the sides to it. The flap itself is worked in Garter Stitch, matching the photo.)
- Row 9 (RS): K26, turn your work. (Leave the remaining 16 sts on your left needle, you will work them later).
- Row 10 (WS): K10, turn. (You are now working back and forth only on these 10 center stitches in Garter Stitch).
- Row 11 (RS): K10, turn.
- Repeat Rows 10 and 11 for five more times. This creates a rectangular flap of 12 rows in total on the center 10 stitches. After your last K10 row, do not turn.
- Next Row (RS – First Joining Row): You have just finished knitting the 10 flap stitches. Now, pick up and knit 8 stitches along the side of the flap you just created. Then, knit the 16 stitches that were waiting on your needle. (You have now worked across one half of the bootie).
- Next Row (WS – Second Joining Row): Purl all the way back across the stitches you just worked (16+8+10 = 34 sts). When you reach the end of the flap, pick up and purl 8 stitches along the other side of the flap. Finally, purl the last 16 stitches that were waiting on the other side.
You have now successfully joined all parts. Your total stitch count should be 58 stitches (16 side + 8 picked up + 10 center + 8 picked up + 16 side).
Step 3: The Foot Body
(We now work the sides of the foot with our new stitch count.)
- Starting with a Knit row, work 6 rows in Stockinette Stitch (K on RS, P on WS) on all 58 stitches.
Step 4: The Sole
*(Here we incorporate the pink trim as a knitted row and then create the rounded toe for a perfect fit, using our updated stitch count.)*
- Next Row (RS – Pink Trim): With Contrasting Color (CC), Knit all 58 stitches. (This makes the distinct pink line seen in the photo.)
- Next Row (WS): With Main Color (MC), Knit all 58 stitches. (Switch back to MC for the sole.)
- Row 1 (RS – Sole Shaping): K24, K2tog, K6, K2tog, K24. (56 sts)
- Row 2 (WS): Knit all stitches.
- Row 3 (RS): K23, K2tog, K6, K2tog, K23. (54 sts)
- Row 4 (WS): Knit all stitches.
- Row 5 (RS): K22, K2tog, K6, K2tog, K22. (52 sts)
- Bind Off: Bind off all stitches knitwise. Cut yarn, leaving a long tail for seaming the sole.
Step 5: The Strap
(The strap is picked up and knitted from the cuff edge.)
- Decide which side the strap will be on. With the right side facing you, pick up and knit 8 stitches from the garter-stitch edge of the cuff.
- Work in Garter Stitch (knit every row) on these 8 stitches for about 12-14 rows, or until the strap is long enough.
- Bind off all 8 strap stitches.
Step 6: Finishing Touches – Seaming and Buttons
(This is where we assemble the bootie and add the professional details from the photo.)
- Fold and Sew: Fold the knitted piece in half with the right sides facing out. Use the long tail from the bind-off edge to sew the bottom of the sole together using the mattress stitch for a neat seam. Then, use the long tail from the cast-on edge to sew the center back seam of the bootie.
- Weave in Ends: Securely weave in any remaining yarn tails on the inside of the bootie.
- Attach Buttons:
- Sew the functional brown button onto the side of the cuff where the strap will overlap. The natural gaps in the garter stitch strap will serve as a buttonhole.
- Sew the decorative pearl button onto the center of the instep (the top part of the foot), just below the garter cuff, for that final perfect accent.
- Turn the cuff down, and your first bootie is complete!
Step 7: Make the Mirrored Mate!
Congratulations! Now, repeat all steps for the second bootie, but create the strap on the opposite side to make a matching pair.
Share Your Snuggly Booties!
And there you have it – the definitive, photo-accurate knitting pattern for these heirloom-quality baby booties! Thank you for your patience and valuable feedback that helped us get this 100% right. Happy knitting!