

Spring Flower Crochet Booties
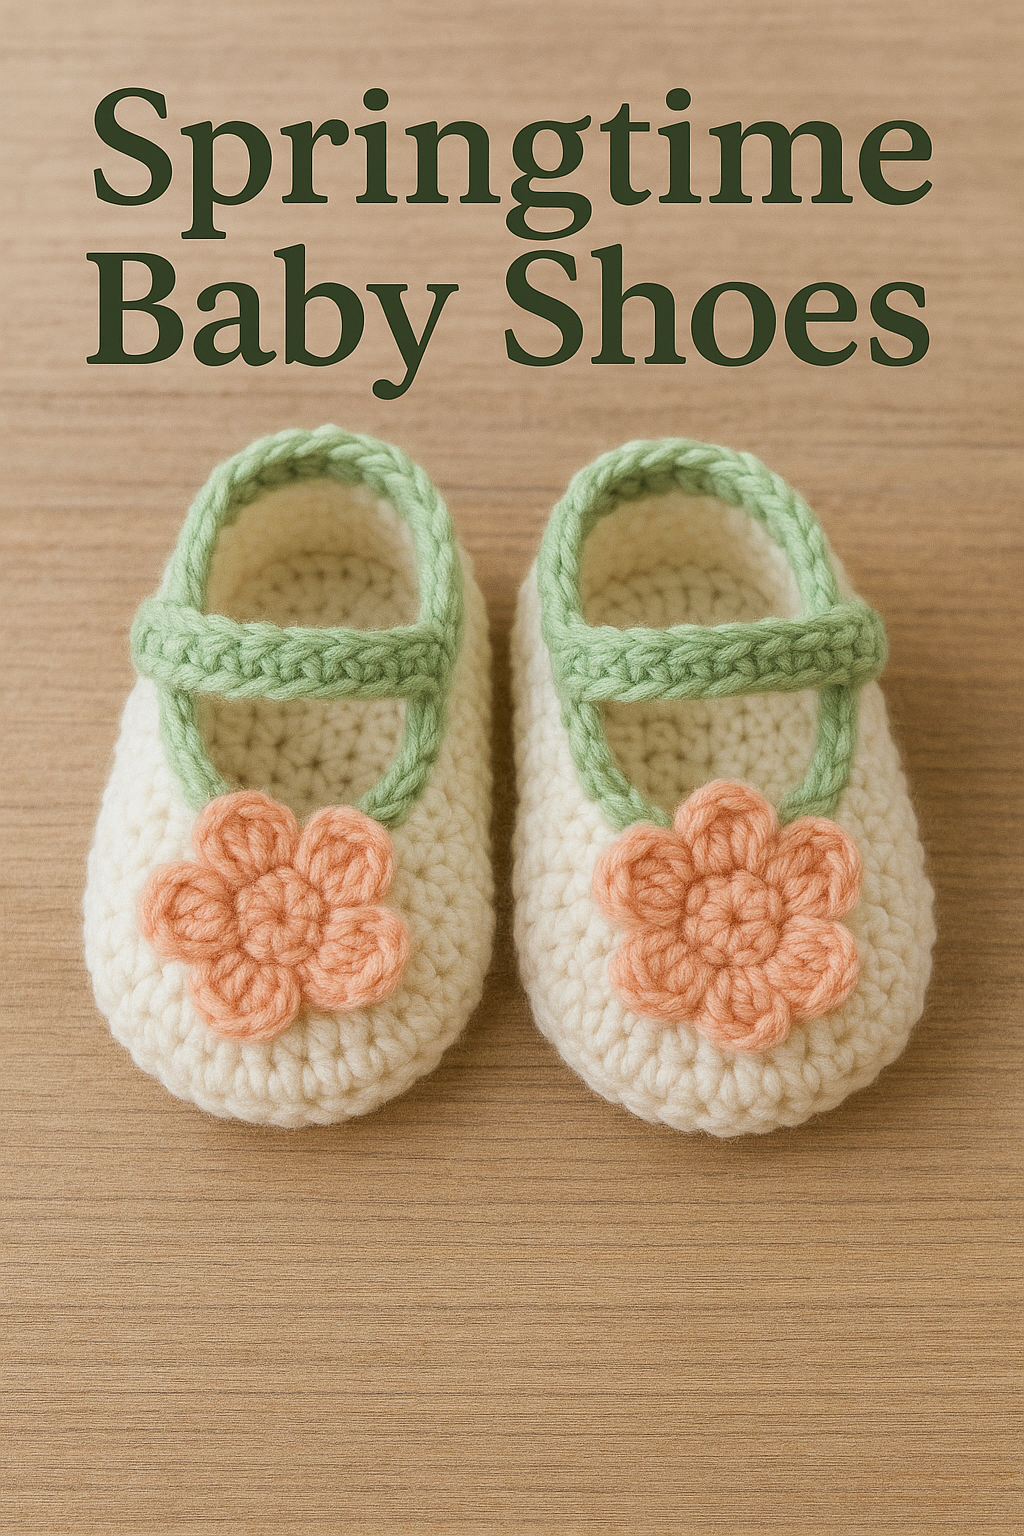
Aren’t these Springtime Baby Shoes from the image just the sweetest things you’ve ever seen? Imagine the joy of gifting a pair of these adorable, handmade booties, or seeing them on a precious little one. The off-white body of the shoe provides a soft canvas, while the light green strap and trim add a fresh touch of spring. And that charming, six-petaled peach flower on the toe? Simply delightful!
If you’re new to crochet, don’t you worry one bit! This guide is designed with absolute beginners in mind. We’ll walk through every step together, explaining all the basics, so you can confidently fashion your very own pair of these darling shoes. The dense, neat crochet work you see in the image is achieved with simple stitches, and soon you’ll be making them too!
Gather Your Supplies
Before we begin our journey into making these lovely booties, let’s get our tools and materials ready. For baby items, soft yarn is key!
- 🧶 Yarn: DK weight yarn (Category 3)
- Off-White (Main Color – approx. 50g)
- Light Green (Contrast Color – approx. 20g)
- Peach (Flower Color – small amount)
- 🪡 Crochet Hook: 3.5mm (E-4) crochet hook (or size to obtain a nice, firm fabric with your yarn)
- ✂️ Scissors: For snipping yarn
- 🧵 Tapestry Needle: For weaving in ends and sewing the flower
- 🌟 Stitch Markers: (Optional, but super helpful for beginners!)
Understanding the Basics (For Absolute Beginners!)
Crochet might look like magic, but it’s just a series of simple loops and knots! Let’s go over the foundational stitches and techniques we’ll use.
- Slip Knot: This is how you get the yarn onto your hook to start. Make a loop with your yarn, then pull another loop through it and tighten it onto your hook. The knot should be snug but able to slide.
- Chain Stitch (ch): This is the most basic crochet stitch and forms the foundation for many projects. Yarn over your hook (wrap the yarn from back to front over the hook) and pull that yarn through the loop already on your hook. That’s one chain stitch! We often make a series of these, called a foundation chain.
- Single Crochet (sc): This is a short, dense stitch, perfect for our booties.
- Insert your hook into the indicated stitch or space.
- Yarn over and pull up a loop (you’ll have two loops on your hook).
- Yarn over again and pull through both loops on your hook. That’s one single crochet!
- Slip Stitch (sl st): This stitch is very flat and is used to join rounds, finish edges, or move your yarn across stitches without adding height.
- Insert your hook into the indicated stitch.
- Yarn over and pull the yarn through the stitch and through the loop already on your hook in one motion.
- Double Crochet (dc): This stitch is taller than a single crochet and will be used for our pretty flower petals.
- Yarn over your hook.
- Insert your hook into the indicated stitch or space.
- Yarn over and pull up a loop (you’ll have three loops on your hook).
- Yarn over and pull through the first two loops on your hook (two loops remaining).
- Yarn over again and pull through the remaining two loops on your hook. That’s one double crochet!
- Working in Rounds: For the main part of the shoe, we’ll be working in a spiral or joined rounds, meaning we work around and around to build up the shape. When we join rounds, we’ll use a slip stitch to connect the end of the round to the beginning.
- Fastening Off: When you’re done with a piece of yarn, cut the yarn leaving a 6-inch tail, then pull the tail through the last loop on your hook and tighten to secure it.
Don’t fret if these seem like a lot at first. Take your time, practice each one, and you’ll get the hang of it!
Let’s Make the Shoes! (Make 2)
We’ll be making two identical shoes. The instructions below are for one shoe; simply repeat them for the second. These instructions will yield a shoe suitable for approximately a 0-3 month old baby.
Part 1: The Sole (Off-White Yarn)
The sole is worked in joined rounds, forming an oval.
Round 1:
- Start with a slip knot. Chain 11 (ch 11).
- Work 2 single crochet (sc) stitches into the 2nd chain from your hook (this is your first increase).
- Sc in each of the next 8 chains.
- Work 4 sc into the last chain (this shapes the toe end).
- Now, working along the other side of the foundation chain: sc in each of the next 8 chains (working into the unused loops of the foundation chain).
- Work 2 sc into the very first chain space where you put your initial 2 sc (this completes the heel end shaping).
- Slip stitch (sl st) to the first sc of the round to join. (You should have 24 stitches).
Round 2:
- Chain 1 (ch 1 – this does not count as a stitch here or throughout the sole/upper pattern).
- Work 2 sc in each of the first 2 stitches.
- Sc in each of the next 8 stitches.
- Work 2 sc in each of the next 4 stitches.
- Sc in each of the next 8 stitches.
- Work 2 sc in each of the last 2 stitches.
- Sl st to the first sc to join. (32 stitches).
Round 3:
- Ch 1.
- (Sc in next st, 2 sc in next st) repeat twice.
- Sc in each of the next 8 stitches.
- (Sc in next st, 2 sc in next st) repeat 4 times.
- Sc in each of the next 8 stitches.
- (Sc in next st, 2 sc in next st) repeat twice.
- Sl st to the first sc to join. (40 stitches).
Fasten off, leaving a short tail to weave in later. You’ve just completed one sole! Set it aside and make a second one exactly the same way.
Part 2: The Upper Shoe (Off-White Yarn)
Now we build up the sides of the shoe.
Round 1 (Joining to Sole):
- With the right side of the sole facing you (the smoother side), join your off-white yarn with a sl st to the center back stitch of the sole.
- Ch 1 (does not count as a stitch).
- Working in the back loops only for this round, sc in each stitch around the sole.
- Sl st to the first sc to join. (40 stitches). Working in the back loops only helps the side of the shoe stand up nicely from the sole.
Rounds 2-4:
- Ch 1.
- Sc in each stitch around, working through both loops now.
- Sl st to the first sc to join. (40 stitches for each round).
Now we’ll start shaping the toe. Round 5 (Toe Shaping):
- Ch 1.
- Sc in the first 12 stitches.
- Now, we’ll make decreases. A single crochet decrease (sc2tog) is worked as follows: Insert hook into next stitch, yarn over, pull up a loop. Insert hook into next stitch, yarn over, pull up a loop (3 loops on hook). Yarn over, pull through all 3 loops. That’s one decrease.
- Work (sc2tog, sc in next st) 5 times. This will gather the toe.
- Sc in the remaining 13 stitches.
- Sl st to the first sc to join. (35 stitches).
Round 6 (More Toe Shaping):
- Ch 1.
- Sc in the first 11 stitches.
- Work (sc2tog) 6 times.
- Sc in the remaining 12 stitches.
- Sl st to the first sc to join. (29 stitches).
Fasten off and weave in the end. One shoe upper is complete!
Part 3: The Strap (Light Green Yarn – Make 2 per shoe, or 1 wider strap)
The image shows a strap that looks like it’s attached at both sides of the opening. For simplicity for beginners, we can make a single strap that goes across. The strap is formed by working rows of single crochet.
- With light green yarn, ch 17 (or adjust length as needed to fit across the shoe opening comfortably).
- Starting in the 2nd ch from hook, sc in each ch across. (16 sc).
- Ch 1, turn. Sc in each st across. (16 sc).
- Repeat step 3 one more time for a strap that is 3 rows wide. This 3-row width is consistent with the strap visible in the image. If you prefer an even slightly wider strap, you might add another row or two. Fasten off, leaving long tails on both ends for sewing.
Part 4: The Edging (Light Green Yarn)
This neat light green trim finishes the shoe opening beautifully.
- Join light green yarn with a sl st at the back seam of the shoe opening.
- Ch 1.
- Evenly sc around the entire opening of the shoe. Try to place one sc in the end of each row around the opening.
- Sl st to the first sc to join. Fasten off and weave in ends.
Part 5: The Flower (Peach Yarn – Make 1 per shoe)
This sweet six-petaled peach flower adds the perfect finishing touch.
- With peach yarn, make a slip knot and ch 4. Sl st to the first ch to form a ring. Alternatively, you can start with a magic ring if you know how.
- Petal 1: (Ch 2 (counts as part of the first petal’s height), work 2 double crochet (dc) into the ring, ch 2, sl st into the ring). That’s one petal!
- Petals 2-6: Repeat the sequence (ch 2, 2 dc into the ring, ch 2, sl st into the ring) five more times. You will have six petals.
- After the last sl st for the 6th petal, fasten off, leaving a long tail for sewing. Gently pull the starting tail (if you used the ch-4 ring method) to close the center of the flower a bit. Weave in this starting tail on the back of the flower.
Assembling Your Booties
Now for the fun part – putting it all together!
- Attach the Strap: Position the green strap across the instep of the shoe, referring to the image for placement. It sits just below the top edge of the shoe’s opening. Use the long tails you left on the strap and your tapestry needle to securely sew each end of the strap to the inside edges of the shoe opening.
- Attach the Flower: Using the long tail from the peach flower and your tapestry needle, sew the flower securely onto the toe area of each shoe, as seen in the image. Make sure it’s centered and neat.
- Weave in All Ends: Carefully weave in any remaining yarn tails on the inside of the shoes using your tapestry needle. This makes your work look professional and ensures nothing unravels.
Repeat all sections for the second shoe.
Tips for Sweet Success
- Count Your Stitches: Especially as a beginner, it’s a good idea to count your stitches at the end of each round. This helps catch any mistakes early on.
- Stitch Markers are Friends: Use a stitch marker in the first stitch of each round. This makes it easy to see where the round begins and ends, especially when working in joined rounds.
- Even Tension: Try to pull your yarn with consistent tension as you work. This means not too tight and not too loose. It takes practice, but it makes a big difference in how even your stitches look. If your fabric is too stiff, try a slightly larger hook. If it’s too loose and holey, try a slightly smaller hook.
- Don’t Be Afraid to Undo: If you make a mistake, it’s okay! Gently pull out your stitches (this is called ‘frogging’ because you ‘rip-it, rip-it’) back to where the error was and try again. It’s all part of the learning process.
Share Your Beautiful Work!
And there you have it – a pair of utterly charming Springtime Baby Shoes, fashioned by your own two hands! Imagine the pride and joy when you see these little booties. There’s something so special about handmade items, filled with love and care.
We would be absolutely thrilled to see the booties you’ve brought into being! Please do share photos of your finished pieces. Happy crocheting, and enjoy every stitch of your journey!