
Genius Hack: Catch Drill Dust with a Sticky Note!
Hanging a new picture frame or putting up a shelf should be a moment of productive satisfaction. But then the power drill comes out, and with it, that pesky cloud of grit and dust—the sworn nemesis of a clean finish. It settles on floors, coats furniture, and turns a simple task into a two-part job: installation and cleanup.
But what if the solution to this mess wasn’t an expensive gadget or a clumsy vacuum attachment? What if it was something you probably have on your desk right now? Enter one of the most brilliantly simple home improvement hacks: using a humble sticky note to create a perfect, self-adhesive dust catcher. It’s a testament to the idea that the most innovative solutions are often the simplest.
The Step-by-Step Guide to a Dust-Free Wall
Achieving a perfectly clean drilling experience is just a few simple moves away. Following these steps ensures a flawless execution every time.
- Select Your Tool: A standard 3×3 inch (or 7.6×7.6 cm) sticky note is perfect for most small-to-medium drilling jobs. The adhesive is usually more than enough to hold the weight of the resulting dust.
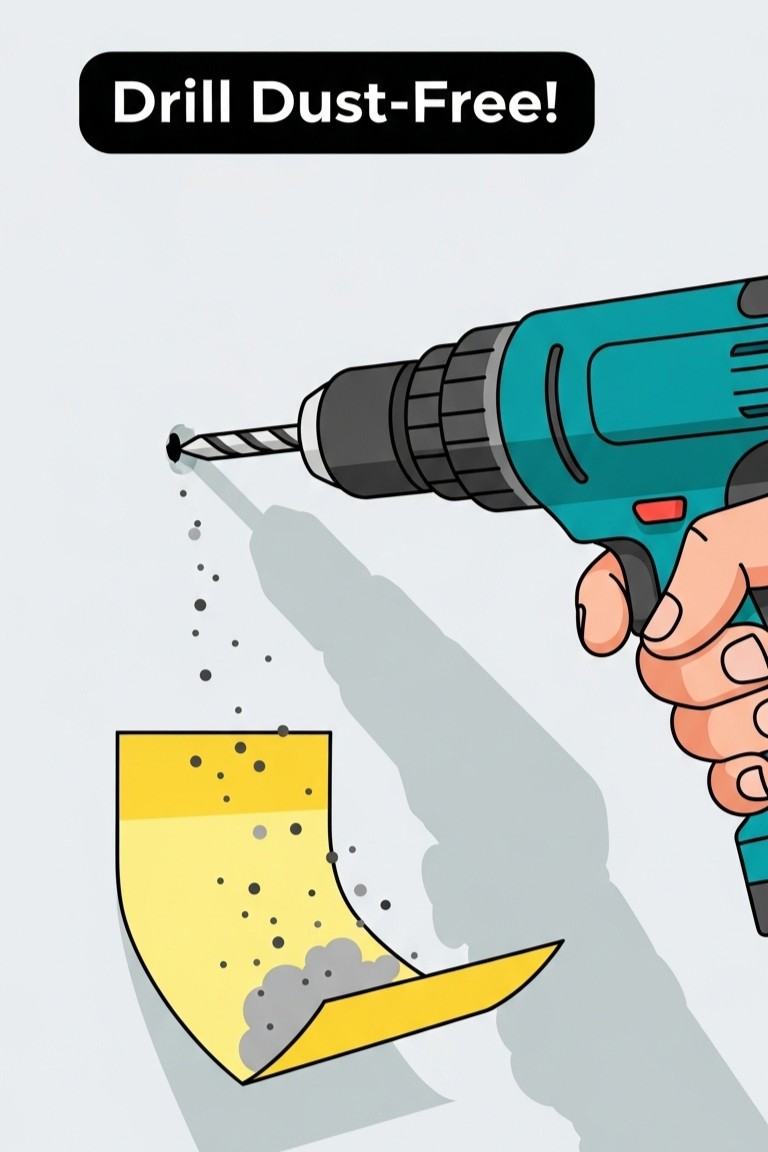
- The Perfect Fold: This is the crucial step where the magic happens. Take the sticky note and fold it at a 90-degree angle near the middle, creating an “L” shape. The bottom portion should now point outwards from the wall, forming a small shelf. The top portion, with the adhesive strip on its back, will remain flat to stick to the wall.
- Positioning is Key: Identify the spot on the wall that needs to be drilled. Take the folded sticky note and position it so the top edge of the shelf is just a centimeter or two directly below the mark. Firmly press the adhesive part of the note against the wall to ensure it has a good, secure hold.
- Drill with Confidence: With the sticky note shelf in place, proceed with drilling as usual. You’ll see the dust, which would normally cascade down the wall, fall directly onto the paper shelf. It’s captured instantly, with no mess and no fuss.
- The Clean Disposal: Once the drilling is finished, the disposal is just as elegant. Carefully peel the sticky note from the wall, making sure to keep it level. The note, now containing all the debris, can be folded over on itself to seal the dust inside. From there, it goes straight into the trash. Absolutely no post-drilling cleanup required.
Pro-Tips for Perfect Execution
While the basic method is nearly foolproof, a few extra tips can help you tackle different situations and elevate this hack from great to legendary.
- For Bigger Jobs: If you’re using a larger drill bit that will produce more debris, simply opt for a larger sticky note. A 4×6 inch note provides a much wider and deeper shelf for extra security.
- The Envelope Alternative: For a truly heavy-duty job, like drilling into brick or concrete, an envelope can be used instead. Tape the envelope to the wall just below the drill site, leaving its flap open to catch the heavier debris.
- Check the Surface: On delicate surfaces like wallpaper or freshly painted walls, it’s wise to first test the sticky note’s adhesive in an inconspicuous area to ensure it peels away cleanly without causing damage.
- A Little Reinforcement: On highly textured or uneven walls where the adhesive might not get a perfect grip, a small piece of painter’s tape over the adhered part of the note can provide extra support and peace of mind.
The Joy of a Clean Finish
There is a profound satisfaction that comes from completing a home project without the frustrating cleanup that usually follows. This sticky note hack does more than just prevent a mess; it protects that feeling of accomplishment, allowing you to move straight from the act of improvement to the act of enjoyment.
It’s a small change in process that yields a big change in experience. It proves that the best solutions aren’t always the most expensive or complicated, but are often born from looking at everyday objects in a new light. Here’s to smarter, more joyful home projects, one sticky note at a time.