
Sunny Strawberry Tart Delight
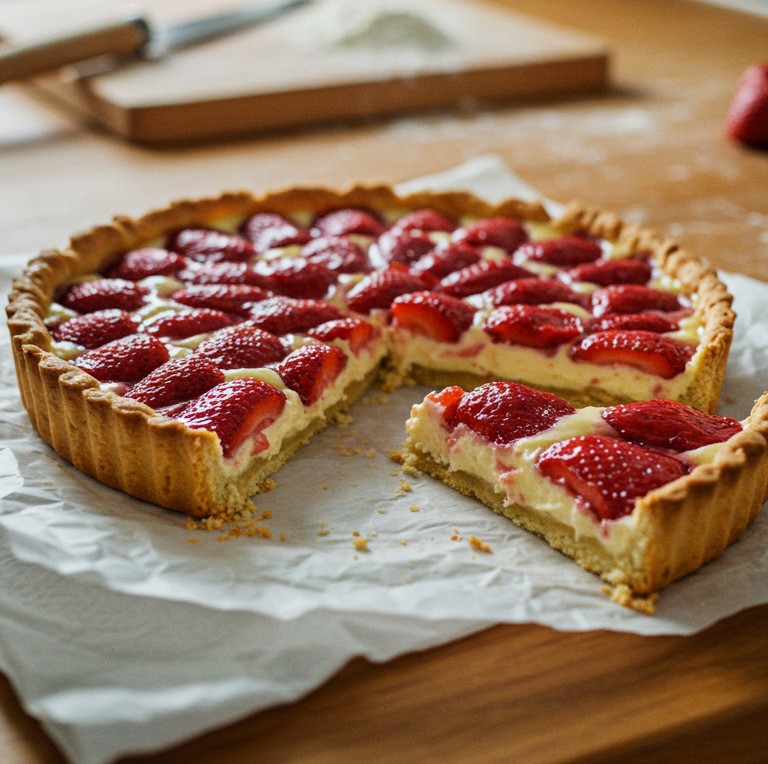
This beautiful Strawberry Custard Tart presents a stunning combination of textures and flavours. A buttery, golden pastry shell holds a smooth, luscious custard, all crowned with vibrant, fresh strawberries. The image showcases this perfectly: the crisp, fluted edge of the tart, the pale creaminess of the filling peeking between the berries, and the jewel-like shine of the halved strawberries arranged meticulously. Preparing this dessert offers a deeply satisfying experience, resulting in a truly impressive sweet treat suitable for any occasion. This guide walks beginners through preparing this exact tart, ensuring all steps are clear and achievable.
Halal Ingredients You’ll Need
- 🧈 For the Pastry (Pâte Sablée):
- 250g Plain Flour (All-Purpose)
- 125g Cold Unsalted Butter (Halal), cut into small cubes
- 75g Icing Sugar (Powdered Sugar)
- 🥚 1 Large Egg Yolk (Halal)
- 🤏 Pinch of Salt
- 💧 2-3 tbsp Ice Cold Water
- 🥛 For the Custard Filling (Crème Pâtissière):
- 500ml Whole Milk (Halal)
- 🍦 1 Vanilla Pod or 1 tsp Halal Vanilla Extract
- 🥚 4 Large Egg Yolks (Halal)
- 🍚 100g Caster Sugar (Fine Sugar)
- 🌽 40g Cornflour (Cornstarch)
- 🧈 25g Unsalted Butter (Halal), softened
- 🍓 For the Topping:
- 500g Fresh Strawberries, hulled
- 🍑 2 tbsp Apricot Jam (Halal), optional for glaze
- 💧 1 tbsp Water, optional for glaze
Kitchen Equipment Required
- 🥧 9-inch (23cm) Fluted Tart Tin with Removable Bottom
- 🥣 Large Mixing Bowl
- 🥣 Medium Mixing Bowl
- 🔪 Sharp Knife
- 🪵 Cutting Board
- 🤏 Measuring Cups and Spoons
- 🌪️ Whisk
- 🍳 Medium Saucepan
- 🧱 Rolling Pin
- 📄 Parchment Paper
- 🏋️ Pie Weights (or dried beans/rice)
- 🖌️ Pastry Brush (optional, for glaze)
- 🧊 Sieve
Preparing Your Strawberry Custard Tart
Follow these steps carefully to assemble a dessert identical to the one pictured.
Step 1: Prepare the Sweet Pastry (Pâte Sablée)
This type of pastry is tender and slightly crumbly, providing the perfect base.
- Place the flour, salt, and icing sugar into the large mixing bowl. Add the cold, cubed butter.
- Using fingertips, rub the butter into the flour mixture. This means gently rubbing the butter and flour together until the mixture looks like fine breadcrumbs. Lift the mixture as you go to incorporate air, which helps keep the pastry light. Work quickly so the butter doesn’t get too warm.
- In a small bowl, lightly beat the egg yolk with 2 tablespoons of ice-cold water.
- Make a well (a hollow space) in the centre of the flour mixture and pour in the egg yolk mixture.
- Using a knife or your hands, gently mix everything together until it just starts to form a dough. Avoid over-mixing; this can make the pastry tough. If it seems too dry, add the remaining tablespoon of ice water, a tiny bit at a time.
- Gather the dough into a ball, flatten it slightly into a disc shape, wrap it in cling film (plastic wrap), and let it rest in the refrigerator for at least 30 minutes. Chilling the dough makes it easier to roll out and helps prevent shrinkage during baking.
Step 2: Roll Out and Blind Bake the Pastry Case
Blind baking means partially baking the pastry shell before adding the filling. This is crucial for achieving the crisp, golden base seen in the photograph and preventing a soggy bottom.
- Lightly flour a clean work surface and your rolling pin. Unwrap the chilled dough disc.
- Roll the dough out from the centre outwards, turning it occasionally, until it’s about 3-4mm thick and large enough to line the base and sides of your 9-inch tart tin.
- Carefully lift the pastry using the rolling pin (drape it over the pin) and gently lower it into the tart tin.
- Press the pastry gently into the base and up the sides of the tin, making sure it fits snugly into the fluted edges. Don’t stretch the pastry.
- Trim any excess pastry from the rim using your rolling pin rolled across the top edge or a sharp knife held parallel to the rim.
- Prick the base of the pastry lightly with a fork. This helps stop it from puffing up too much.
- Chill the lined tart tin in the refrigerator for another 20-30 minutes. This further helps prevent shrinkage.
- Preheat the oven to 190°C (375°F / Gas Mark 5).
- Line the chilled pastry case with a piece of parchment paper, ensuring it covers the base and sides. Fill it with ceramic pie weights or dried beans/rice. Make sure the weights fill the case well, especially around the edges.
- Bake for 15 minutes. Carefully remove the tin from the oven, lift out the parchment paper and weights.
- Return the tart tin to the oven and bake for another 10-15 minutes, or until the pastry is pale golden and looks dry. This ensures the base is properly cooked. The final colour should be a lovely light golden brown, just like the tart shown.
- Remove the tart case from the oven and let it cool completely in the tin on a wire rack.
Step 3: Prepare the Custard Filling (Crème Pâtissière)
This is a classic pastry cream, thick, smooth, and vanilla-infused.
- Pour the milk into the medium saucepan. If using a vanilla pod, split it lengthwise, scrape out the seeds, and add both the pod and seeds to the milk. If using extract, add it later.
- Heat the milk gently over medium heat until it is steaming but not boiling. Once steaming, remove it from the heat and let it infuse for 10 minutes if using a pod. Then, remove the pod.
- While the milk is infusing (or heating, if using extract), whisk the egg yolks and caster sugar together in the medium mixing bowl until the mixture is pale and thick. This usually takes a couple of minutes.
- Sift the cornflour over the egg yolk mixture and whisk it in until smooth.
- Now, you need to temper the eggs. This technique prevents the hot milk from scrambling the eggs. Pour about half of the warm milk very slowly into the egg yolk mixture, whisking constantly as you pour.
- Pour this warmed egg mixture back into the saucepan with the remaining milk.
- Place the saucepan over medium-low heat and cook, whisking constantly and vigorously, especially around the bottom and edges, to prevent lumps and scorching.
- The custard will start to thicken. Bring it just to a gentle boil, still whisking. Let it bubble gently for 1-2 minutes, continuing to whisk, until it is very thick and smooth. The consistency should coat the back of a spoon heavily.
- Remove the saucepan from the heat. If using vanilla extract, stir it in now. Stir in the softened butter until it has melted and fully incorporated. This adds richness and shine.
- Pour the finished custard into a clean bowl. Press a piece of cling film directly onto the surface of the custard. This prevents a skin from forming as it cools.
- Let the custard cool completely. It can be cooled more quickly by placing the bowl in an ice bath (a larger bowl filled with ice and water) before refrigerating.
Step 4: Assemble and Finish the Tart
This is where the components come together to match the beautiful tart in the image.
- Once the pastry case and the custard are both completely cool, remove the custard from the refrigerator and give it a good whisk to loosen it up and make it smooth again.
- Carefully remove the cooled pastry case from its tin (this is why tins with removable bottoms are helpful!) and place it on your serving plate or board. The image shows the tart sitting on crumpled parchment paper on a wooden surface.
- Spoon the cooled, whisked custard into the pastry case, spreading it evenly with the back of a spoon or an offset spatula. Fill it generously, leaving a small gap below the rim. The filling should be a pale, creamy yellow.
- Prepare the strawberries. Wash and hull them (remove the green leafy tops). Slice each strawberry in half lengthwise.
- Arrange the strawberry halves, cut-side down, on top of the custard. Start from the outer edge and work inwards, making concentric circles, as seen precisely in the photograph. Pack them closely together for a full, abundant look.
- (Optional Glaze): For the glossy finish visible on the strawberries in the picture, gently warm the apricot jam with 1 tablespoon of water in a small saucepan until melted and smooth. Strain it through a fine sieve to remove any solids. Let it cool slightly, then carefully brush the glaze over the strawberries using a pastry brush. This adds shine and helps preserve the fruit slightly.
- Chill the finished tart in the refrigerator for at least 30 minutes before serving. This allows the custard to set fully and the flavours to meld.
Serving Your Masterpiece
The image shows a single slice already removed, showcasing the perfect layers of golden crust, creamy custard, and fresh fruit. Slice the tart using a sharp knife, wiping the blade clean between cuts for neat slices. This Strawberry Custard Tart is best enjoyed on the day it’s prepared.
Preparing food at home brings a special kind of joy. Taking simple, good-quality halal ingredients and transforming them into something so visually appealing and delicious is incredibly rewarding. Don’t hesitate to try this recipe. Feel encouraged to share pictures of your completed Strawberry Custard Tart – seeing the results of home baking is always wonderful! Enjoy every bite.