
Vibrant No-Bake Watermelon Cheesecake
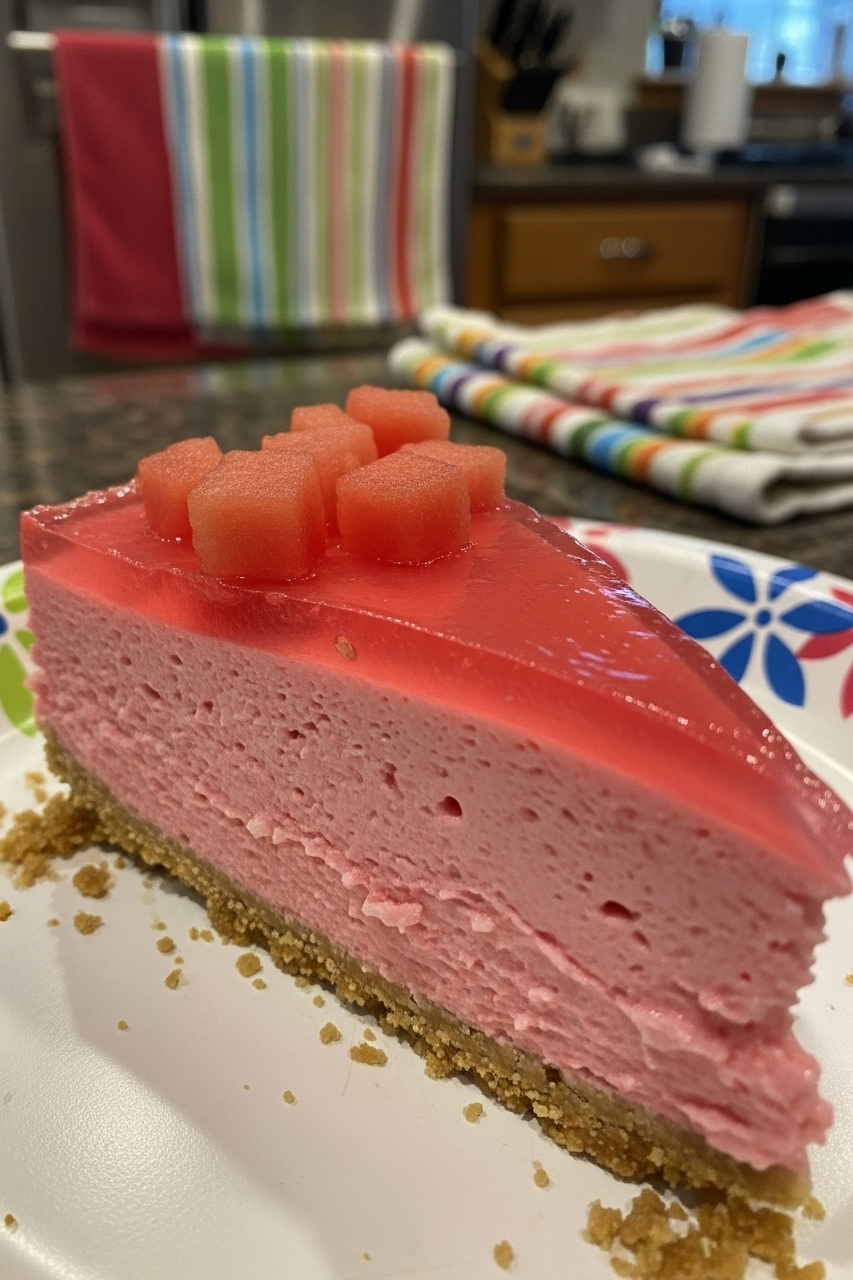
Welcome a slice of pure summer joy into the kitchen! This stunning No-Bake Watermelon Cheesecake is a refreshing escape, perfect for warm days and sharing with loved ones. It features a sturdy, golden-brown graham cracker foundation, a thick layer of airy, light-pink watermelon mousse, and is finished with a vibrant, translucent jelly topping. The dessert is garnished with a neat arrangement of small, juicy watermelon cubes, making it as beautiful as it is delicious. This guide offers everything a beginner needs to confidently assemble this delightful treat from scratch.
What You’ll Need
Gathering the right ingredients and tools is the first step toward a successful dessert. Here’s a list of what’s required.
🛒 Halal Ingredients
- 🍪 1 ½ cups (150g) Graham cracker crumbs
- 🧈 ½ cup (113g) Unsalted butter, melted
- 🍬 ¼ cup (50g) Granulated sugar
- 🍉 1 box (3 oz / 85g) Halal watermelon-flavored gelatin (like Jell-O), divided
- 💧 1 ½ cups Boiling water, divided
- 🧀 2 packages (16 oz / 450g) Full-fat block cream cheese, softened to room temperature
- 🍚 1 cup (120g) Powdered sugar
- 🥛 1 ½ cups (360ml) Cold heavy whipping cream
- 🍉 ½ cup Fresh watermelon, cut into small cubes for garnish
🔪 Kitchen Equipment
- 🥣 3 Medium mixing bowls
- 🍰 9-inch (23cm) Springform pan
- 🥄 Spatula
- 📏 Measuring cups and spoons
- ⚡ Electric mixer (handheld or stand mixer)
- 🔪 Sharp knife and cutting board
Putting It All Together: Step-by-Step
This recipe is broken down into three simple parts. Following the steps closely will lead to a wonderfully layered and flavorful cheesecake.
Part 1: The Buttery Graham Cracker Base
The foundation of any great no-bake cheesecake is a solid crust. This part explains how to get that perfect texture.
- In a medium bowl, combine the graham cracker crumbs and granulated sugar. Pour the melted butter over the crumb mixture.
- Mix everything with a fork or spatula until all the crumbs are evenly moistened. The texture should resemble wet sand.
- Pour the mixture into the 9-inch springform pan. Use the bottom of a measuring cup or the back of a spoon to press the crumbs down firmly and evenly across the bottom of the pan. Pressing firmly is the key to a crust that holds its shape and doesn’t fall apart when sliced.
- Place the pan in the freezer for about 15-20 minutes to set while preparing the filling.
Part 2: The Dreamy Watermelon Cheesecake Filling
This is where the light, airy texture and sweet watermelon flavor come to life. Working with softened cream cheese and cold whipping cream is essential.
- In a small bowl, dissolve half of the watermelon-flavored gelatin powder (about 1.5 oz / 42g) in ½ cup of boiling water. Stir until the powder is completely gone, then set it aside to cool down to room temperature. Warning: Adding hot gelatin to the cream cheese will melt it and ruin the texture.
- In a large mixing bowl, beat the softened cream cheese with an electric mixer on medium speed until it’s completely smooth and free of lumps. Softening the cream cheese first prevents a lumpy filling.
- Add the powdered sugar and beat again until well combined. Scrape down the sides of the bowl with a spatula to make sure everything is mixed in.
- Pour the cooled-down gelatin mixture into the cream cheese mixture. Beat on low speed until just combined.
- In a separate, clean bowl, use the electric mixer (with clean beaters) to whip the cold heavy whipping cream. Start on low speed and gradually increase to high. Whip until stiff peaks form. This means that when the beaters are lifted, the cream stands up in firm points that don’t curl over. This airiness is what gives the cheesecake its mousse-like body.
- Now, it’s time to fold the whipped cream into the watermelon cream cheese mixture. Take about one-third of the whipped cream and gently mix it in to lighten the base. Then, add the rest of the whipped cream. Using a spatula, cut down through the center of the mixture, scrape along the bottom, and lift the mixture up and over. Rotate the bowl and repeat. This gentle motion combines the ingredients without knocking out the air that was just whipped into the cream.
- Retrieve the chilled crust from the freezer. Gently spoon the finished watermelon filling over the crust and spread it into an even layer with the spatula.
Part 3: The Glossy Jelly Topping & Garnish
The final layer adds a beautiful shine and an extra burst of watermelon flavor.
- Place the cheesecake in the refrigerator for at least 30-60 minutes. This initial chill helps the filling firm up slightly so the warm jelly topping won’t mix into it.
- Prepare the topping. In a small bowl, dissolve the remaining half of the watermelon-flavored gelatin powder in 1 cup of boiling water. Stir until completely dissolved.
- Let this mixture cool on the counter for at least 30 minutes, or until it is at room temperature. It should not be warm to the touch.
- Gently pour the cooled jelly mixture over the top of the chilled cheesecake filling.
- Carefully arrange the small cubes of fresh watermelon on top of the liquid jelly.
- Return the cheesecake to the refrigerator.
Chilling for Perfection
Patience at this final stage is rewarded with a perfect dessert. The cheesecake must chill for at least 6 hours, but overnight is even better. This time allows all the layers to set completely, ensuring clean, beautiful slices when it’s time to serve. Once fully set, run a thin knife around the edge of the pan before releasing the springform collar.
There is immense satisfaction in presenting a homemade dessert that looks and tastes so incredible. Anyone who tries this recipe is encouraged to share photos of their gorgeous watermelon cheesecake—a testament to a little time and care in the kitchen. Enjoy every slice.