
Wholesome Walnut Hearth Loaf
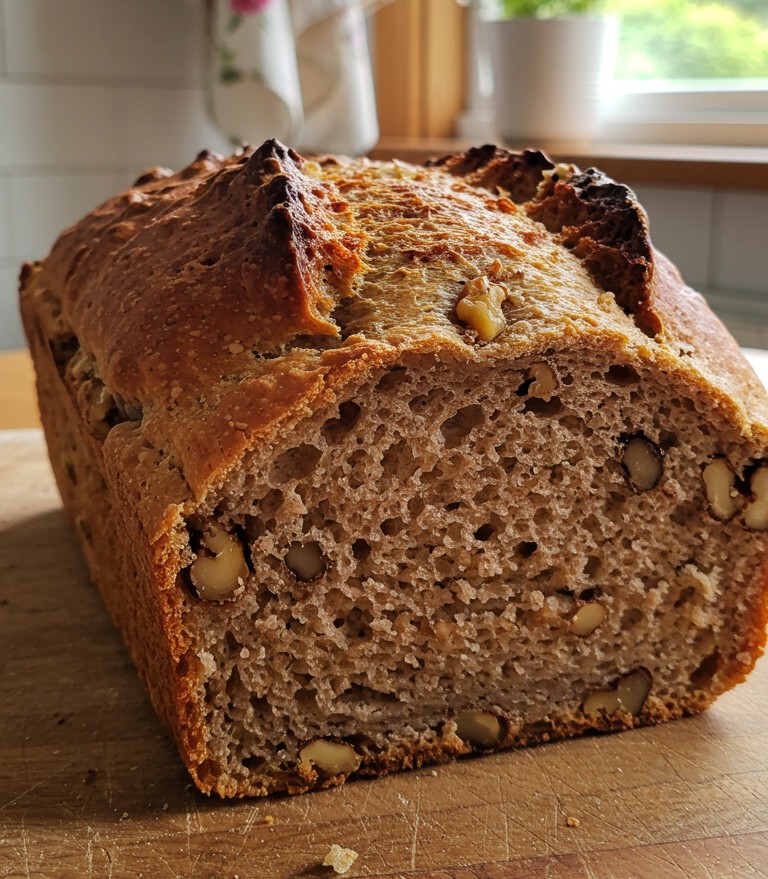
Baking a loaf of bread from scratch is a wonderfully rewarding experience. This guide walks through the process of making a beautiful, rustic walnut loaf, just like the one pictured. Imagine the aroma filling the kitchen, and the satisfaction of slicing into a warm, homemade loaf, its interior studded with delicious walnuts. This recipe is designed for anyone new to bread baking, explaining each step simply.
What You’ll Need
Before embarking on this baking adventure, gather these essentials:
🥣 Ingredients:
- 💧 1 ½ cups (360ml) lukewarm water (about 105-115°F or 40-46°C)
- 🥄 2 ¼ teaspoons (1 packet or 7g) active dry yeast
- 🍯 1 tablespoon halal honey or sugar (optional, for a touch of sweetness and to help yeast)
- 🌾 2 cups (240g) halal bread flour, plus more for dusting
- 🍞 1 ½ cups (180g) halal whole wheat flour
- 🧂 1 ½ teaspoons salt
- 🌰 1 cup (100g) walnuts, roughly chopped
- 🧈 2 tablespoons halal unsalted butter, melted (or halal vegetable oil)
🛠️ Kitchen Equipment:
- 🌡️ Kitchen thermometer (optional, for water temperature)
- 🥣 Large mixing bowl
- 🥄 Wooden spoon or spatula
- 📏 Measuring cups and spoons
- ✨ Plastic wrap or a clean kitchen towel
- 🍞 9×5 inch (23×13 cm) loaf pan
- 🧺 Wire cooling rack
Preparing Your Walnut Loaf: Step-by-Step
Follow these instructions to bake a loaf that has the gorgeous golden-brown, craggy crust and walnut-filled interior seen in the image.
1. Awaken the Yeast
- In the large mixing bowl, pour in the lukewarm water. The water needs to be warm enough to activate the yeast, but not so hot that it harms it – think baby’s bathwater temperature.
- Sprinkle the active dry yeast over the water. If using, stir in the honey or sugar.
- Let this mixture sit for 5-10 minutes. This process is called proofing the yeast. You’ll know the yeast is alive and ready if the mixture becomes foamy or bubbly on top. If nothing happens, the yeast might be old, and it’s best to start over with fresh yeast.
2. Combine the Ingredients
- Once the yeast is bubbly, add the melted butter (or oil), bread flour, whole wheat flour, and salt to the bowl with the yeast mixture. The whole wheat flour contributes to the lovely medium-brown color of the bread’s interior, as is visible in the sliced loaf in the image.
- Using a wooden spoon or your hands, mix everything together until a shaggy dough starts to form. This means it will look a bit rough and not yet smooth.
- Add the roughly chopped walnuts and continue to mix until they are just incorporated into the dough.
3. Knead the Dough
- Turn the dough out onto a lightly floured, clean work surface.
- Now, it’s time for kneading. Kneading is the process of working the dough to develop gluten. Gluten is a protein network that gives bread its structure and chewiness, allowing it to trap air and rise.
- To knead: Fold the dough over towards you, then use the heel of your hand to push it away from you. Give the dough a quarter turn and repeat this push-fold-turn motion.
- Continue kneading for about 8-10 minutes. The dough should become smooth, elastic, and less sticky. If it’s too sticky, add a tiny bit more bread flour, one tablespoon at a time. A well-kneaded dough is key to achieving the satisfying texture seen in the image.
- Beginner’s Tip: If kneading by hand seems daunting, a stand mixer with a dough hook attachment can do this work in about 5-7 minutes on a medium-low speed.
4. The First Rise (Bulk Fermentation)
- Lightly oil the large mixing bowl (you can use the same one, just give it a quick clean if needed).
- Shape the kneaded dough into a ball and place it in the oiled bowl. Turn the dough over once so the top is also lightly oiled. This prevents a dry crust from forming.
- Cover the bowl tightly with plastic wrap or a damp kitchen towel.
- Let the dough rise in a warm, draft-free place for 1 to 1.5 hours, or until it has doubled in size. This is called the first rise or bulk fermentation. The yeast is working to produce carbon dioxide gas, which makes the dough expand.
- Troubleshooting Tip: If your kitchen is cold, you can place the bowl in an oven that is turned off but has the light on, or near a warm (not hot) spot.
5. Shape the Loaf
- Once the dough has doubled, gently punch it down. This means pressing down on the center of the dough to release the trapped gases. Don’t be too aggressive; a gentle press is enough.
- Transfer the dough to a lightly floured surface.
- Gently pat or roll the dough into a rectangle, roughly the length of your loaf pan.
- Roll up the rectangle tightly to form a log shape. Pinch the seam closed and tuck the ends under slightly.
- Grease and lightly flour your 9×5 inch loaf pan.
- Place the shaped dough seam-side down into the prepared loaf pan.
6. The Second Rise (Proofing in the Pan)
- Cover the loaf pan loosely with plastic wrap (lightly greased on the side facing the dough to prevent sticking) or a kitchen towel.
- Let the dough rise again in a warm place for about 45-60 minutes, or until it has risen about 1-1.5 inches above the rim of the pan. This second rise gives the bread a lighter texture. The prominent peaks visible on the crust of the pictured bread are a result of a good rise and the baking process.
7. Bake to Golden Perfection
- About 20 minutes before the second rise is complete, preheat your oven to 375°F (190°C). Preheating is crucial for a good bake.
- Once the loaf has completed its second rise, place the loaf pan in the center of the preheated oven.
- Bake for 35-45 minutes. The bread is done when the crust is a deep golden brown, just like the rich color in the image, and it sounds hollow when you tap the bottom (carefully remove it from the pan to test this). If the top is browning too quickly, you can loosely tent it with aluminum foil for the last 10-15 minutes of baking.
- Note: The rustic, somewhat uneven top with natural cracks, as seen on the featured loaf, is perfectly normal and adds to its homemade charm. No need for precise scoring unless desired.
8. Cool Completely
- Once baked, immediately and carefully remove the loaf from the pan and transfer it to a wire cooling rack.
- Let the bread cool completely before slicing, at least 1-2 hours. This is a very important step! Slicing hot bread can result in a gummy texture because the interior is still setting. Patience here will be rewarded.
9. Slice and Enjoy Your Handiwork
- Once cooled, use a serrated bread knife to slice your wholesome walnut hearth loaf. Admire the beautiful crumb structure, with walnuts peeking through, just as the image displays.
- This bread is delicious on its own, toasted with butter, or alongside soups and salads.
Share Your Baking Success!
There’s immense joy in preparing food from simple ingredients and transforming them into something as delightful as this walnut loaf. Feel the warmth of the oven, smell the inviting aroma, and take pride in the beautiful bread you’ve brought forth.
Give this recipe a try! It’s a journey of simple steps leading to a delicious outcome. When your loaf is baked and sliced, feel free to share a picture of your results – seeing others enjoy homemade goodness is always an inspiration! Happy baking!