

Beginner’s Guide to Color Correcting for Brighter Skin
Are you tired of dealing with redness, dullness, or dark circles that just won’t go away no matter how much concealer you apply? Well, it’s time to unlock the secret to a flawless, radiant complexion: color correcting.
In this comprehensive beginner’s guide, we’ll dive deep into the world of color correcting and explore how this game-changing technique can transform your skin from drab to fab. Whether you’re new to the concept or simply looking to refine your color correcting skills, you’re in the right place.
By the end of this post, you’ll have a solid understanding of color theory, the different color correcting products, and step-by-step application methods tailored to your unique skin tone. Say goodbye to uneven skin tone and hello to a luminous, camera-ready complexion.
Understanding Color Theory
Before we get into the nitty-gritty of color correcting, it’s important to have a basic understanding of color theory. After all, knowing how colors interact with each other is the key to mastering this game-changing makeup technique.
Primary, Secondary, and Complementary Colors
The color wheel is the foundation of color theory, and it’s divided into three main categories: primary, secondary, and complementary colors.
The primary colors are red, yellow, and blue. These are the pure, unmixed colors that can’t be created by combining any other hues.
The secondary colors are orange, green, and purple, and they’re created by mixing two primary colors together.
Finally, the complementary colors are those that sit directly across from each other on the color wheel. For example, red and green, blue and orange, and yellow and purple are all complementary color pairs.
Understanding these color relationships is crucial when it comes to color correcting, as we’ll use complementary colors to neutralize specific skin concerns.
Identifying Your Skin’s Undertones
In addition to understanding the color wheel, it’s important to identify your skin’s undertones. These are the underlying hues that can be warm (yellow/golden), cool (pink/blue), or neutral (a balanced mix of both).
Determining your undertones is easy. Take a look at the veins on the inside of your wrist. If they appear more blue or purple, you likely have cool undertones. If they look green, you have warm undertones. If they’re a mix of both, you have neutral undertones.
Knowing your skin’s undertones will help you choose the right color correcting products and techniques to achieve the most natural-looking, seamless results.
Color Correcting Basics
Now that we’ve covered the color theory basics, let’s dive into the world of color correcting products and how to use them.
Color Correcting Products
Color correcting can be achieved using a variety of products, including:
- Primers: Color-correcting primers help neutralize discoloration and create a smooth, even canvas for the rest of your makeup.
- Concealers: Specifically formulated color-correcting concealers are designed to target and camouflage specific skin concerns.
- Powders: Color-correcting powders can be used to set and further blend color-corrected areas.
When selecting color correcting products, it’s important to choose shades that are opposite to your specific skin concern on the color wheel. This is the key to achieving the most effective results.
Matching Color Correctors to Skin Concerns
- Neutralizing Redness: Green-tinted color correctors are perfect for counteracting redness, whether it’s from blemishes, broken capillaries, or overall inflammation.
- Counteracting Dullness: Peach or salmon-colored color correctors can help brighten and enliven dull, lackluster skin.
- Diminishing Dark Circles: Purple or lavender-hued color correctors are your best friends for minimizing the appearance of dark circles.
- Minimizing Hyperpigmentation: Yellow or bisque-toned color correctors work wonders for neutralizing unwanted patches of discoloration.
By matching the right color correcting product to your specific skin concern, you’ll be well on your way to a more even, radiant complexion.
Step-by-Step Color Correcting Routine
Ready to put your newfound color theory knowledge into practice? Follow these simple steps for a flawless color correcting routine.
Cleansing and Prepping the Skin
Begin by thoroughly cleansing your skin to remove any dirt, oil, or impurities that could interfere with the seamless application of your color correcting products. Follow up with a hydrating toner or essence to ensure your skin is properly prepped and primed.
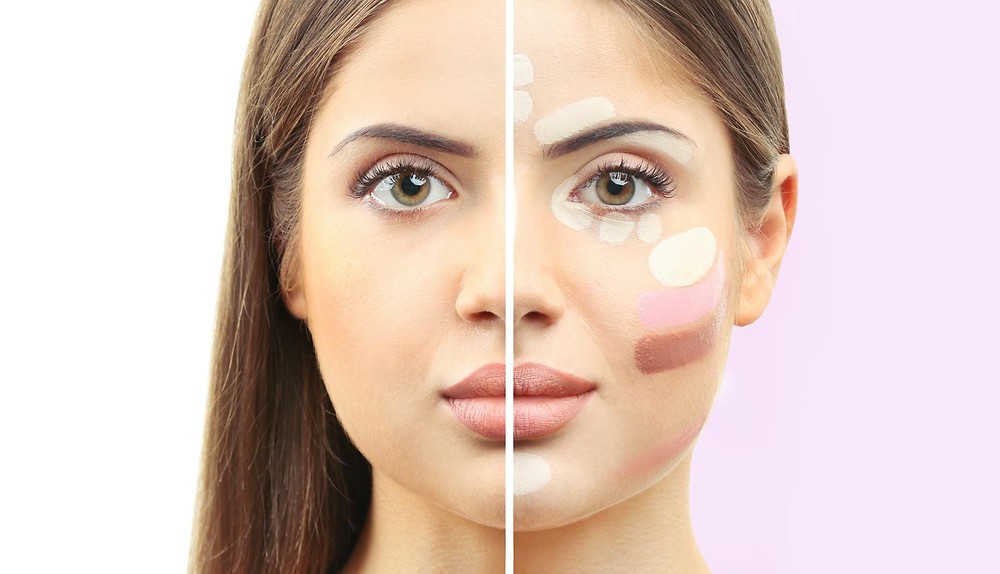
Applying Color Correcting Products
- Primer: Start by applying a color-correcting primer to the areas of your face that need the most attention. Gently massage the primer into the skin, focusing on areas of redness, dullness, or discoloration.
- Concealer: Next, reach for your color-correcting concealer and apply it directly to the areas you want to neutralize. Use a small, precise brush or your fingertips to gently dab and blend the product into the skin.
- Powder: To set and further blend the color-corrected areas, lightly dust a color-correcting powder over the top. Be sure to use a fluffy brush and a gentle, patting motion to avoid disturbing the underlying makeup.
Remember to work in thin, buildable layers, and don’t be afraid to experiment with different color combinations to achieve your desired results.
Blending Techniques for Seamless Application
The key to a natural-looking, color-corrected complexion is all in the blending. Use a damp makeup sponge or a fluffy synthetic brush to gently buff and blend the edges of your color correcting products, ensuring a seamless transition between the corrected and uncorrected areas of your face.
Take your time and be patient with the blending process. The more you blend, the more natural and flawless your final result will appear.
Color Correcting for Different Skin Tones
One of the best things about color correcting is that it’s a highly versatile technique that can be tailored to a wide range of skin tones. Whether you have fair, medium, or dark skin, there’s a color correcting routine that can work for you.
Fair Skin Tones
If you have a fair complexion, you’ll want to focus on neutralizing redness, dullness, and dark circles. Opt for peach or salmon-colored color correctors to brighten and enliven the skin, and use a yellow-based concealer to counteract any unwanted bluish undertones.
Medium Skin Tones
For medium skin tones, the color correcting game plan may involve a combination of techniques. Use green-tinted products to neutralize redness, peach or salmon hues to combat dullness, and lavender or purple-based concealers to diminish dark circles.
Dark Skin Tones
Individuals with deeper skin tones may find that yellow or bisque-based color correctors work best for minimizing hyperpigmentation and discoloration. Don’t be afraid to experiment with a range of color correcting shades to find the perfect match for your unique skin tone.
Regardless of your skin tone, the key is to start with sheer, buildable layers of color correcting products and blend thoroughly to achieve a seamless, natural-looking result.
Common Mistakes to Avoid
While color correcting can be a game-changing technique, it’s important to be mindful of a few common mistakes that can sabotage your efforts.
Using the Wrong Color Corrector
One of the most common mistakes is choosing a color corrector that’s not quite right for your specific skin concern. Remember to refer back to the color wheel and match your color correcting products accordingly.
Over-Applying Color Correcting Products
It’s easy to get carried away with color correcting, but using too much product can lead to a cakey, unnatural appearance. Start with a small amount and build up as needed, blending thoroughly to avoid any visible lines or demarcations.
Neglecting Proper Blending
Proper blending is crucial for achieving a seamless, natural-looking result. If you skimp on the blending process, you run the risk of having visible color correcting patches or lines on the skin.
By being mindful of these common pitfalls, you’ll be well on your way to mastering the art of color correcting for a flawless, radiant complexion.
The Benefits of Incorporating Color Correcting
Now that you’ve learned all about the ins and outs of color correcting, let’s explore the amazing benefits this technique can offer.
Achieving a Brighter, More Even Complexion
One of the primary benefits of color correcting is its ability to neutralize discoloration and create a more even, radiant complexion. By strategically applying color-correcting products, you can diminish the appearance of redness, dullness, dark circles, and hyperpigmentation for a more luminous, youthful glow.
Enhancing the Effectiveness of Foundation and Concealer
Color correcting acts as the perfect primer for the rest of your makeup routine. By neutralizing specific skin concerns, you’ll find that your foundation and concealer apply more smoothly, blend more seamlessly, and last longer throughout the day.
Boosting Confidence and Self-Esteem
Perhaps the most valuable benefit of color correcting is the confidence boost it can provide. When you feel confident in the appearance of your skin, it can have a ripple effect on your overall well-being and self-esteem. Embrace the power of color correcting and let it shine through in your everyday life.
Conclusion
There you have it – a comprehensive beginner’s guide to color correcting for brighter, more radiant skin. By mastering the art of color theory and the proper application techniques, you’ll be on your way to achieving a flawless, camera-ready complexion in no time.
Remember to start slow, experiment with different color correcting products, and be patient with the blending process. With a little practice, color correcting will become second nature, and you’ll wonder how you ever lived without it.
So, what are you waiting for? Grab your color correcting arsenal and get ready to transform your skin from drab to fab. And don’t forget to share your color correcting journey with us – we’d love to hear all about your newfound glow!