

How to Make Hand-Painted Plates | Instructions and Ideas
You have old plates made of porcelain or ceramics in your cupboard that could use a new face? Then we will show you here how you can easily paint them and turn them into a jewel of the table!
Painting plates: Preparations
You need:
- Tableware: Whether porcelain or ceramic, preferably in white
- Porcelain pencils/porcelain paints/ceramic colours: Colours for porcelain or ceramics are commercially available, which are normally also suitable for both materials.
As required:
- Brushes
- Little sponges
- Motif
- tracing paper
- Pencil
- Adhesive tape
Note: When using paints or pens for porcelain or ceramics, pay attention to the manufacturer’s instructions. Most colours must not be used on the eating or cutting surfaces and are therefore either only suitable for decorative tableware or must be applied to areas that do not come into contact with food.
Tip: If you don’t have tracing paper at hand, you can make your own! Transfer your motif onto a white sheet of paper and hatch the back with a pencil. Then fix the paper on your plate with some tape (hatched side down) and trace it with a sharp pencil.
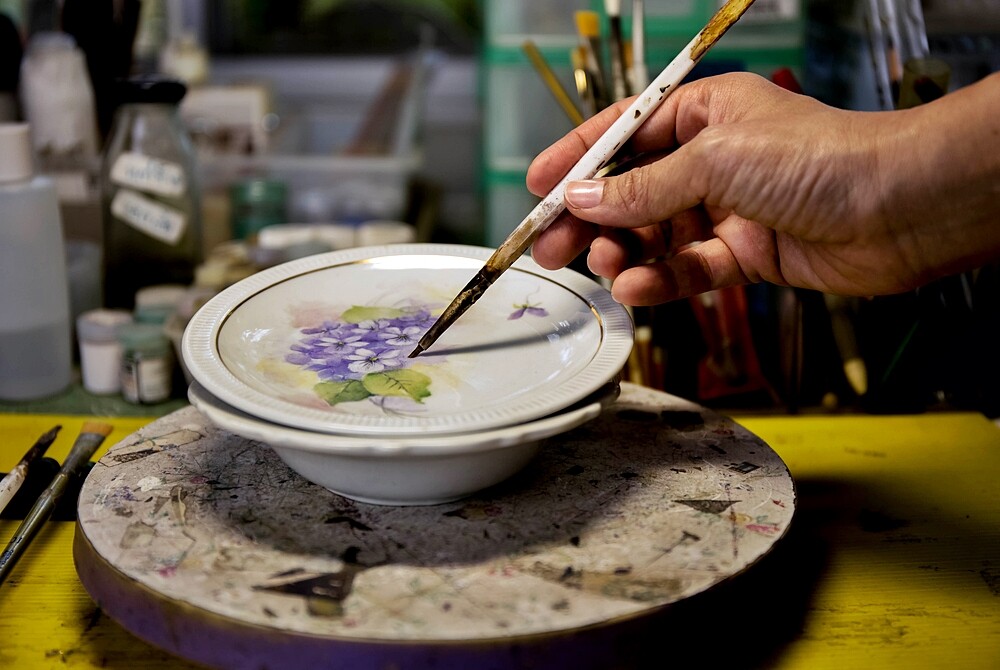
Plate painting: Explained step by step
- Clean the plates thoroughly with detergent and water: they must be free of dust and grease. Dry them and make sure that no new fingerprints are left on them.
- Transfer your desired motif onto the tracing paper. Place the tracing paper on the plate, fix it with some adhesive tape and transfer the motif with a sharp pencil or ballpoint pen. Alternatively, you can also sketch directly on the porcelain with a pencil.
- Then trace your motif with the porcelain colours or pens. Of course, you can also practice drawing freehand. Should you prescribe or paint yourself, the wet paint can usually be removed easily with a cotton swab or a cloth. If the paint is already dry, an alcohol-based cleaner is used to remove it. If you use several paints, always let each one dry well until you apply the next one.
- The paint must then dry on the porcelain according to the manufacturer’s instructions and then be fired in an oven. Usually the firing time and temperature is between 25 and 90 minutes at 160 °C in a preheated oven. Afterwards the plates are water and dishwasher safe.
Plate painting: Techniques
Points
Colour splashes or splashes of paint always look good on porcelain or ceramic. The swabs can be applied well with cotton swabs, for example. Alternatively, the back of a brush is also suitable. For a nice splash or speckle pattern, it is best to lay out a large area of newspaper, dip a larger brush or old toothbrush in the paint and hold your tool close over the porcelain while running your fingers over the bristles. You can also spill the paint across the plate.
Stenciling
You can either make a paper template of your own or stick graphic patterns on the plate with adhesive tape (test beforehand whether the tape can be removed without leaving any residue). Paper lace doily also make a nice template. Afterwards you only have to apply the paint on the dishes with a brush or sponge and remove the stencil.
Stamping
The smooth surface of the plates can be optimally used for stamping. Apply some paint to a painting palette and spread the paint with a small sponge. This ensures that the ink is evenly absorbed by the stamp. Then dip your stamp into the ink and transfer it onto the porcelain. This works best with dark colours. Light colours do not cover the porcelain as well.
Handlettering
A beautiful slogan or a name immortalized on the porcelain with a handlettering is guaranteed to attract everyone’s attention. Here you can also work wonderfully with design elements such as tendrils, curlicues and banners.
Porcelain stickers
You can also put special stickers on the porcelain. They are commercially available in various designs. Cut out the motif with a margin of about 1.5 mm, peel off the paper and press the foil onto the porcelain. Rub out all air bubbles with a cloth and then pull off the transfer foil. Afterwards, the foil only needs to dry according to the manufacturer’s instructions: it is not baked in the oven!
Plate painting: Beautiful ideas from Pinterest
If you don’t have any ideas yet, you can find inspiration at Pinterest. Here we will show you beautiful ideas for your porcelain!