

10 Super Cute Nail Designs You Can Do From Home
At-home nail art has exploded in popularity recently. A survey showed 38% of women tried DIY manicures last year alone. Why pay big bucks at salons when you can use simple techniques to decorate your nails just as stylishly from home?
This comprehensive guide features 10 beginner to intermediate nail looks to inspire your inner artist. For each, we include:
- Overview of the design concept
- Step-by-step tutorial for flawless execution
- List of necessary nail art supplies with shopping ideas
- Handy tips, tricks and troubleshooting for decorating like a pro!
Let’s dive in to these insanely-cute nail designs and ideas to make your basic manicure so much cuter!
1. The Perfect Solid Color Manicure
Nothing looks more elegant that an immaculate solid color manicure. Choosing an on-trend hue and applying multiple ultra thin coats for a super glossy finish elevates the simple into spectacular.
Follow these steps for a salon-worthy solid color manicure:
Step One: Prep your nails by gently brushing back cuticles with an angled cuticle pusher. This reveals more nail surface for polish contact. Apply cuticle oil around nail edges if needed.
Step Two: Wipe nails with nail polish remover or alcohol to dehydrate and remove excess oils for better polish bonding.
Step Three: Apply a base coat from base to tip and sidewall to sidewall on each nail. Base coats fill in ridges and prevent staining. Allow to dry for 1-2 minutes. For long wear, try Essie’s “Here To Stay” base.
Step Four: Apply your first layer of chosen polish shade using three brush strokes down the middle of the nail and one on either sidewall. Follow immediately with another layer before full drying for a smooth application.
Step Five: Repeat another thin application following dry time directions on polish bottle. Usually 2-3 total coat suffices. Be wary of thickness – layer too thickly and chips/cracks can occur.
Step Six: Cap off your flawless polish application by sweeping top coat over tips and down sidewalls to seal in shine and prevent early chipping on the edges. Seche Vite Fast Drying Top Coat is top-rated.
Voila! With the perfect prep and precise application, your basic at-home manicure can look straight from the salon.
Solid Color Manicure Tutorial
Check out this helpful YouTube tutorial for the techniques in action:
Supplies Needed
Recreate the solid perfection with:
- Base coat – fill ridges and prevent staining
- Top coat – seals everything for prolonged wear
- Nail polish colors – creams have the most flawless application
- 100% acetone polish remover – removes errors or stale polish
- Cotton balls – applies remover for clean slate before redoing nails
- Cuticle oil – keep cuticles hydrated if pushing them back
- Cuticle pusher – reveals entire nail surface for contact with polish
Expert Tips & Tricks
Up your DIY manicure game with these professional tips:
- Always wrap tips when polishing – cap off by brushing over tips and sidewalls
- Use three strokes down nail center – prevents too thick of application
- Don’t shake polish – can introduce air bubbles ruining smoothness
- Store polishes upside down – prevents thickening of formula at bottle necks
- Refrigerate rather than toss old polishes – extends life of drying out polishes
2. Elevated Nails With Ombre
Ombre manicures fade two polish shades together for depth and dimension. Mastering the blended ombre gradient takes skill – but done right it makes basic colors pop.
Step-By-Step
Follow along to ombre perfection:
Step 1) Paint on your base color per solid color manicure directions. Allow to dry fully before proceeding.
Step 2) Choose a second nail polish shade close on the color spectrum to your base for a smooth transition. Apply heavily to the bottom half of a makeup sponge, dipping frequently into the bottle to load color.
Step 3) Lightly dab loaded makeup sponge on tips of nails in bouncing motions. Adjust pressure to control color intensity. Work across nails for even application with no hard lines.
Step 4) Coat entire nail in glossy top coat to blend ombre for professional results. Don’t overwork the sponge or colors can get muddy.
Check Out This YouTube Ombre Nails Tutorial
See the sponge ombre technique in action here!
Must-Have Supplies
Recreate flawless at-home ombre with:
- Base & top coat
- 2 nail polish colors in similar shades
- Makeup sponge for gradients
- Paper towels for wiping sponge
- Nail polish remover & cotton balls
- Dotting tool (optional) – creates reverse ombre or French fade tips
Tips for Salon-Quality Ombre
Take your ombre manicure next level with these tips from celebrity manicurists:
- Always apply darker color heavily on sponge away from base for clean application
- Use subtle pressure and bounce motions to prevent harsh lines
- Work across hand not finger-by-finger for uniform fading
- Don’t rub! Dab lightly. Touch up tips last and seal with glossy top coat.
- Clean sponge between uses and let dry to prevent color transfer
3. Cute & Customizable With Nail Decals
Pre-made nail stickers and decals make for easy statement nails without steady painting skills. Apply cute designs, fun patterns and trendy images in seconds for shortcut statement manicures.
How-To Apply Nail Decals Flawlessly
Step 1) Determine placement and size needed for each nail decal before peeling from sheet. Cut down if necessary using manicure scissors.
Step 2) File nails for smooth, even surface. Apply basecoat avoiding cuticles for optimal decal adhesion.
Step 3) Peel off decal backing and place sticky-side down on nail. Use a cuticle pusher to squeeze any air pockets or bubbles trapped underneath.
Step 4) Seal entire decaled nail with glossy top coat to lock everything in place. Avoid pulling or tugging decals once stuck. If needed, use water or clear tape to reposition without ripping.
Step 5) Repeat decal application across remaining nails mixing colors and designs. Accent single nails or cover them all!
Check Out This Super Helpful Nail Decals Application Tutorial
Must-Have Nail Decal Supplies
Apply decals like a pro with:
- Base & top coat
- Sheet(s) of nail decals
- Cuticle pusher
- Manicure scissors
- Paper towels
- Water in spray bottle (repositioning)
Expert Decal Tips & Tricks
Take your decaled nail game up a notch with these tips:
- Avoid darker polishes under lighter decals
- File nails smooth so decals lay flat
- Apply to clean dry nails for best adhesion
- Use cuticle pusher to fix air pockets
- Mist water if needing to reposition decal
- Apply top coat over entire nail once placed
More Trendy Nail Art Designs to DIY
Ready for more Pinterest-worthy nail inspiration? Decorating at home is limitless once you’ve mastered the basics!
4. Polka Dot Nails
How-To: Use dotting tool for perfect little circles studded across your base color. Go classic with white dots or match dot shade to base hue for sweet speckled polish.
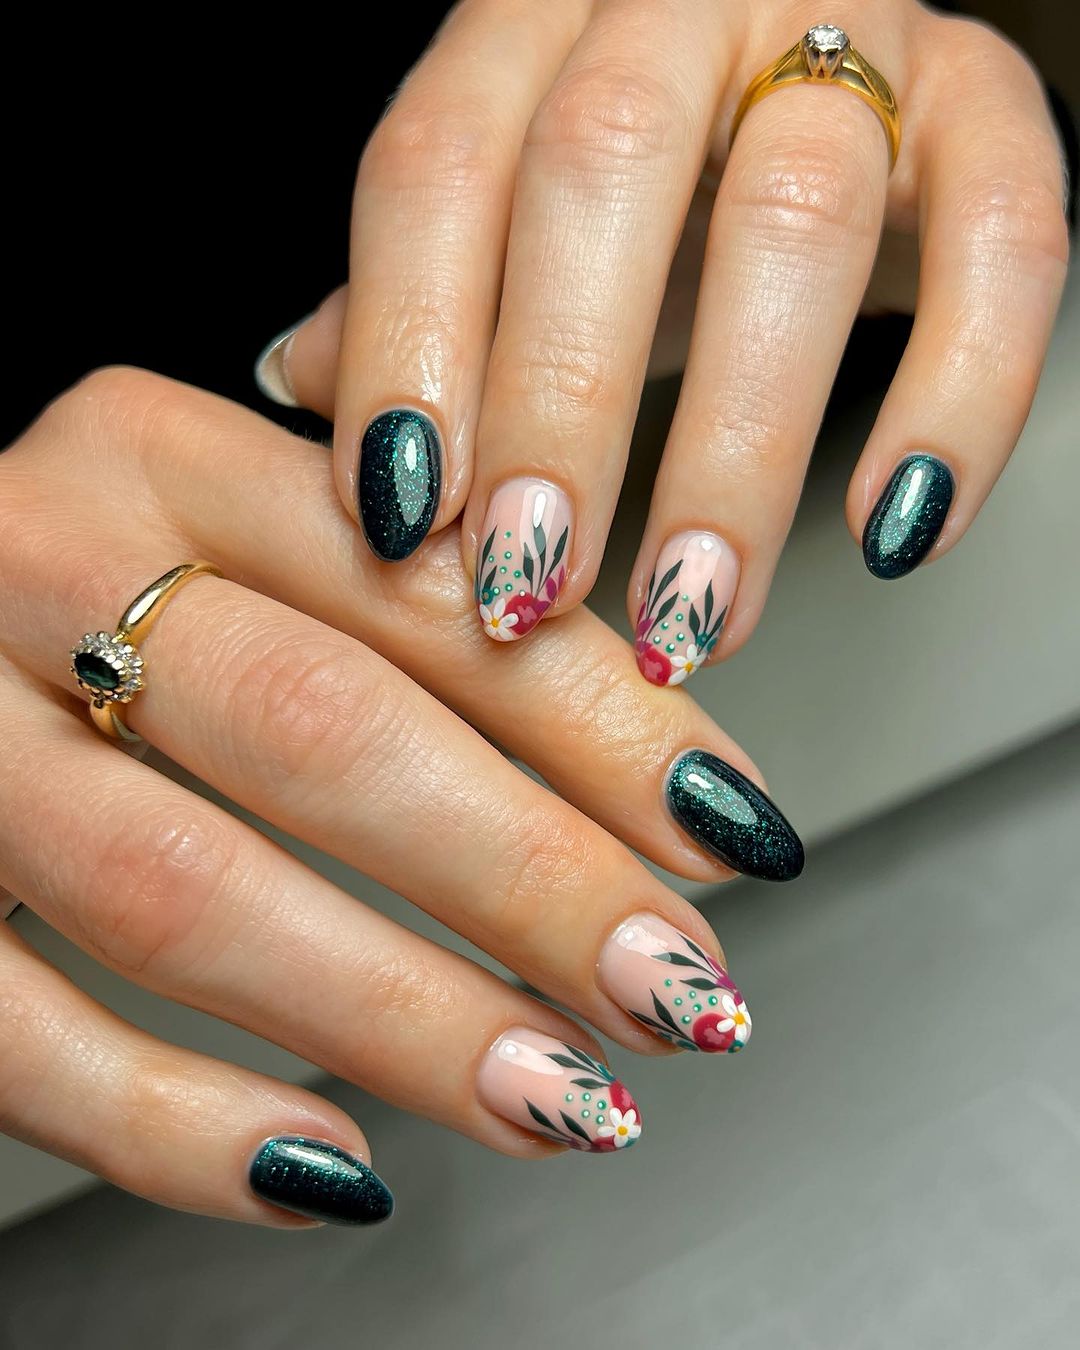
5. Floral Nails
How-To: Practice brush stroke daisies, roses, daffodils and more in coordinating brights nail polishes. Outline petals first, fill next with polish strokes.
6. Geometric Nails
How-To: Use striping tape to create clean lines and graphic shapes like triangles, circles and squares. Apply base color first, stick tape second to divide sections for artsy polish fills!
7. Gradient Nails
How-To: Sponging in one direction, fade dark polish into light alternatively on nails. Use dotting tool for reverse ombre tips.
8. Marble Nails
How-To: Drop a few random polish colors onto plastic wrap. Dip a toothpick into drops, then “marble” onto bare nails in abstract vein-like designs.
9. Holographic Nails
How-To: Layer ultra shiny top coats with iridescent hex glitters sparingly over your go-to shades. Create dazzling dimension!
10. Rhinestone Nails
How-To: Outline nail tips or random hips of stones for instant bling. Apply top coat first to help gems adhere – cure fully before wearing to prevent losing dazzle!
Key Takeaways for Every Nail Art Beginner
From proper polish application to fun embellishments, at-home manicures can look just a trendy as professional ones following core techniques:
- Always prep nails first – clean, trim, file into perfect shapes
- Use base coats on bare nails so polish bonds properly
- Remember the cap rule – seal polish over tips and sides
- Apply multiple thin color layers allowing each to dry
- Finish off with glossy quick-dry top coat for mega shine + strength
- Have remover wipes and cotton balls ready for any mistakes
- Start simple – lines, solids, ombre, decals – before complex art
- Watch YouTube tutorials for visual guidance on new techniques
- Just go for it! Don’t fear imperfection. Nothing that can’t be removed and redone until you love the finished look!
Armed with inspiration from chic solid colors to blended ombre and decorative touches like marble or rhinestones, what nail art will you try next? Show off your nail art skills recreating these popular Pinterest-worthy designs.
Go on, unleash your inner manicurist! Those basic nails are going to look so cuuuute.