

The “Mason Jar Shake” Hack for Instant Homemade Whipped Cream
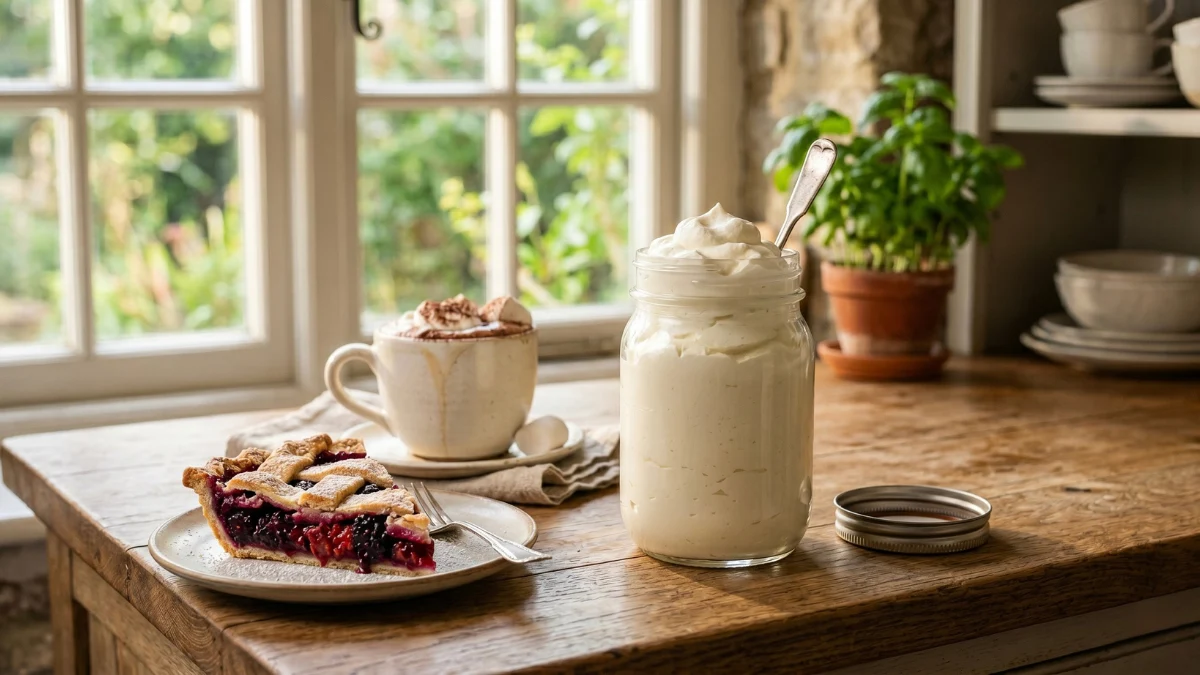
If you have ever found yourself staring at a freshly baked pie, a bowl of fresh summer berries, or a steaming mug of hot cocoa, only to realize you forgot the whipped topping, you are not alone. The thought of dragging out a heavy electric stand mixer, finding the right whisk attachments, and dealing with the inevitable dairy splatter on your clean kitchen counters is often enough to make anyone skip the topping altogether. But what if there was a simple way to whip up a fresh, delicious batch in under five minutes using nothing more than a standard glass jar and a little elbow grease?
Welcome to the mason jar shake technique. This brilliant kitchen trick has been circulating for years, but recent online discussions and culinary tweaks have elevated it from a simple hack to a reliable, everyday culinary technique. It requires minimal equipment, produces zero mess, and results in a perfectly fluffy topping that tastes far superior to anything you can buy in a pressurized spray can. Grab your favorite coffee mug, sit back, and let us dive into the precise details of whipping cream by hand, the modern way.
Why the Mason Jar Method Works (The Science of the Shake)
To understand why this technique is so effective, it is highly beneficial to look at the basic science of heavy dairy. Heavy whipping cream contains a high percentage of butterfat—typically between 36% and 40%. When you aggressively agitate this liquid, you are essentially forcing microscopic air bubbles into the fat network. The fat molecules surround these air bubbles, trapping them and transforming the heavy liquid into a light, semi-solid foam.
When using an electric mixer, the metal whisks rapidly incorporate that air. A glass jar does the exact same thing through the sheer force of the liquid crashing against the hard interior walls. As long as you leave enough empty space in the container for the liquid to move around, the vigorous shaking motion builds the structure necessary for a fluffy topping. As frequently emphasized by home cooks and dessert enthusiasts on Reddit, ensuring that your dairy has a high fat content is strictly non-negotiable. Lower fat options simply lack the structural integrity to trap and hold the air bubbles, which will inevitably leave you with a runny, soupy mess rather than a thick, perfectly spoonable dessert topping.
Step-by-Step Guide to the Perfect Shake
Executing this technique is delightfully straightforward, but precision in the initial setup will determine your overall success. Here is exactly how to achieve the absolute best results every single time you try it.
Step 1: Chill Everything Down
Temperature is without a doubt the most critical factor here. The fat in the dairy must be as cold as possible to hold its shape. Warm fat melts and collapses, which means you will be shaking forever with zero results. Keep your dairy in the coldest part of your refrigerator until the very second you are ready to pour it. For an extra structural advantage, place your clean, empty glass jar in the freezer for about fifteen to twenty minutes before you start. A frosty glass environment helps maintain the ideal temperature during the vigorous shaking process.
Step 2: Measure Carefully
Choose a standard 16-ounce (pint-sized) glass jar with a very tight-fitting lid. Pour in half a cup to one cup of cold heavy whipping cream. The golden rule here is never to fill the jar more than halfway. The liquid needs ample room to crash against the sides and incorporate air. If the jar is too full, the dairy cannot move freely, and it will never thicken properly.
Step 3: Sweeten and Flavor
Add your sweeteners and flavors directly into the liquid before you start shaking. One to two tablespoons of powdered sugar (confectioners’ sugar) is usually perfect for one cup of liquid. Powdered sugar contains a tiny bit of cornstarch, which actively helps stabilize the final foam. Add a splash of pure vanilla extract for that classic, comforting bakery flavor.
Step 4: The Workout
Secure the lid tightly. Ensure it is completely threaded on, or you will end up with a very messy kitchen floor. Now, shake vigorously. Shake it up and down, back and forth. You are not just gently rocking it; you need to apply real, consistent physical force.
Step 5: Listen to the Sound
This is where you need to pay close attention to auditory cues. At first, you will hear a loud, liquid sloshing sound. After a couple of minutes, that sound will transition into a heavier, muffled thud. Finally, the jar will become almost completely silent. When you can no longer hear the liquid moving, stop shaking immediately. Open the lid and check the consistency. You should see beautiful, soft peaks clinging to the sides.
The Reddit Marble Trick: A Game-Changing Trend
If you browse recent discussion threads on the popular r/Cooking community on Reddit, you will notice a recurring tip that has completely revolutionized this manual process: the marble trick.
Many home cooks note that shaking by hand can be tiring, sometimes taking up to five or eight minutes depending on arm strength and ambient kitchen humidity. To drastically speed up the aeration, experienced users suggest dropping a single, thoroughly washed and sterilized glass marble into the jar before sealing it. The marble acts as a makeshift internal whisk, bouncing rapidly through the liquid and incorporating air at a much faster rate. Users report that this simple addition cuts the required time in half.
Furthermore, the marble provides a brilliant auditory cue. As the liquid thickens, the sharp clinking sound of the marble hitting the glass will dull. When the clinking stops entirely, your topping is perfectly whipped. Just remember to fish the marble out with a spoon before serving!
Flavor Variations to Elevate Your Desserts
Once you master the basic vanilla version (alcohol free), the flavor possibilities are truly endless. Customizing your topping is an excellent way to elevate a simple dessert into something highly memorable.
- Rich Cocoa: Add one tablespoon of sifted, high-quality cocoa powder and a little extra powdered sugar to the jar. This produces a decadent, mousse-like topping that is phenomenal on hot coffee or simple pound cake.
- Warm Autumn Spices: For pies and warm beverages, add a pinch of cinnamon, nutmeg, and perhaps a tiny dash of cardamom. It pairs beautifully with pumpkin pie or a steaming mug of apple cider.
- Citrus Burst: Add a quarter teaspoon of pure lemon or orange extract, or a small pinch of freshly grated citrus zest. This brings a bright, refreshing contrast to heavy, rich chocolate desserts.
- Maple Pecan: Skip the powdered sugar entirely and use a tablespoon of pure maple syrup instead. The earthy, complex sweetness is absolutely delicious poured over warm pancakes or morning waffles.
The Best Dairy Alternatives for the Shake
While traditional heavy whipping cream is the undisputed champion of this technique, many people wonder if plant-based alternatives can achieve the same fluffy results in a jar. The short answer is yes, but it requires a bit more finesse. If you prefer a dairy-free topping, full-fat coconut milk is your best option. You must use canned coconut milk, not the watery carton variety, and let it sit quietly in the refrigerator overnight.
The next day, carefully scoop out the solid white coconut cream that has risen to the top, leaving the clear coconut water behind in the can. Place those rich solids into your chilled glass jar, add your powdered sugar and vanilla, and shake just as you would with dairy. Coconut cream whips up beautifully and offers a lovely, subtle tropical flavor that pairs perfectly with fruit-based desserts. Remember that standard oat, almond, and soy milks do not have enough fat to trap the air, so they will not work for this specific manual shaking method.
Troubleshooting Common Mistakes
Even with the easiest techniques, things can occasionally go wrong. Here is how to navigate the most common pitfalls based on shared community experiences.
“I Shook It Too Long and It Looks Grainy”
This is the absolute most frequent issue. There is a very fine line between fluffy topping and homemade butter. If you ignore the silence in the jar and keep shaking, the fat solids will separate from the liquids (buttermilk). The mixture will first look grainy and curdled, and eventually, a solid lump of yellow butter will form. If you hit the grainy stage, it is too late to save it as a topping. Keep shaking until you have a solid mass of butter, pour off the buttermilk, add a pinch of salt, and spread it on some fresh toast. It is a happy accident!
“It Has Been Ten Minutes and It Is Still Liquid”
If you have been shaking vigorously and absolutely nothing is happening, there are usually three main culprits. First, your dairy might not be cold enough. Second, you may have used half-and-half or a low-fat alternative instead of genuine heavy whipping cream. Third, you might have overfilled the jar, leaving no room for air to circulate. Check these three factors, correct the issue, and try again.
“The Lid Leaked Everywhere”
Always double-check the seal. Mason jars with two-piece lids (the flat metal disc and the screw band) are ideal, but you must ensure the rim of the glass is completely clean before screwing it shut. A single drop of liquid on the rim can compromise the tight seal under the intense pressure of vigorous shaking.
Storage and Shelf Life
One of the best aspects of this technique is the built-in storage solution. You are preparing and storing the food in the exact same container, completely eliminating extra dishes. If you do not use all of it immediately, simply screw the lid back on tightly and place the jar right back into the refrigerator.
Freshly whipped cream will securely hold its structure in the fridge for about 24 to 48 hours. Because it lacks the commercial chemical stabilizers found in store-bought tubs, it may begin to weep or separate slightly after a full day. If you notice a little liquid pooling at the bottom, do not throw it away. Just tighten the lid and give it three or four vigorous shakes to bring it right back together flawlessly.
A Final Thought on Kitchen Simplicity
There is something profoundly satisfying about preparing food with zero reliance on modern electrical appliances. The mason jar shake is more than just a convenient shortcut; it is a reliable, rewarding method that grounds you in the simple, tactile mechanics of cooking. It proves that you do not always need an array of expensive gadgets to produce high-quality, delicious results in your own kitchen.
Whether you are camping out in the woods without electricity, trying to keep the kitchen completely quiet while the family sleeps, or simply avoiding the hassle of cleaning a bulky stand mixer, this trick is guaranteed to save the day. All it takes is the right high-fat ingredients, a little bit of physical effort, and the patience to listen for that satisfying silence. Happy shaking!