

DIY Pedicure at Home: Soften, Smooth, & Brighten Nails
At-home pedicures are becoming increasingly popular, with nearly 40% of women now opting to pamper their feet in the comfort of their own homes. Not only can DIY pedicures be relaxing, but they allow you to address specific foot care needs on your own schedule. With just a little bit of time and some key supplies, you can give yourself a salon-quality pedicure without the high costs or health risks associated with public nail salons.
Why DIY Pedicures Have Grown in Popularity
The pedicure industry has exploded in recent decades, but more women are choosing DIY options from the comforts of home. There are a few reasons at-home pedicures are rising in popularity:
Convenience
You can soak feet and paint nails whenever it fits into your personal schedule without rushing or worrying about salon hours. It makes pampering yourself as stress-free as possible.
Customization
When you give yourself a pedicure, you get full control over products used. You can pick soaks with essential oils you enjoy, use your favorite lotions and nail polish colors, etc. It’s personalized to your preferences.
Affordability
Professional pedicures typically start at $30 and can be $50-60 for more elaborate nail art or gel polish options. The supplies for an at-home pedicure have further use as well so it comes out drastically cheaper per session.
Hygiene
Public salons, especially those with jetted pedicure chairs, run a higher risk of spreading infections like bacterial or fungal infections. You avoid these health hazards when caring for your own feet.
Now that you know the main advantages of DIY pedicures, let’s go over the process from start to finish…
Gather Your DIY Pedicure Supplies
To perform a complete home pedicure, you’ll want to gather the following supplies which enable you to soak, exfoliate, moisturize, trim and polish your feet properly:
Foot Soak Ingredients
Epsom Salt
- Magnesium sulfate crystals
Baking Soda
- Naturally antibacterial
Essential Oils
- Lavender, eucalyptus, lemon etc.
- Add aroma therapy aspect
Oatmeal
- Anti-inflammatory
Whole Milk
- Softens dry, cracked skin
Liquid Soap
- Extra bubble factor!
Why Soak Feet First?
A warm foot soak serves multiple purposes as the first step in a pedicure routine. Sitting with feet immersed for 10+ minutes helps soften thick calluses, loosen dead cuticles, and reduce inflammation/soreness. It also gives pedicure products better penetration and prepares both toenails and skin for smoothing treatments next.
Foot Scrubs
Once you’ve soaked for optimum hydration and softening, it’s time to slough away icky layers of dead skin buildup. This is done with a foot scrub that both chemically and physically exfoliates the roughest spots on your feet.
Common exfoliating ingredients in foot scrubs include:
Sugar
- Granulated white sugar
- Gently buffs skin
Sea Salt
- Deeply polishes
Essential Oils
- Peppermint, rosemary etc.
- Soothes skin
Coconut/Almond Oils
- Softens while exfoliating
Pumice Stone Pieces
- Lava rock mineral
- More aggressive scrubbing
Foot scrubs often come in thick cream-like formulas so they stick to skin while you massage the grains over calluses, heels, balls of feet etc. The scrub grains themselves physically lift and sweep away flaky dead dermal cells.
Some popular base ingredients for foot scrub recipes are:
Sugar
Coconut Oil
Olive/Almond Oil
Plain Yogurt
You can easily DIY foot scrubs at home using simple ingredients you likely have in your kitchen now.
Picking the Right Foot Exfoliant
Rougher, more callused feet may prefer scrubs with coarser particles like sea salt or pumice. Super dry and cracked heels benefit from ultra-hydrating formulas packed with vitamin E oils and butters.
Delicate skin still wanting polished softness calls for finer scrubs with things like jojoba beads or citrus extracts.
Basically, you’ll want to match the foot scrub to your unique skin type and concerns for maximum results.
Cuticle Care Products
Once feet are soaked, exfoliated and rinsed clean, it’s time to shift focus to your toenails.
Cuticle Cream
There are specialty cuticle remover creams formulated to gently dissolve excess cuticle tissue around nails so it wipes away more easily. Applying this cream after a foot soak lets it really penetrate and loosen the cuticles from nail beds for easier trimming.
Cuticle Nippers/Pushers
These precision tools allow you to both push back and trim away dead cuticles without damaging skin or nails in the process. Most will have slightly curved metal tips with different sized grooves and edges.
- Use the flatter, paddle-shaped pusher tip first to gently press back overgrown cuticles, revealing more of the nail bed beneath.
- Then use the nipper tool to carefully trim off only the excess dead hangnails and tissue. Never cut into healthy, living skin.
Cuticle Oil
After cuticle removal, it’s vital to nourish and moisturize the exposed nail beds and surrounding skin to prevent painful cracking or infection. That’s where hydrating, vitamin-enriched cuticle oils come in!
Rubbing in drops of oil around each nail multiple times per week keeps the area supple and healthy long after your DIY pedicure. It maintains the polished end results.
Callus Removers
Pumice Stones
The simplest physical callus removers are pumice stones which use porous, lava rock material to lightly abrade thick, dead skin. These are a very mild smoothing option best for maintenance between pedicures.
Foot Files
More heavy duty callus removers come in the form of foot files, often made of metal. These files have slightly abrasive surfaces designed to grind away dry skin and calluses when rubbed vigorously over the roughened areas.
Baby Foot Peel
For those with extremely built up calluses or cracked heels, try using an intensive baby foot peel product. These contain gentle acids that deeply penetrate and dissolve layers of dead skin that then shed off over the course of a week, revealing ultra soft feet underneath.
Nail Polish Supplies
The final stage of a pedicure involves trimming and reshaping nails before applying fresh polish. You’ll need:
Nail Clippers – Trim/reshape each toenail
Nail File – Smoothing rough edges
Base Coat – Protects nails
Nail Polish – Your preferred colors!
Top Coat – Adds extra shine/seals
Now let’s walk through the proper pedicure process from start to finish…
Prep Your Feet
Before you trim, file, or paint nails, you need to soak and exfoliate your feet properly:
Remove Old Nail Polish
Use a pure acetone-based remover to take off any remaining chips of old polish still sticking to nails. Darker or glitter polishes may require extra scrubbing with cotton balls soaked in remover to fully dissolve. This clears the slate for your fresh pedicure polish.
Foot Soak
Fill a plastic tub/bin large enough to fit both feet with warm – not scalding hot – water. The ideal temp for soaking is roughly 95-110°F which feels pleasantly warm without risk of burns.
As far as soak ingredients, you can keep it simple with just water or customize it to your liking. Some ideas:
- 1 cup Epsom Salt – soothes achy feet & softens skin
- Lemon juice – refreshing citrus punch
- A few drops essential oils like lavender, eucalyptus etc.
- 1-2 cups baking soda – deodorizes
- Oatmeal packets – reduces inflammation
- Whole milk – intense moisture treatment
Set a timer and submerge both feet in the soak solution for 10-15 minutes initially. The longer you’re able to sit with feet in the water, the more softened skin/cuticles/calluses will become.
Lean back and relax during this time, letting the warmth penetrate deep. You can gently rub any especially rough areas of feet together under the water to boost effects.
Exfoliate Feet
Once your timer goes off, pull feet from the soak and thoroughly pat them dry with a clean towel. While skin is still warm and damp, use your foot scrub product of choice to buff away icky layers of dead skin buildup.
Scoop some of the scrub into hands and evenly distribute over entire feet – don’t forget between the toes! With medium pressure, massage the gritty scrub all over heels, balls of feet, ankles etc. Spend extra time focusing on areas prone to heavy callusing like heels and balls of feet.
Once you’ve thoroughly covered both feet with scrub, run feet under lukewarm water while using your hands/washcloth to gently scrub skin in circular motions. This rinses away the dead cells and exfoliant grains down the drain while also boosting circulation.
Pat feet dry again when done and apply a light moisturizer like aloe vera gel to freshly buffed skin. Let it fully absorb before moving on. The exfoliation process leaves feet renewed but also vulnerable to dryness.
Pro Tip: Save leftover coffee grounds from brewing to mix with olive oil and sugar for an all-natural, free foot scrub loaded with antioxidants! The coarse grounds offer great exfoliation.
Cuticle Care
Start cuticle care first by generously rubbing cuticle remover cream around nail beds of each toe after soaking and exfoliating them. This allows the formula time to penetrate and break down excess tissue.
After a few minutes, gently push back cuticles with a metal pusher tool. Avoid tearing healthy skin or forcing tools under nails. Nails themselves should never be touched by metal implements to prevent damage!
Trim off any remaining overgrown, dead cuticle shreds using the smaller opening of sterile cuticle nippers. Disinfect tools properly between uses.
Finish by massaging antioxidant cuticle oil around nails and skin to nourish these areas. The oil soaks in best when applied to freshly exfoliated nails right after soaking and cuticle removal.
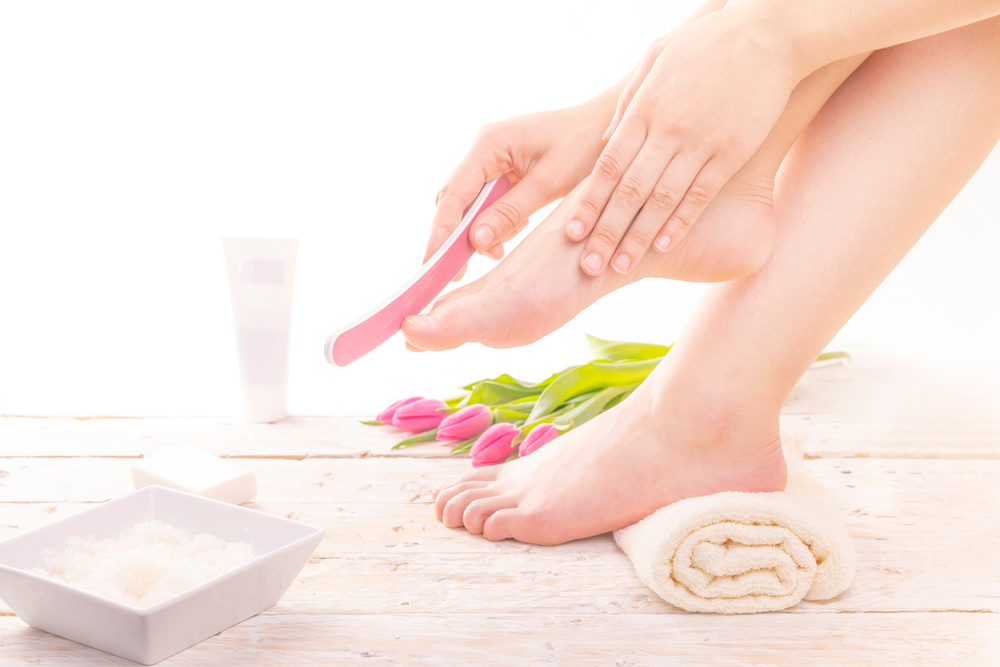
File and Shape Nails
Remove Excess Nail Length
Use proper toenail clipping technique:
- Soak nails first to soften. This prevents painful cracking or splintering.
- Hold each toe stable while positioning sterile nail clipper.
- Trim nail straight across to shorten from the outer tips.
- Never round off edges by clipping into nail corners.
- Don’t cut too short into pink nail beds.
Smooth The Nail Edges
Use an emery board:
- Gently file across trimmed nail tips using long, single sweeping motions.
- Use a light touch; no heavy scraping which weakens nails.
- Always file nails from outer tip toward base, not back/forth.
- Bevel/round off any pointed corners left from clipping.
The goal is evenly trimmed nails with no sharp edges catching on socks or digging into neighboring toes later on.
Properly filing each toenail into clean, uniform shapes prepares them for the final beautification steps next.
Moisturize Feet
It’s important to nourish nail beds + surrounding skin after all the trimming and filing:
Apply Rich Foot Cream
Massage ultra-rich foot cream or salve over entire foot area, applying extra to any extremely callused spots still needing moisture. Slowly work the thick moisturizer into cracked heels and calluses until fully absorbed.
Benefits:
- Instantly softens and hydrates
- Repairs cracked skin
- Reduces further callus formation
Ingredients to Seek:
Urea – Exfoliates
Glycerin – Deep hydration
Allantoin – Soothes
Vitamin E – Anti-aging
Tea Tree Oil – Anti-fungal
Peppermint – Cools
Let the intensive cream fully penetrate for several minutes before wiping any residue with a paper towel and moving onto the next steps.
Apply Cuticle Oil
Use a small nail/cuticle brush to apply antioxidant vitamin E enriched cuticle oil around the base of each nail to nourish nail beds and surrounding skin. The oil soaks in best when applied to freshly exfoliated nails right after soaking and filing them.
Massage the non-greasy formula into the sides and base of nails to moisturize cuticles and condition bitten areas. Frequent oil application keeps nails flexible and skin supple in between full pedicure pampering sessions.
Paint Your Nails
Time for the fun polish application process! Choose whatever finish and colors suit your mood.
Base Coat
Start by wiping nails with a dehydrating prep solution first to remove any lingering oil or moisture for better polish adhesion. Apply a thin layer of base coat evenly over each nail and let fully dry. This protects nails underneath and helps prevent staining or discoloration.
Color Coats
With base coat dry, apply 2-3 thin layers of your chosen polish shade using smooth brush strokes from base to tip. Make sure you let each layer set first before adding another to prevent bubbling. If polishing toes a darker color than hands, be sure to use a separate brush to avoid color cross-contamination.
Pro Tip: If you mess up polish on one toe, wait until it fully dries first rather than risk smudging wet color onto neighboring nails. Then go back with a small brush and remover to gently fix errors once dry.
Top Coat
The final step is applying a glossy top coat over colored polish to help it wear longer without chips or dulling of shine. Use quick-dry spray formulas to get an instant mirror-like sheen. This seals color underneath for prolonged perfect wear through daily footwear friction.
Maintain Results
To keep your DIY pedicure results looking freshly fabulous longer between full pamper sessions:
Let Polish Dry
Be patient after painting nails and allow adequate drying time before putting socks/shoes back on. Slipping feet into restrictive materials too soon can cause ugly polish smudging.
Apply Cuticle Oil
Nourish nail beds daily by massaging in vitamin E cuticle oil 1-2x per day even after polish wears off. This maintains smooth cuticles and prevents painful cracking or hangnails.
Exfoliate Regularly
Don’t let calluses build back up. Use foot scrubs 2-3 times a week to keep skin silky smooth. Apply foot creams after to lock in softness.
Moisturize Daily
Rub rich foot cream into calloused areas like heels nightly. The thicker the moisturizer, the deeper it penetrates cracked skin as you sleep.
For diabetics prone to foot ulcers, daily hydration is crucial.
Re-paint When Needed
Don’t let chips go too long before removal and reapplication to protect nails underneath and maintain beauty.
Extra Pedicure Tips and Tricks
Paraffin Wax Treatment
For an extra moisturizing boost, try using heated paraffin wax between full pedicure sessions. Dip each foot into the melted wax then let it fully cool and harden before peeling off. The wax seals in hydration as it cools.
Nightly Foot Massages
Massaging arches, heels and toes for just 5-10 minutes before bedtime can aid various foot pain causes:
- Sore arches
- Calluses
- Plantar fasciitis
- Arthritis
Use massage lotion or foot cream to help hands glide. Apply thumb pressure in small circles focusing on tight areas.
Stretches
Stretch feet properly to aid mobility:
- Sit on floor with legs extended
- Loop towel around ball of one foot
- Gently pull towel back towards body until slight tension felt
- Hold for 30 seconds
- Repeat towel stretch several times per foot
Also try pointing toes down to flex then pulling them back towards knees to fully stretch calves.
The Benefits of Regular At-Home Pedicures
Consistently caring for feet with proper soaking, filing, moisturizing and nail care provides numerous advantages beyond just looking fabulous in summer sandals.
Softer,Smoother Skin
Exfoliating dry, calloused skin away regularly prevents painful cracks in heels and thick layers of dead cells forming. Using intensive creams and oils keeps hardened areas hydrated.
Healthier Nails
Frequent filing shapes nails better than occasional harsh clipping. Cuticle removal protects against hangnails. Rich oils nourish to prevent splitting or breakage even without polish.
Reduced Inflammation
Foot soaks, especially with Epsom salts, improve circulation and blood flow which helps decrease swelling and sore, tense arches. This offers relief to those with foot conditions like plantar fasciitis.
Increased Relaxation
The pedicure process of cleansing feet in aromatic waters followed by smoothing scrubs and massaging in moisturizers provides mental benefits too. It’s an act of self-care that reduces stress.
Conclusion
With just a bit of prep work, time and TLC, you can experience the rejuvenating benefits of pedicure treatments from the comforts of home. Taking proper care of your feet provides instant visible improvements with beautifully shaped nails and soft, sandal-ready skin. But consistently practicing proper foot care also has key long term health advantages too.
The removal of callused layers and hydrating oils allows for better absorption of beneficial ingredients into freshly revealed skin. Vitamin-rich creams and cuticle oils reinforce nails and cuticles against infection or splitting over time with dedicated use. Foot soaks and scrubs improve overall circulation which in turn aids common foot ailments ranging from sore heels to inflammatory conditions like arthritis.
While an occasional professional pedicure at a salon can be a nice indulgence, taking foot care into your own hands is more budget-friendly and personalized. You control products used and the timing that fits your personal schedule best. It removes the risks associated with public nail equipment and harsh chemicals found in many commercial pedicure settings too.
Ultimately, establishing your own DIY pedicure rituals results in prettier feet now while also preventing bigger foot care issues in the future through diligent conditioning. Just a few key supplies, some creativity with essential oils or foot soaks, and a bit of patience pampering feet allows you to show off smooth summer ready soles!