

Handmade Modern Comfort Knit Booties
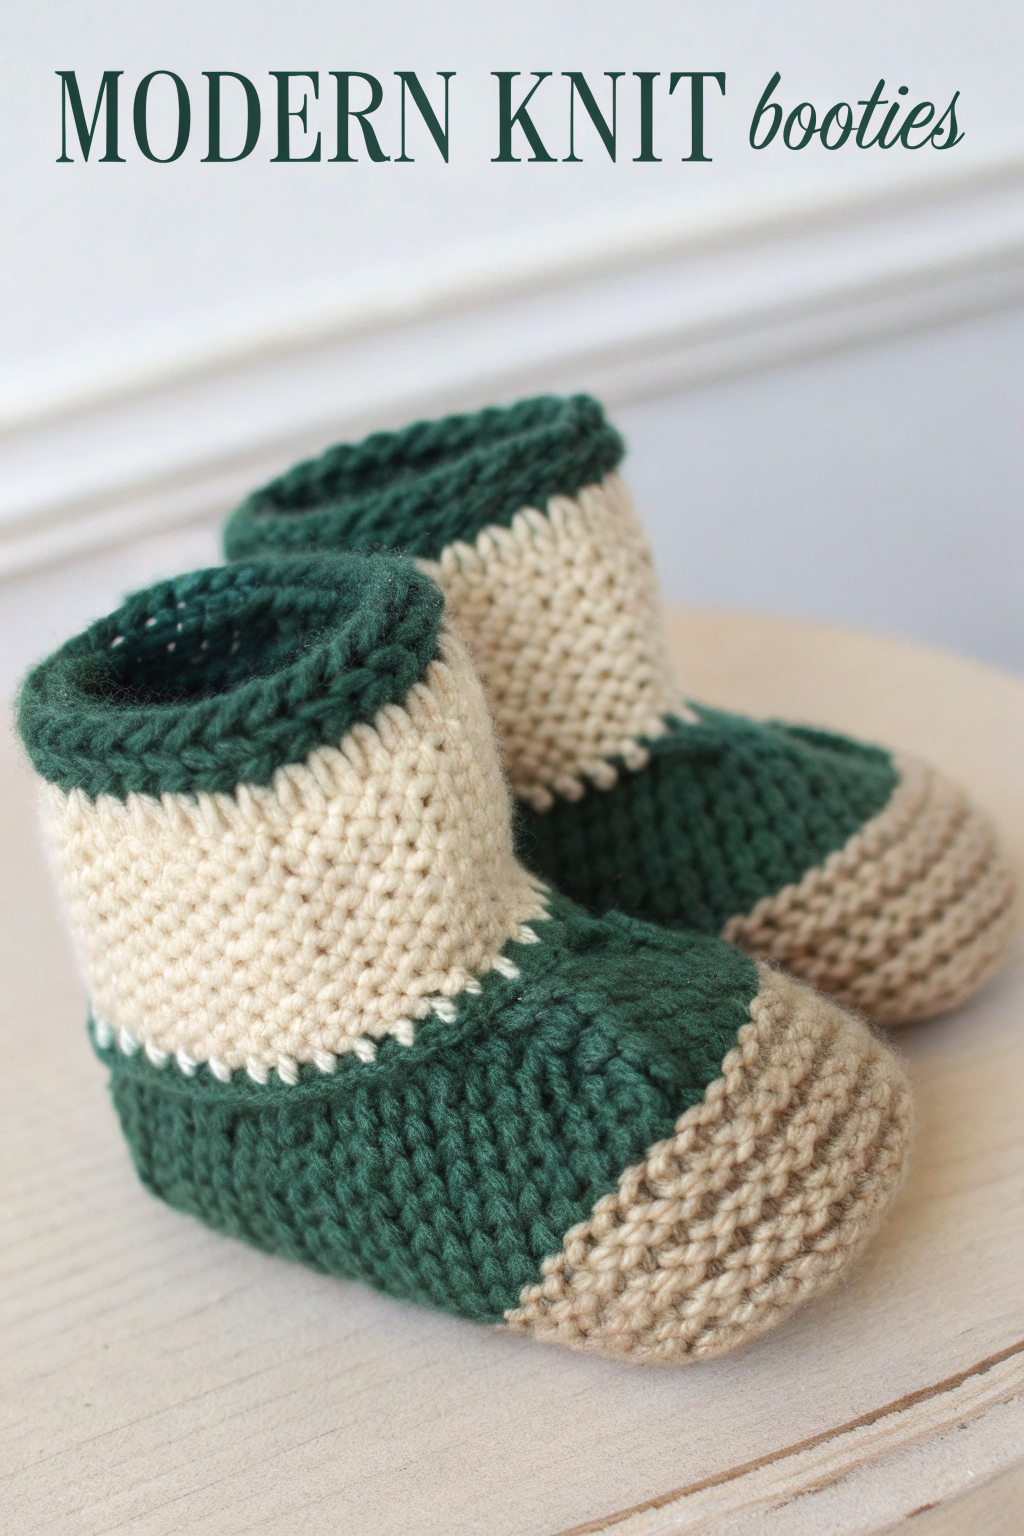
Isn’t there just something so wonderfully rewarding about making tiny garments with your own hands? Especially when they turn out as super stylish and oh-so-cozy as these Modern Knit Booties you see in the image! Just imagine the smile when a little one wears these darling handmade treasures – melts your heart, right? If you’re new to knitting, you’re in exactly the right place! This guide is lovingly put together for absolute beginners, so we’ll explore each step together, nice and clearly, helping you fashion a gorgeous pair. So grab your yarn, and let’s have some fun turning it into pure, squishy cuteness!
What You’ll Need
To get started on these sweet booties, gather these materials:
- 🧶 Worsted weight yarn (Category 4) – You’ll need small amounts in two colors as seen in the image: Dark Green and Beige (or a similar cream/off-white).
- 🥢 Knitting needles – Size US 7 (4.5mm) is a good starting point for worsted weight yarn, but check your yarn label for recommendations.
- 🧵 Tapestry needle – For weaving in ends and seaming the pieces together.
- ✂️ Scissors – For cutting yarn.
- 📏 Measuring tape or ruler (optional) – To check your progress.
Understanding the Stitches and Techniques
Before we dive in, let’s get comfortable with the basic stitches and methods. These booties feature distinct sections: a dark green ribbed cuff with a garter stitch rolled top edge, a beige garter stitch ankle section, a dark green stockinette stitch panel over the foot, a beige garter stitch toe, and a beige garter stitch sole.
- Cast On (CO): This is how you get your first stitches onto the needle. Think of it as making a row of loops that will become the foundation of your knitted piece. Many beginner-friendly methods exist, like the “long-tail cast on.”
- Knit Stitch (k): The fundamental stitch! Insert your right needle into the front of a loop on the left needle (from front to back), wrap yarn around the right needle tip, and pull a new loop through, letting the old loop slide off.
- Purl Stitch (p): The other essential stitch. With yarn in front of your work, insert your right needle into the front of a loop on the left needle (from right to left), wrap yarn around the tip, and push it back through to form a new loop, letting the old one slide off.
- Garter Stitch: This is the wonderfully squishy, ridged fabric seen on the beige ankle and toe sections. When knitting flat (back and forth in rows), you simply knit every stitch of every row.
- Stockinette Stitch (St st): This produces a smooth fabric with ‘V’ shapes on one side (right side) and bumps on the other (wrong side). The dark green section over the foot is made with this.
- Row 1 (RS – Right Side): Knit all stitches.
- Row 2 (WS – Wrong Side): Purl all stitches.
- Repeat these two rows.
- 1×1 Ribbing: This forms a stretchy fabric, perfect for the dark green cuff.
- Row 1: (Knit 1 stitch, Purl 1 stitch) – repeat across the row.
- Row 2 (and subsequent rows): Knit the knit stitches and purl the purl stitches as they appear from the row below. This lines them up into columns.
- Knit Front and Back (kfb): An increase that turns one stitch into two. Knit into the front of a stitch as usual, but before sliding it off the left needle, knit into the back of the same stitch. Then slide it off.
- Knit Two Together (k2tog): A decrease that turns two stitches into one. Insert your right needle into the next two stitches on your left needle at once (as if to knit) and knit them together.
- Bind Off (BO): Finishing your knitting by securing the live stitches. Knit two stitches, then lift the first stitch over the second and off the needle. Knit one more stitch, lift the older stitch over the newer one. Repeat from * to * until one loop remains. Cut yarn, pull tail through.
- Changing Colors: Finish the last stitch of the old color. Drop the old yarn (leave a 6-inch tail). Pick up the new color (leave a 6-inch tail) and knit the next stitch. You can twist the yarns on the wrong side once to prevent a small hole.
- Pick Up and Knit: Adding new stitches along an existing edge. With the Right Side of your work facing, use your needle to go into an edge stitch (or space), wrap yarn, and pull through a loop. This new loop is now on your right needle.
- Seaming: Sewing your knitted pieces. Use a tapestry needle and a length of yarn.
A Note on Gauge: For baby items, exact gauge isn’t as critical as for adult garments, but it helps! Aim for approximately 18-20 stitches in Stockinette or Garter stitch over 4 inches (10 cm) using worsted weight yarn and US 7 (4.5mm) needles. This pattern aims for a bootie suitable for approximately 3-6 months.
Let’s Make Some Booties! (Make 2 Alike)
We’ll construct each bootie by making an upper cuff/ankle piece, then an instep/toe flap, and finally a sole, then assemble them.
Part 1: The Cuff and Ankle Piece (Make 2)
This piece is worked flat, back and forth.
- With Dark Green yarn, Cast On (CO) 30 stitches.
- Rows 1-4: Work in Garter stitch (knit every stitch). This forms the lovely rolled top edge of the cuff you see in the picture.
- Next, work in 1×1 Ribbing for about 1.5 inches (approx. 10-12 rows):
- Row 1 (RS): (K1, P1) repeat across the row.
- Row 2 (WS): (K1, P1) repeat across the row (knitting the knits and purling the purls as they face you).
- Repeat Row 2 until the ribbed section measures about 1.5 inches.
- Change to Beige yarn.
- Next, work in Garter stitch for about 1.5 inches (approx. 20-24 rows). This garter stitch section will give you those beautiful, squishy horizontal ridges seen on the ankle part of the booties.
- Bind Off (BO) all stitches loosely. Leave a long tail (about 12 inches) on one of your cuff/ankle pieces for seaming later.
Part 2: The Instep and Toe Flap (Make 2)
This flap is worked from stitches picked up along the top edge of the ankle section.
- Take one completed Cuff/Ankle piece. Lay it flat with the Right Side (the smoother side of the ribbing, the side you want facing out) facing you. The last row you worked (the bind-off edge of the beige garter stitch) is the top of the ankle front.
- With Dark Green yarn, you will Pick Up and Knit 16 stitches along the center of this beige bind-off edge.
- To do this: Identify the center 16 stitches of the 30-stitch edge. Starting at one end of this center section, insert your empty knitting needle tip from front to back under an edge loop. Wrap your green yarn around the needle as if to knit, and pull a new loop through onto your right needle. Repeat this 15 more times, spacing them evenly across that center section. You now have 16 stitches on your needle.
- Now, work these 16 stitches back and forth:
- Row 1 (WS): Purl all 16 stitches.
- Row 2 (RS): Knit all 16 stitches.
- Repeat these two rows (Stockinette stitch) until the green flap measures about 1.5 – 2 inches from where you picked up the stitches. The stockinette stitch here makes the smooth fabric for the green part over the top of the foot. End having just worked a Purl row (WS).
- Change to Beige yarn. Now we’ll shape the toe in Garter stitch.
- Next Row (RS – Decrease Row): K1, k2tog, knit until 3 stitches remain, k2tog, K1. (You’ll have 14 stitches).
- Next Row (WS): Knit all stitches. (This establishes garter stitch for the toe).
- Repeat these last two rows (one decrease row, one plain knit row) until you have 6 stitches remaining.
- Bind Off these 6 stitches. Leave a 10-inch tail for seaming. And back to garter stitch for the beige toe, giving it that sturdy, textured finish.
Part 3: The Sole (Make 2)
This piece is worked flat in garter stitch.
- With Beige yarn, Cast On (CO) 8 stitches.
- Row 1 (RS): Knit all stitches.
- Row 2 (WS – Increase Row): K1, kfb (knit front and back in the next stitch – this is one increase), knit until 2 stitches remain, kfb in the next stitch, K1. (You’ll have 10 stitches).
- Row 3 (RS): Knit all stitches.
- Row 4 (WS – Increase Row): K1, kfb, knit until 2 stitches remain, kfb, K1. (12 sts).
- Repeat Rows 3 and 4 two more times until you have 16 stitches.
- Now, work in Garter stitch (knit every row) without any more increasing until the sole, from the cast-on edge, measures about 2.5 inches (or until the straight section is about 1 inch long).
- Now we shape the heel:
- Next Row (RS – Decrease Row): K1, k2tog, knit until 3 stitches remain, k2tog, K1. (14 sts).
- Next Row (WS): Knit all stitches.
- Repeat these last two decrease rows until 8 stitches remain.
- Bind Off these 8 stitches. Leave a long tail (about 15 inches) for sewing the sole to the upper.
Assembling Your Booties
This is where your flat pieces transform into adorable booties! Use your tapestry needle and the yarn tails you left.
- Seam the Cuff/Ankle Back: Take one Cuff/Ankle piece. Fold it so the cast-on edge and side edges meet to form a tube shape (the back seam). With the yarn tail you left (or a new piece of green yarn for the cuff and beige for the ankle), sew this back seam. Try to make your stitches neat on the right side. This seam will run down the center back of the bootie.
- Attach the Instep/Toe Flap: Lay the seamed cuff/ankle piece with the front opening facing you. The straight edge of the green instep flap (where you picked up stitches) is already part of the ankle opening. Now, carefully pin the side edges of the green stockinette section of the flap, and then the side edges of the shaped beige toe, to the corresponding front edges of the beige ankle section. You’re essentially closing the top of the foot. Sew these edges together neatly. The goal is for the green section to cover the top of the foot and extend slightly down the sides, flowing into the beige toe.
- Attach the Sole: Take one Sole piece. Pin it to the bottom opening of the assembled upper (the lower edge of the ankle section and the lower edges of the now-attached instep/toe flap). Start pinning at the center heel and center toe, then ease the rest of the sole around the opening. Carefully sew the sole to the upper all the way around using small, secure stitches. The beige garter stitch sole provides a comfy base.
Weave in all loose ends on the inside of the bootie to finish. Repeat all steps for the second bootie!
Tips for Happy Bootie Making!
- Count your stitches regularly! It helps catch any mistakes early.
- Don’t pull your seaming stitches too tight, or the bootie might pucker.
- If you’re new to picking up stitches, watch a quick video tutorial – seeing it done can be very helpful.
- Remember, handmade items have character. Little imperfections are part of their charm!
There you have it! A pair of absolutely charming Modern Knit Booties, made with your own two hands. What a wonderful way to welcome a new arrival or to give a heartfelt, handmade gift. Feel the pride and joy in having patiently worked each stitch to bring these little comforts to life.
We’d be thrilled to see your finished booties! Share a picture of your lovely handiwork. Happy knitting!