

Why You Need to Try the “Oven Rack Taco Shell” Hack Tonight
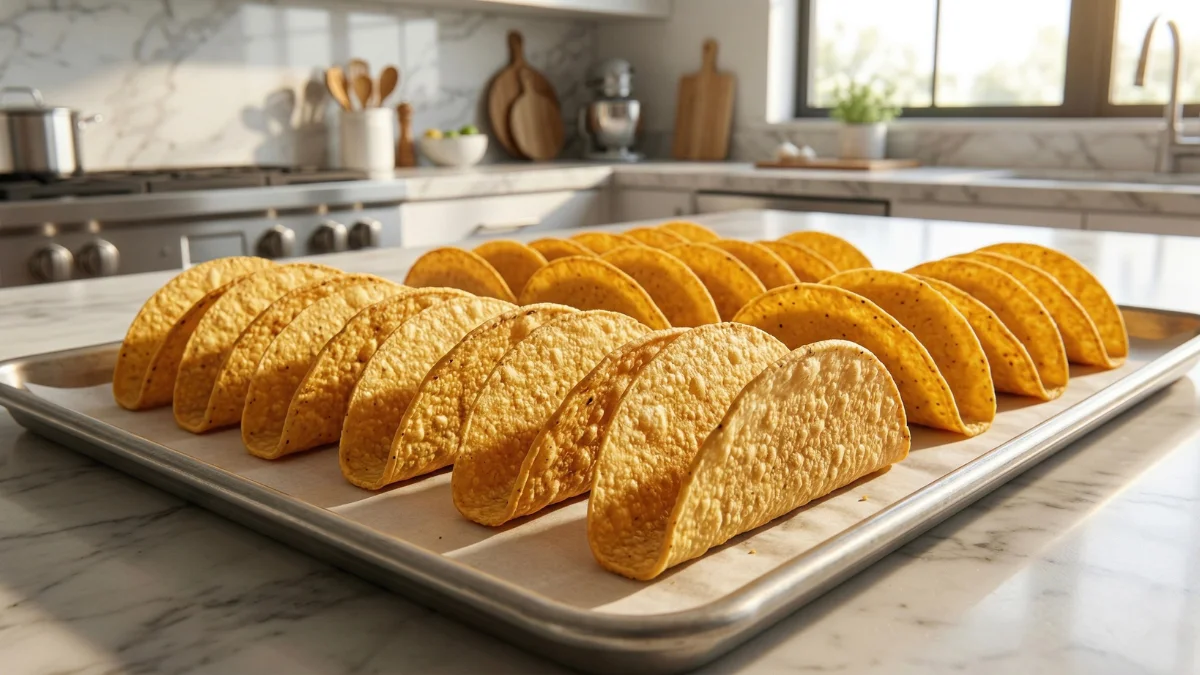
Taco night is a weekly highlight in many households, bringing everyone together over vibrant flavors, customizable plates, and endless toppings. However, there is one universal struggle that often dampens the mood: the taco shell dilemma. Store-bought hard shells are frequently stale, overly brittle, or already shattered right out of the box. On the other hand, frying soft tortillas at home can be messy, greasy, and incredibly time-consuming.
Enter the oven rack taco shell hack, a brilliant culinary technique that turns standard soft tortillas into perfectly shaped, golden, and crunchy shells using nothing but the grates of a standard oven. This method has taken cooking communities by storm, and it is easy to see why. It provides the ultimate crispy texture without the hassle of a deep fryer or a skillet. Here is exactly why this trick needs to be on tonight’s dinner menu, along with the most up-to-date community tips to execute it flawlessly.
What Recent Food Forums Are Saying
Kitchen tricks are constantly being refined by passionate home cooks, and the oven rack taco method is no exception. Initially, the trick was simply hanging a tortilla over a single oven grate. While this produced a crunchy result, recent discussions on platforms like Reddit’s food hack communities have highlighted a few structural flaws with the original method—namely, shells that are too narrow to fill and oil dripping onto the heating elements.
Today, the community consensus points to a much more refined approach. Enthusiasts highly recommend draping the tortilla over two bars of the oven rack instead of one. This slight adjustment forms a flat bottom, allowing the taco to stand upright on a plate. Additionally, culinary forums emphasize the critical importance of a foil-lined rack placed underneath to catch any drips, preventing smoke and oven messes. For those who prefer to keep their oven racks completely pristine, a recent alternative involves using a standard wire cooling rack set over a baking sheet. Both variations deliver that sought-after crunch, proving that this kitchen trick is highly adaptable and continually improving.
5 Reasons You Need to Try This Tonight
If you are still on the fence about ditching the boxed shells, here are five reasons why this method is a total game-changer for dinner routines.
1. Unparalleled Freshness and Crunch
There is simply no comparison between a shell that has been sitting in a cardboard box for months and one that is freshly baked. The oven rack method ensures a robust, satisfying crunch that shatters perfectly upon the first bite, yet holds together well enough to support heavy fillings. The 360-degree air circulation in the oven prevents steam buildup, ensuring the entire shell becomes evenly crispy without any soggy spots at the bottom.
2. The “Stand-Up” Flat Bottom Advantage
As mentioned by numerous home chefs online, adjusting the drape to cover two oven bars forms a flat bottom. This small detail significantly improves the dining experience. Tacos that stand up on their own are infinitely easier to stuff with ingredients. You no longer need to awkwardly balance the shell in one hand while trying to scoop in ground beef and salsa with the other.
3. Healthier, Oil-Controlled Baking
Deep-frying tortillas yields a delicious result, but it adds a significant amount of heavy oil to the meal. The oven rack method requires only a very light spritz or a gentle brushing of cooking oil. This delivers all the satisfying crunch of a fried shell but keeps the meal much lighter. It is a fantastic option for keeping weeknight dinners wholesome without sacrificing that essential texture.
4. Endless Flavor Customization
When baking shells at home, the flavor profile is entirely in your hands. Before popping them into the oven, the oiled tortillas can be dusted with chili powder, cumin, smoked paprika, or a simple pinch of sea salt. Some home cooks even suggest adding a squeeze of fresh lime juice to the oil before brushing it on, providing a bright, citrusy zing baked right into the shell itself.
5. A Cost-Effective Dinner Solution
A pack of plain soft corn tortillas is generally much cheaper than a specialized box of hard taco shells, and it yields significantly more portions. Utilizing this method stretches the grocery budget further while simultaneously elevating the quality of the entire meal.
The Foolproof Step-by-Step Guide
Ready to achieve the perfect crunch? Follow these refined steps based on the best practices shared by culinary communities.
Step 1: The Essential Steaming Phase Never skip this step! Cold or room-temperature corn tortillas will crack when bent over the oven grates. Wrap the tortillas in a damp paper towel or a clean, slightly damp kitchen cloth. Microwave them for 30 to 45 seconds until they are steaming hot, soft, and highly pliable. Working in small batches ensures they do not cool down and stiffen before they reach the oven.
Step 2: The Oil Coating Lightly spray both sides of each warm tortilla with cooking spray, or use a pastry brush to apply a very thin, even layer of neutral oil (such as avocado oil or light olive oil). This is also the perfect time to sprinkle on any desired dry seasonings.
Step 3: Positioning for the Perfect Shape Preheat the oven to 375°F (190°C). Carefully drape each oiled tortilla over two bars of the middle oven rack. Gently press the top down slightly to ensure it forms that coveted flat bottom. Space them out so they are not touching, allowing the hot air to circulate freely around each shell.
Step 4: The Foil Catcher To keep the kitchen completely smoke-free and the oven spotless, pull out the bottom oven rack and line it entirely with aluminum foil. This simple addition will catch any stray drops of oil as the shells bake, saving a significant amount of cleaning time later.
Step 5: The Bake and Cool Bake the tortillas for 8 to 10 minutes. Keep a close eye on them during the last two minutes, as they can transition from golden brown to burnt very quickly. Once they reach the desired color, use metal tongs to carefully remove them from the oven racks. Let them cool on a plate for about two minutes; they will continue to crisp up and harden as they cool down.
Troubleshooting Common Issues
Even the easiest methods can sometimes require a little fine-tuning. Here are the solutions to a few common hurdles encountered during this process.
- Why did the tortillas crack in the oven? If the shells split at the top, they were not heated enough before shaping. The damp paper towel microwave trick is vital. They must be almost too hot to touch when draped over the grates.
- Why are the shells chewy instead of crunchy? This usually means they need another minute or two in the heat. Ovens vary wildly in temperature accuracy. If they are chewy, let them bake slightly longer until the edges are visibly browned. Also, ensure the oil coating is very light; too much oil can weigh the tortilla down and prevent it from drying out properly.
- Can flour tortillas be used instead of corn? Yes, flour tortillas can absolutely be used. They will puff up slightly and offer a different, flakier texture compared to the sturdy crunch of a corn tortilla. However, yellow or white corn tortillas are highly recommended for the most authentic hard-shell experience.
Elevate Your Taco Night
Once the fresh shells are out of the oven and perfectly crisp, the only thing left to do is fill them. Because these shells hold up so beautifully and boast a wonderful standalone flavor, they pair perfectly with hearty, rich fillings. Consider loading them with classic seasoned ground beef, slow-cooked shredded chicken, or a vibrant mix of black beans, roasted sweet potatoes, and corn.
Top everything off with crisp romaine lettuce, a dollop of sour cream, and a generous spoonful of fresh pico de gallo. Taking a few extra minutes to bake tortillas right on the oven rack proves that the best kitchen hacks do not just save time—they genuinely improve the quality of the food. Say goodbye to the fragile boxed shells and hello to the ultimate homemade crunch.