

Restore a Clogged Printer Head: The Rubbing Alcohol Wipe!
That familiar, frustrating sight: a page emerging from the printer not with the sharp document or vibrant photo someone was expecting, but with a series of unsightly streaks and gaps. It’s a universal moment of tech-induced despair for anyone with a home printer, one that can instantly stop a project dead in its tracks and turn a simple task into a headache.
But before giving in to the costly impulse for a new printer or a repair call, a moment of pause is in order. A remarkably simple and powerfully effective fix often sits quietly in a nearby medicine cabinet, ready to solve one of the home office’s most persistent problems: the stubbornly clogged printer head.
The Culprit Behind the Streaks: Understanding Dried Ink
To appreciate the fix, one first needs to understand the problem. Inkjet printers work by firing microscopic droplets of liquid ink onto paper through hundreds of tiny nozzles on the printer head. When a printer isn’t used frequently, this liquid ink can begin to dry out right at the nozzle’s opening, much like paint drying on a brush. This forms a tiny, solid blockage, or clog.
Once a nozzle is blocked, no ink can pass through it. If a few nozzles are clogged, the result is those telltale horizontal white lines in a print. If many are clogged, entire sections of a document might be missing. While most printers have a built-in “head cleaning” function in their software, this process consumes a large amount of ink and, in cases of stubborn clogs, often fails to resolve the issue entirely. This is where a more direct, hands-on approach becomes a true lifesaver.
The Game-Changing Hack: A Gentle and Methodical Wipe
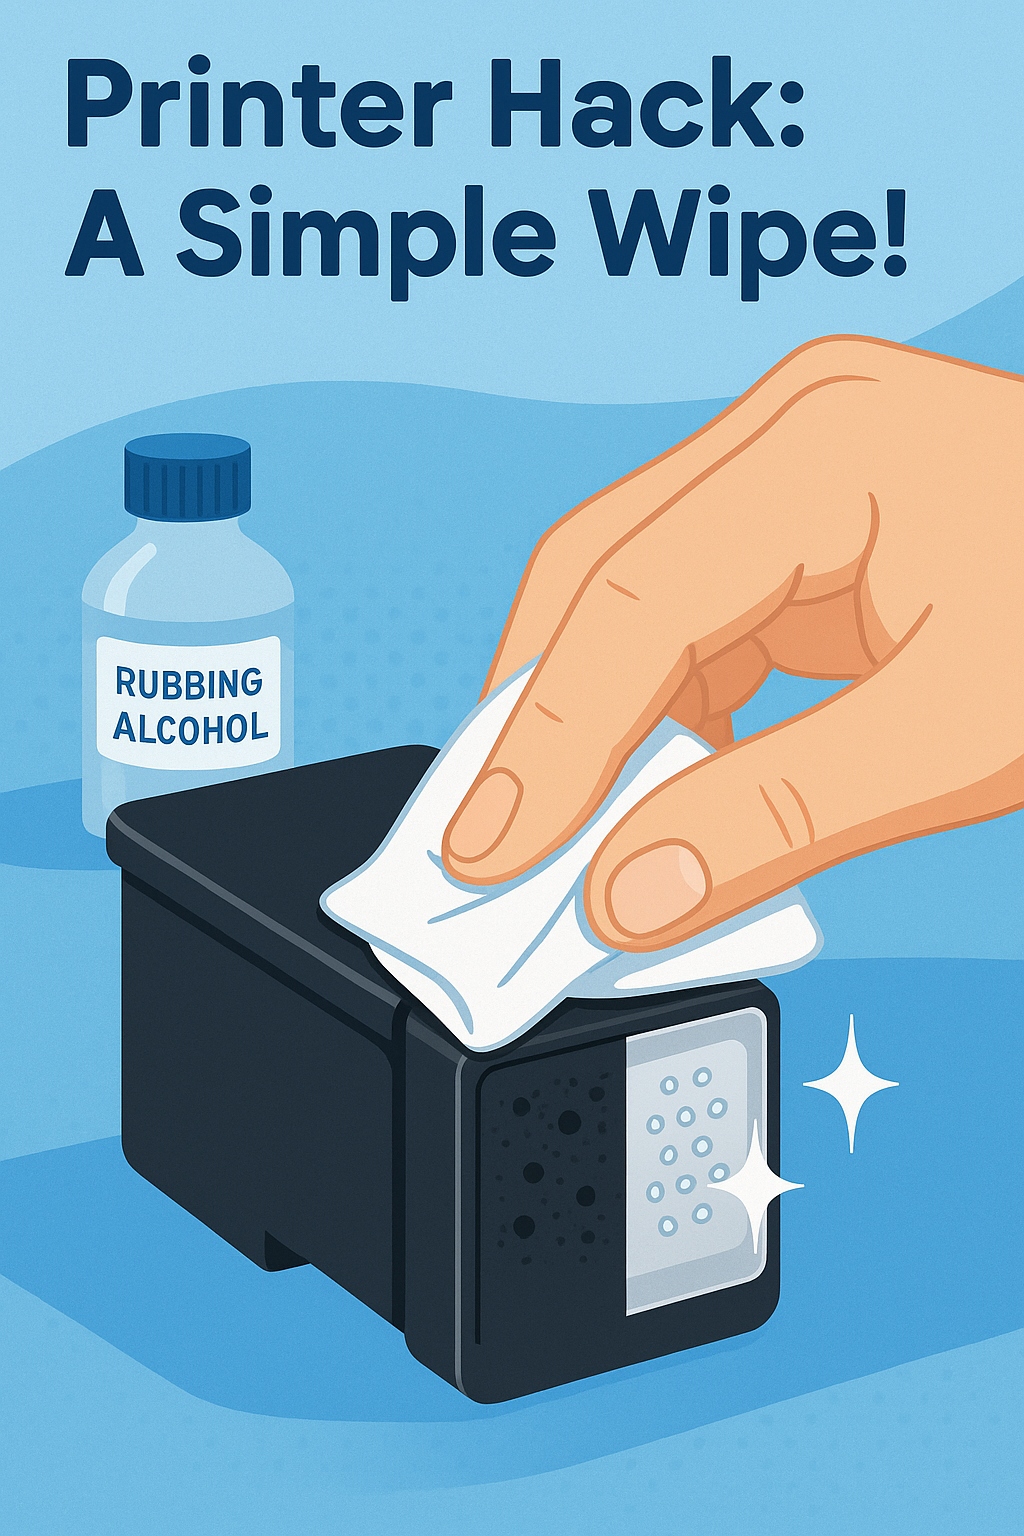
The secret weapon in this battle against dried ink is a common household item: isopropyl alcohol. Its properties make it a perfect solvent for dissolving dried, pigment-based, or dye-based ink without damaging the delicate electronic components of the printer head. Paired with the right technique, it can bring a seemingly defunct printer cartridge back to life.
Here is a thorough, step-by-step guide to reviving a clogged printer head with care and confidence.
A Step-by-Step Guide to a Perfect Print
Before starting, it’s about preparation and patience. Rushing this process is not advised. Assemble the necessary tools on a clean, protected surface.
What is Needed
- A Lint-Free Cloth: This is absolutely crucial. A microfiber cloth, a new glasses cleaning cloth, or specialized electronic wipes are ideal. Standard paper towels or cotton balls must be avoided, as they can leave behind tiny fibers that will cause even more significant clogs.
- Isopropyl Alcohol (70%-99%): A higher percentage is generally more effective, but standard rubbing alcohol works well.
- A Small, Shallow Dish: Something like a clean bottle cap or a small saucer to hold a tiny amount of the cleaning fluid.
- Disposable Gloves (Optional): To keep hands free of ink.
- A Protected Work Surface: A few sheets of old newspaper or a plastic tray to prevent any ink or alcohol stains.
Step 1: Carefully Remove the Cartridge
Turn the printer on and open the access door to the ink cartridges. In most printers, the carriage holding the cartridges will move to a central, accessible position. Wait for it to stop moving completely. Following the printer manufacturer’s instructions, gently unclip and remove the specific cartridge that seems to be causing the printing issue. If all colors are streaky, this process may need to be repeated for each one.
Step 2: Identify the Printer Head
Examine the cartridge. Somewhere on its body—usually on the bottom—will be a flat, metallic strip or plate. This is the printer head, which contains the nozzles. It might look like a small copper or silver-colored rectangle with very tiny, almost invisible dots. This is the target area. Do not touch this surface with bare fingers, as oils from the skin can interfere with performance.
Step 3: The Gentle Wipe
Pour a very small amount of isopropyl alcohol into the shallow dish. Lightly dampen a small corner of the lint-free cloth. The cloth should be damp, not soaking wet. Dripping liquid is a major risk to the electronics.
Holding the cartridge securely, gently wipe the surface of the printer head. Use a single, smooth, and unidirectional motion. Don’t scrub back and forth or apply aggressive pressure. The goal is to let the solvent do the work. One can see the dried ink beginning to dissolve and transfer onto the cloth. After the first wipe, use a clean, damp section of the cloth for a second pass if needed. The aim is to see the metallic plate become clean and shiny again, free from any dried ink residue.
Step 4: The Crucial Drying Phase
After wiping, it’s vital to let the printer head air-dry completely. Take a clean, dry part of the lint-free cloth and gently blot away any excess moisture. Then, let the cartridge sit for at least ten to fifteen minutes to ensure any remaining alcohol has fully evaporated before reinstalling it.
Step 5: Reinstall and Test
Once the cartridge is completely dry, carefully place it back into its slot in the printer, ensuring it clicks securely into place. Close the printer’s access door. Now for the moment of truth: run the printer’s “nozzle check” or “print quality report” function from its software menu. If that’s not available, simply printing a test page with a mix of text and colors will work.
The improvement should be immediately noticeable. The streaks should be gone, and the colors should be vibrant. There is a deep satisfaction in seeing that first perfect page emerge from the machine, knowing that a simple, methodical action fixed the problem.

Maintaining a Healthy Printer
Now that the printer is working perfectly again, a few good habits can prevent this issue from happening again.
- Print Regularly: The easiest way to keep nozzles clear is to use them. Printing just one page in full color once a week is often enough to keep the ink flowing and prevent it from drying out.
- Turn It Off Properly: Always use the printer’s power button to turn it off. This allows the printer to “park” the cartridges in a capped position, which seals them and protects them from air exposure.
A streaky printer doesn’t have to be a source of endless frustration or an expensive problem. With a little care, a bit of patience, and the right technique, almost anyone can perform this simple but powerful maintenance hack. It’s an empowering feeling to fix a piece of technology with one’s own hands, turning a moment of annoyance into a triumph of simple, effective know-how.